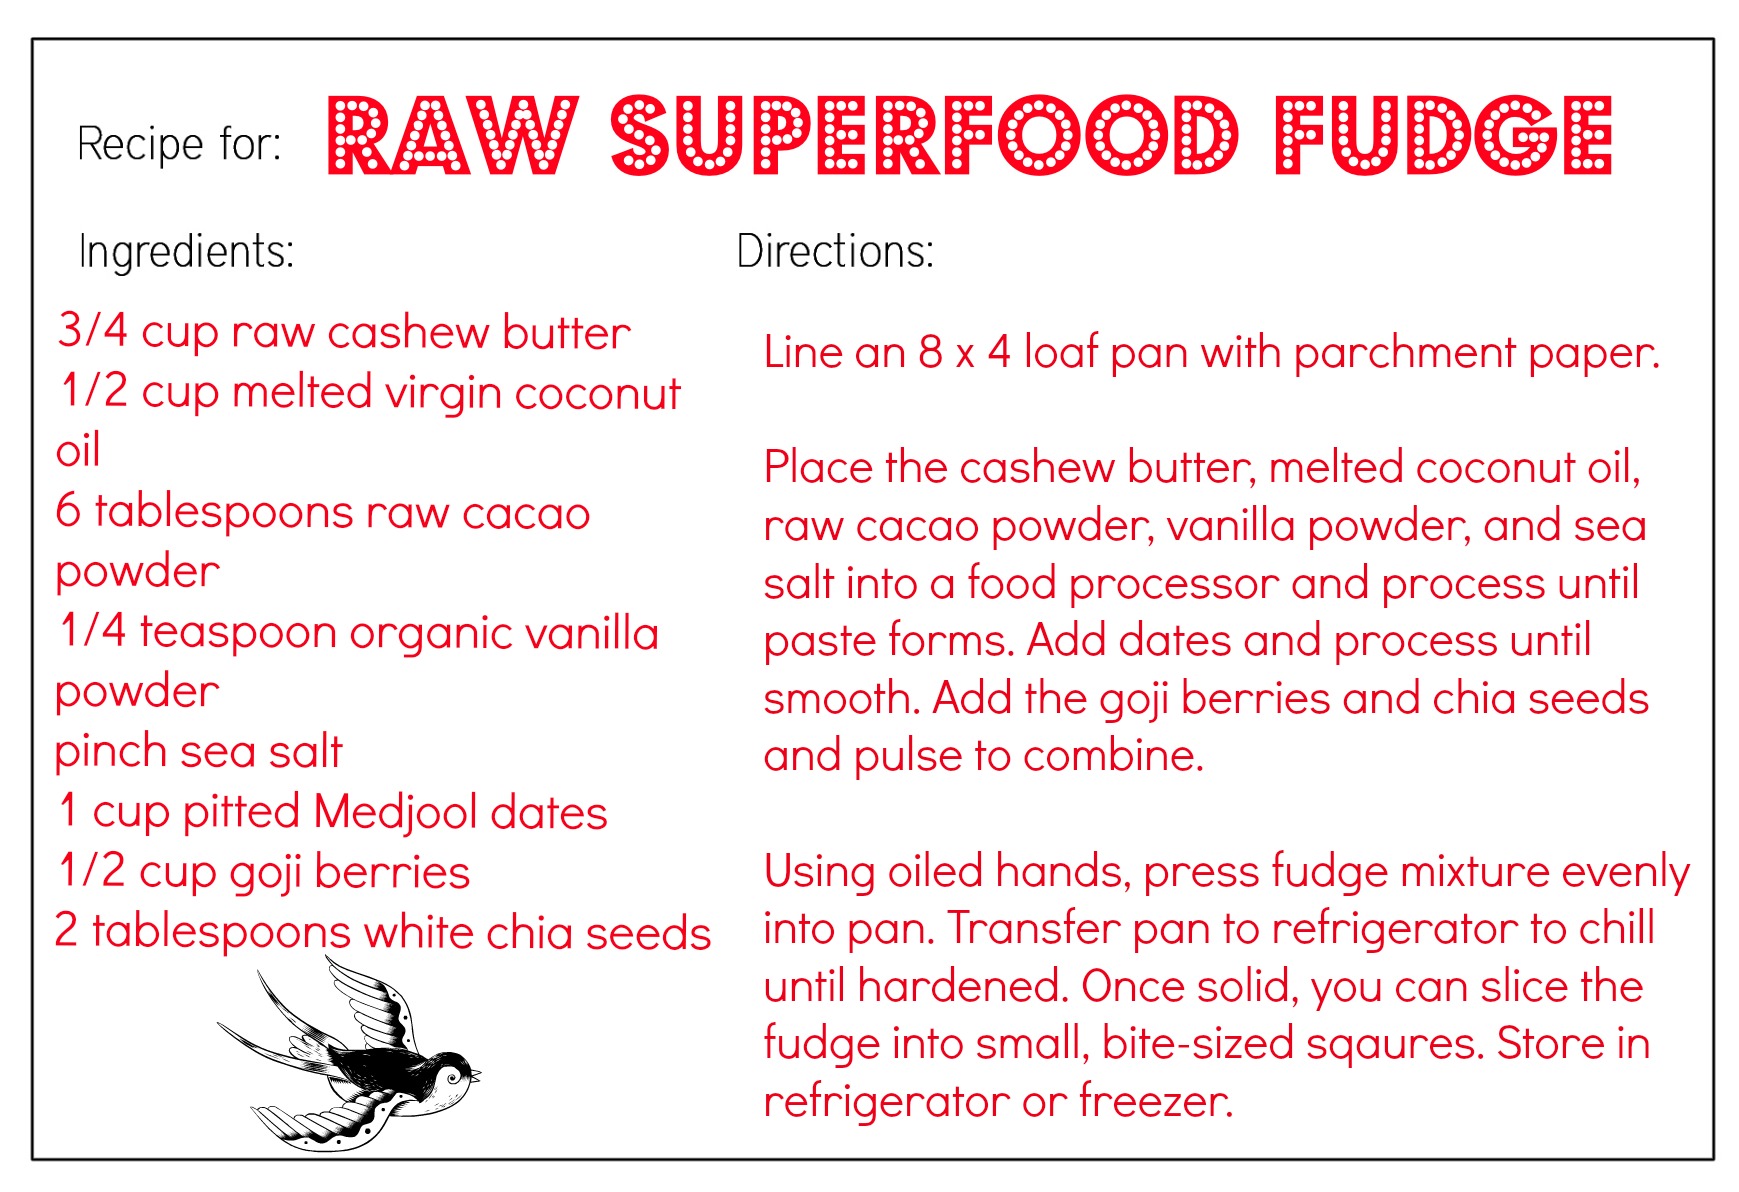
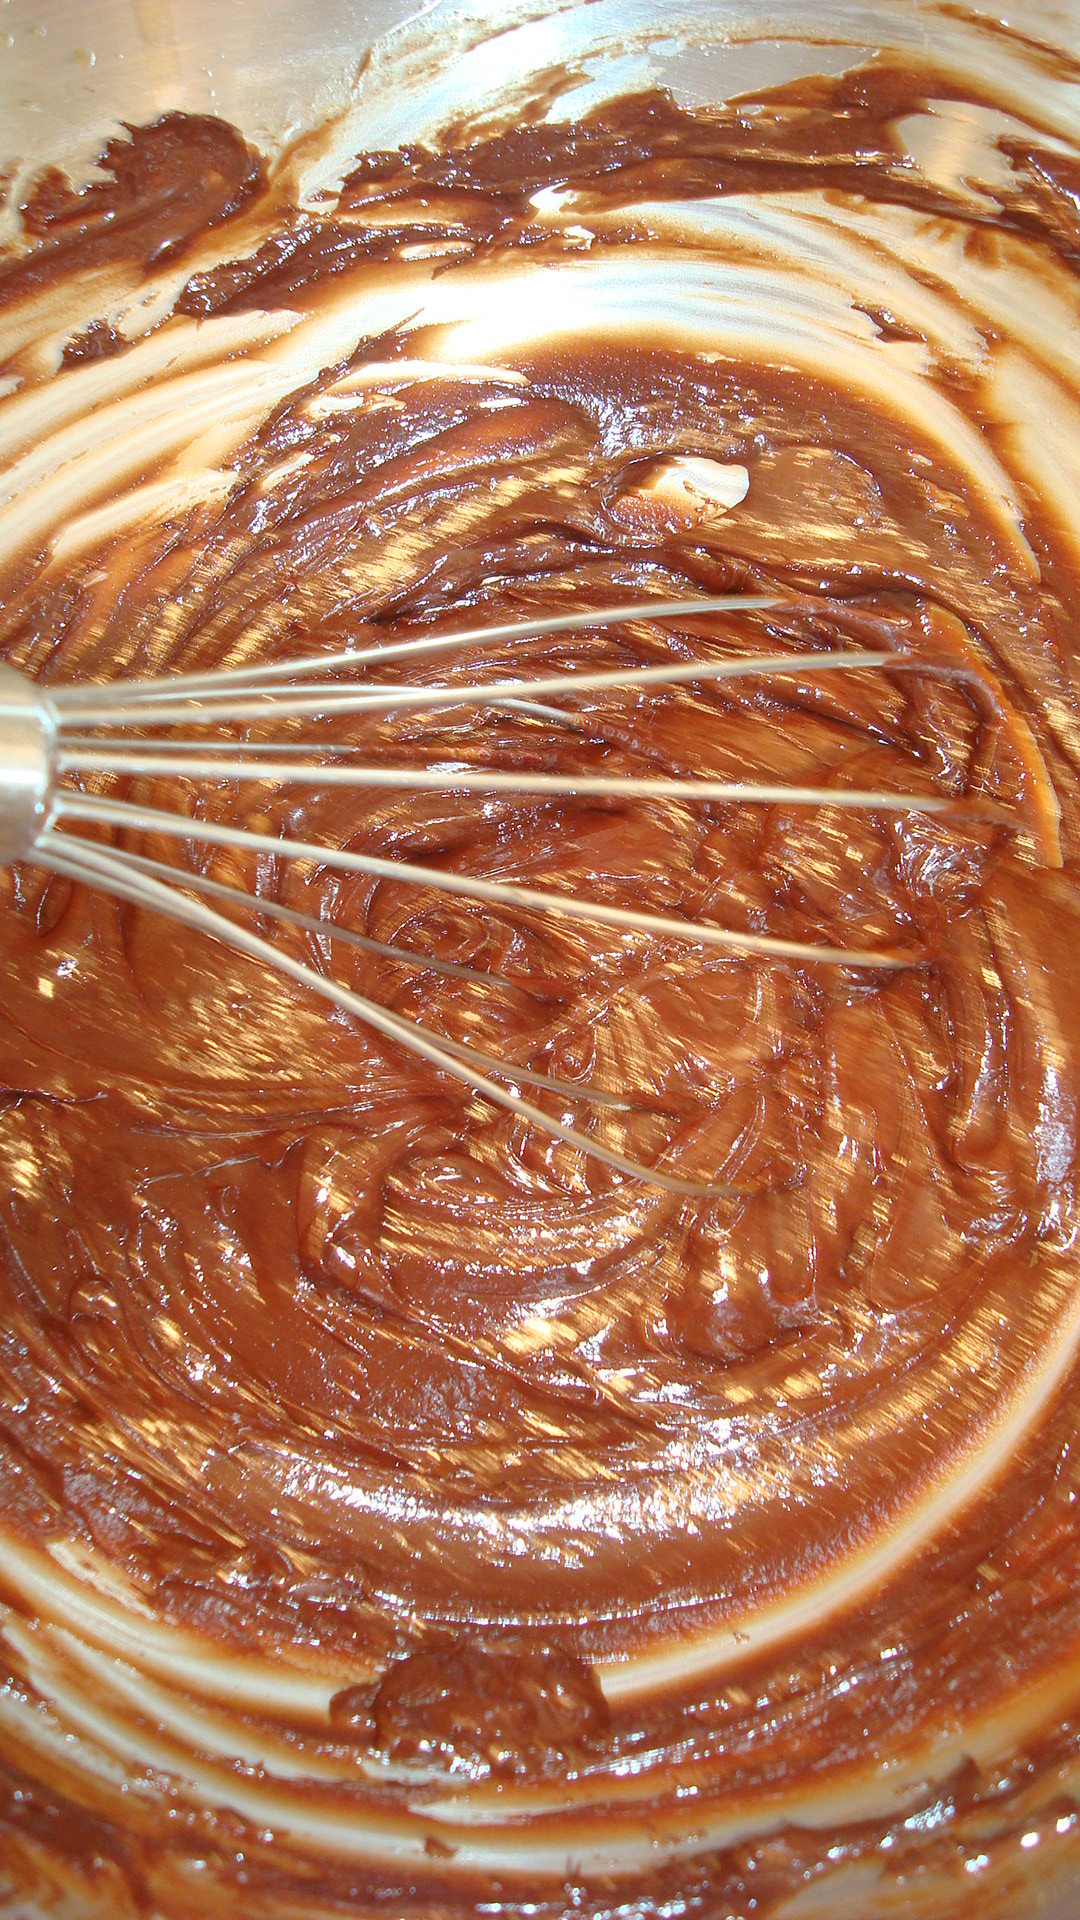
Continuing on with my penchant for sweets, here’s another tempting delight satisfies. This fudge is almost good enough to eat for breakfast, but if you’re like me, you’ll want to save it for dessert, so that you can look forward to it all day.
So, what’s so SUPER about this? Here’s the lowdown:
Cashews (I made my own cashew butter from raw cashews): they’re loaded with magnesium, help to keep blood-sugar levels in check, reducing cravings and binges; they help to regulate energy levels, mood, but also prevent insulin resistance.
Coconut oil: If you want to GLOW, you need fat–the healthy kind in foods like coconut oil. It has immune-boosting properties and its antiviral, antimicrobial, and anti fungal. By adding more of it to your diet may lead to a clearer face.
Raw cacao powder: (Choose raw cacao powder over regular because it is minimally processed.) High in antioxidants (flavonids) and has antidepressant effects.
Dates: benefits include relief from constipation, intestinal disorders, heart problems, anemia, sexual dysfunction, diarrhea, abdominal cancer…
Goji berries: are among the highest antioxidant-containing foods. They are thought to fight heart disease, defend against cancer and diabetes, strengthen the immune system, improve vision, and enhance the complexion.
Chia seeds: are a good source of omega-3 fatty acids as well as loads of other antioxidants and other nutrients, such as iron and calcium; contain high concentration of fiber; rich in protein
I’ve been off refined sugar for about six months now. It’s a difficult road to recovery, but well worth it in terms of how I feel and the deleterious effects that sugar seems to wreak on my skin (think inflammation). As a recovering sugar fanatic (I once went to the dentist and was told that I had 13 cavities and a root canal–in one visit!), I need something, anything sweet before I go to bed. I’ve tried a bunch of alternative snacks, but since I discovered these beauties, they’ve become my mainstay. They are extremely simple to make, require few ingredients, are healthful, and satiate my sweet tooth. They include not one, but THREE superfoods: raw cacao powder, goji berries, and maca powder. Here’s are some fast facts on each of these three superfoods.
Raw cacao powder: (Choose raw cacao powder over regular because it is minimally processed.) High in antioxidants (flavonids) and has antidepressant effects.
Goji berries: are among the highest antioxidant-containing foods. They are thought to fight heart disease, defend against cancer and diabetes, strengthen the immune system, improve vision, and enhance the complexion.
Maca powder: is a Peruvian root reported to increase stamina and help the body better adapt to stress. They’re also reported to increase libido, but I’m not going there…
Best of all? Because they are so quick to make, there’s instant gratification.
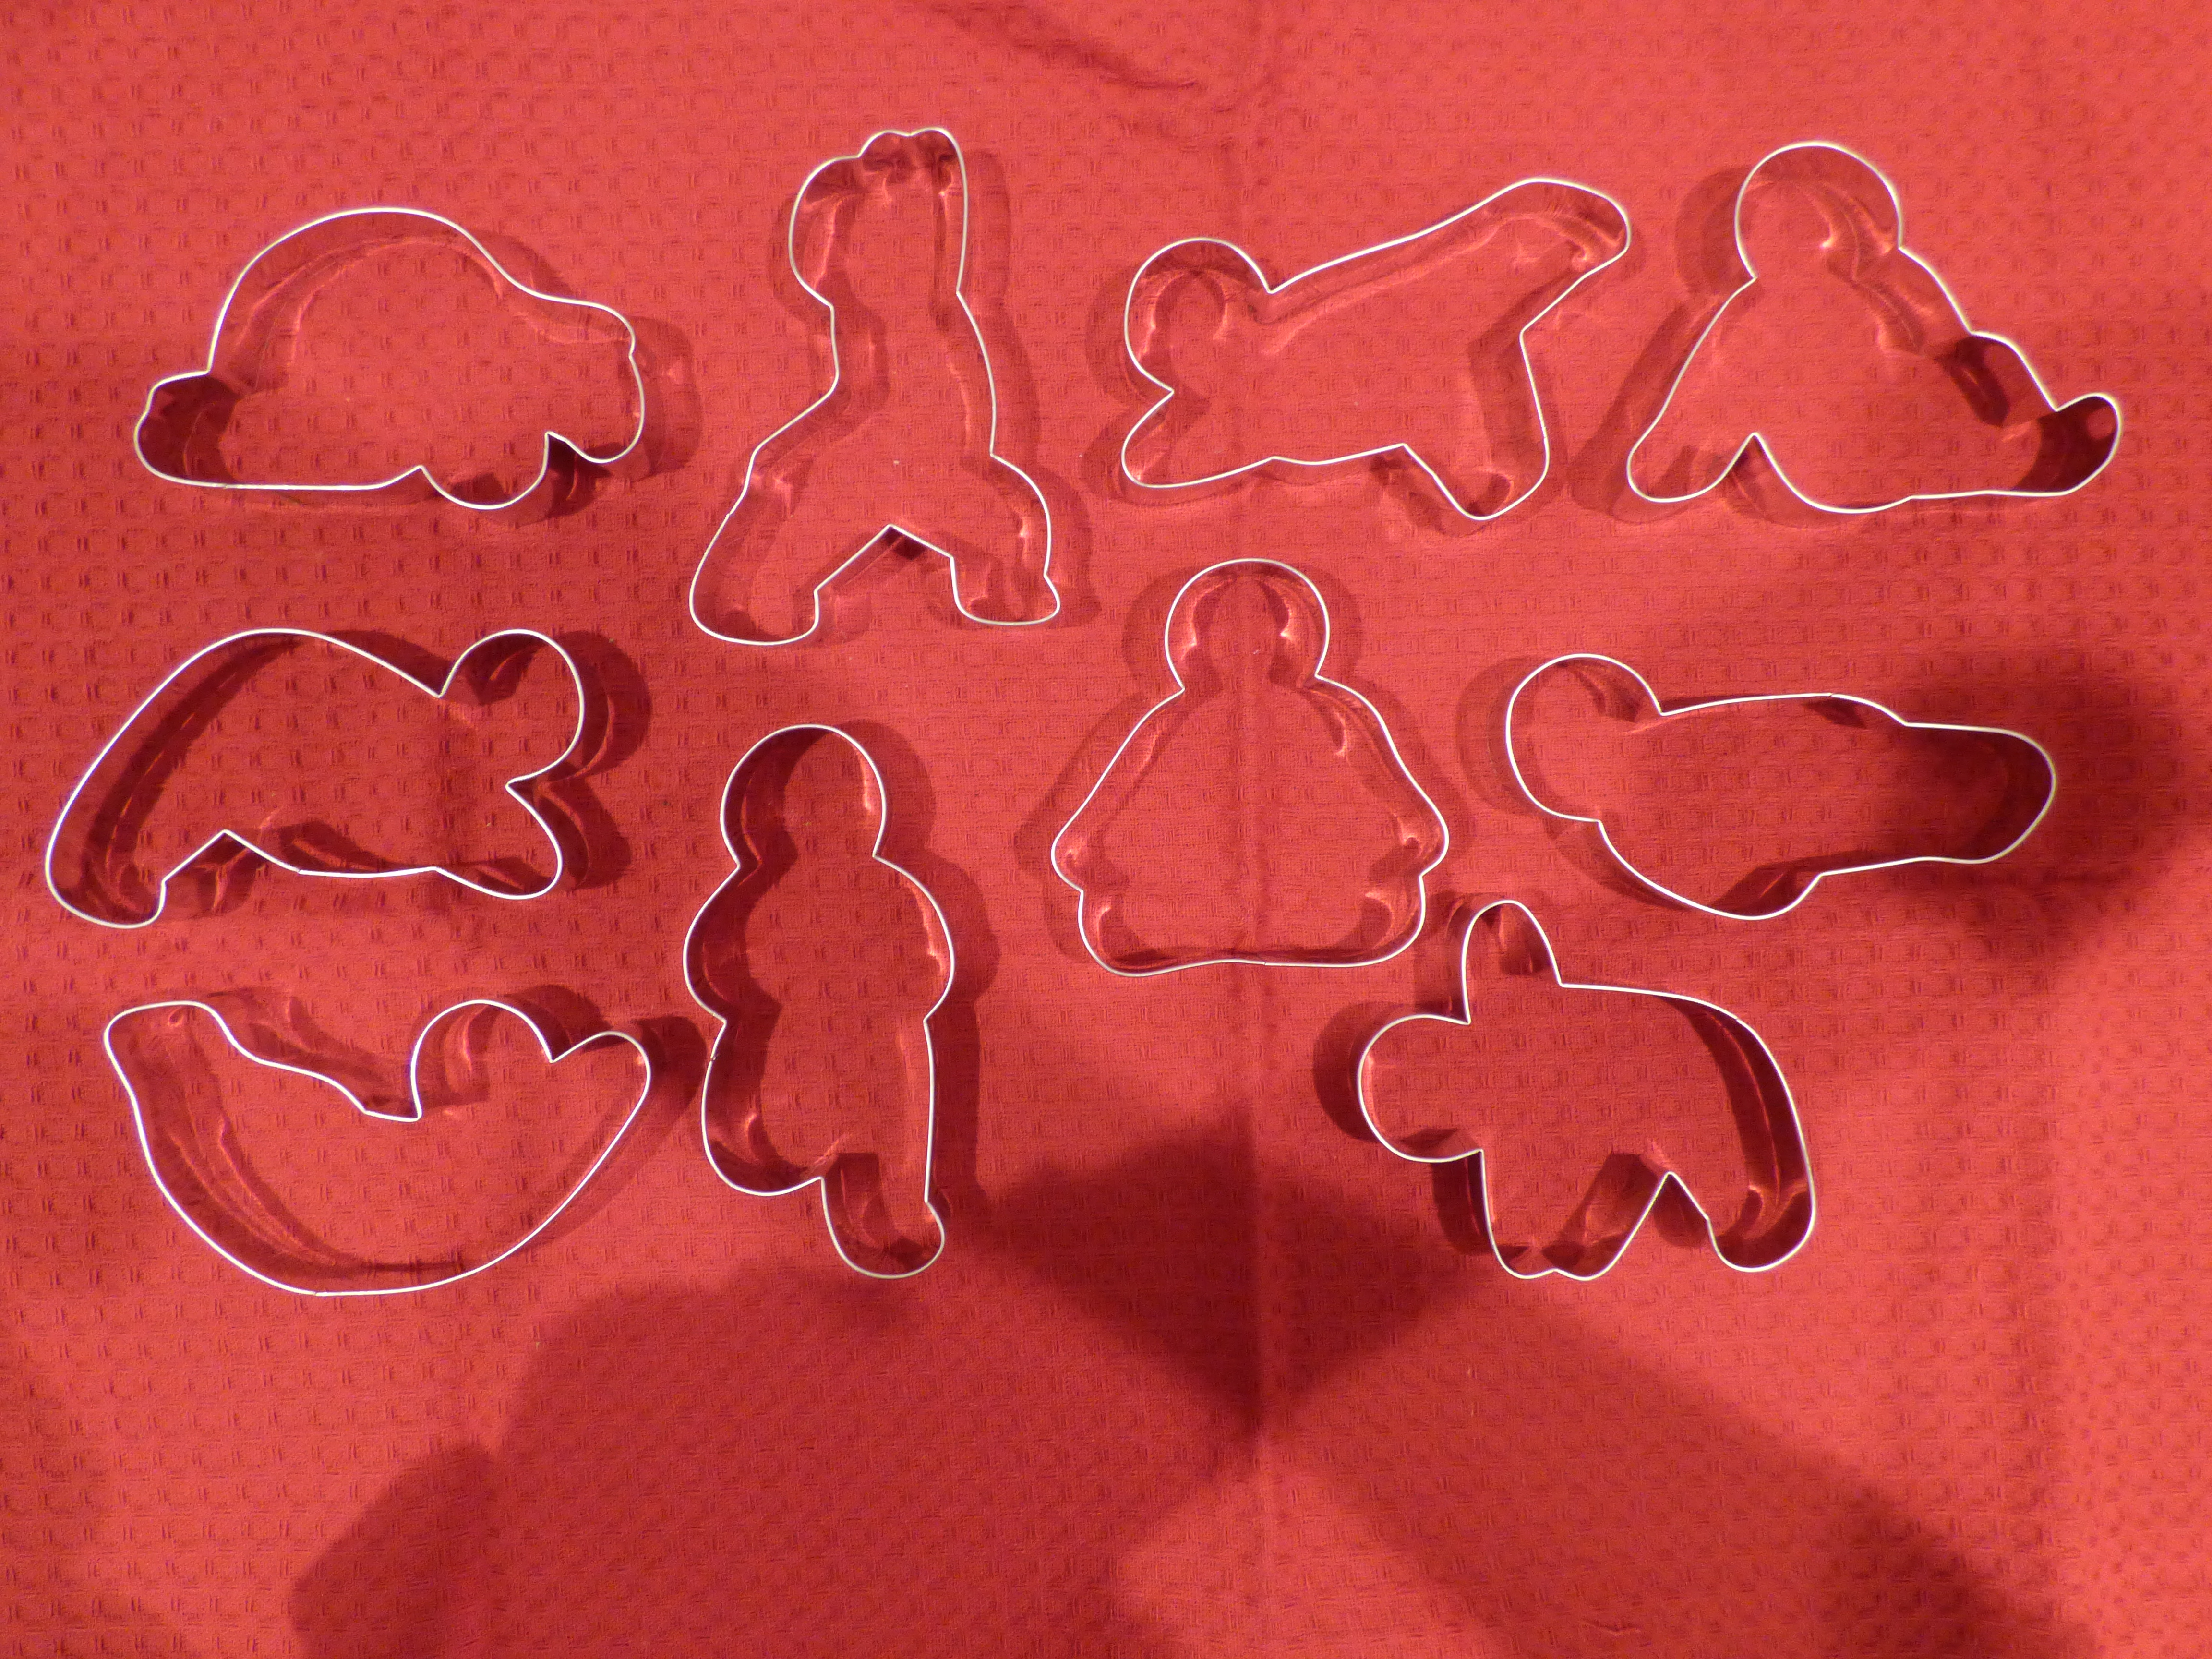
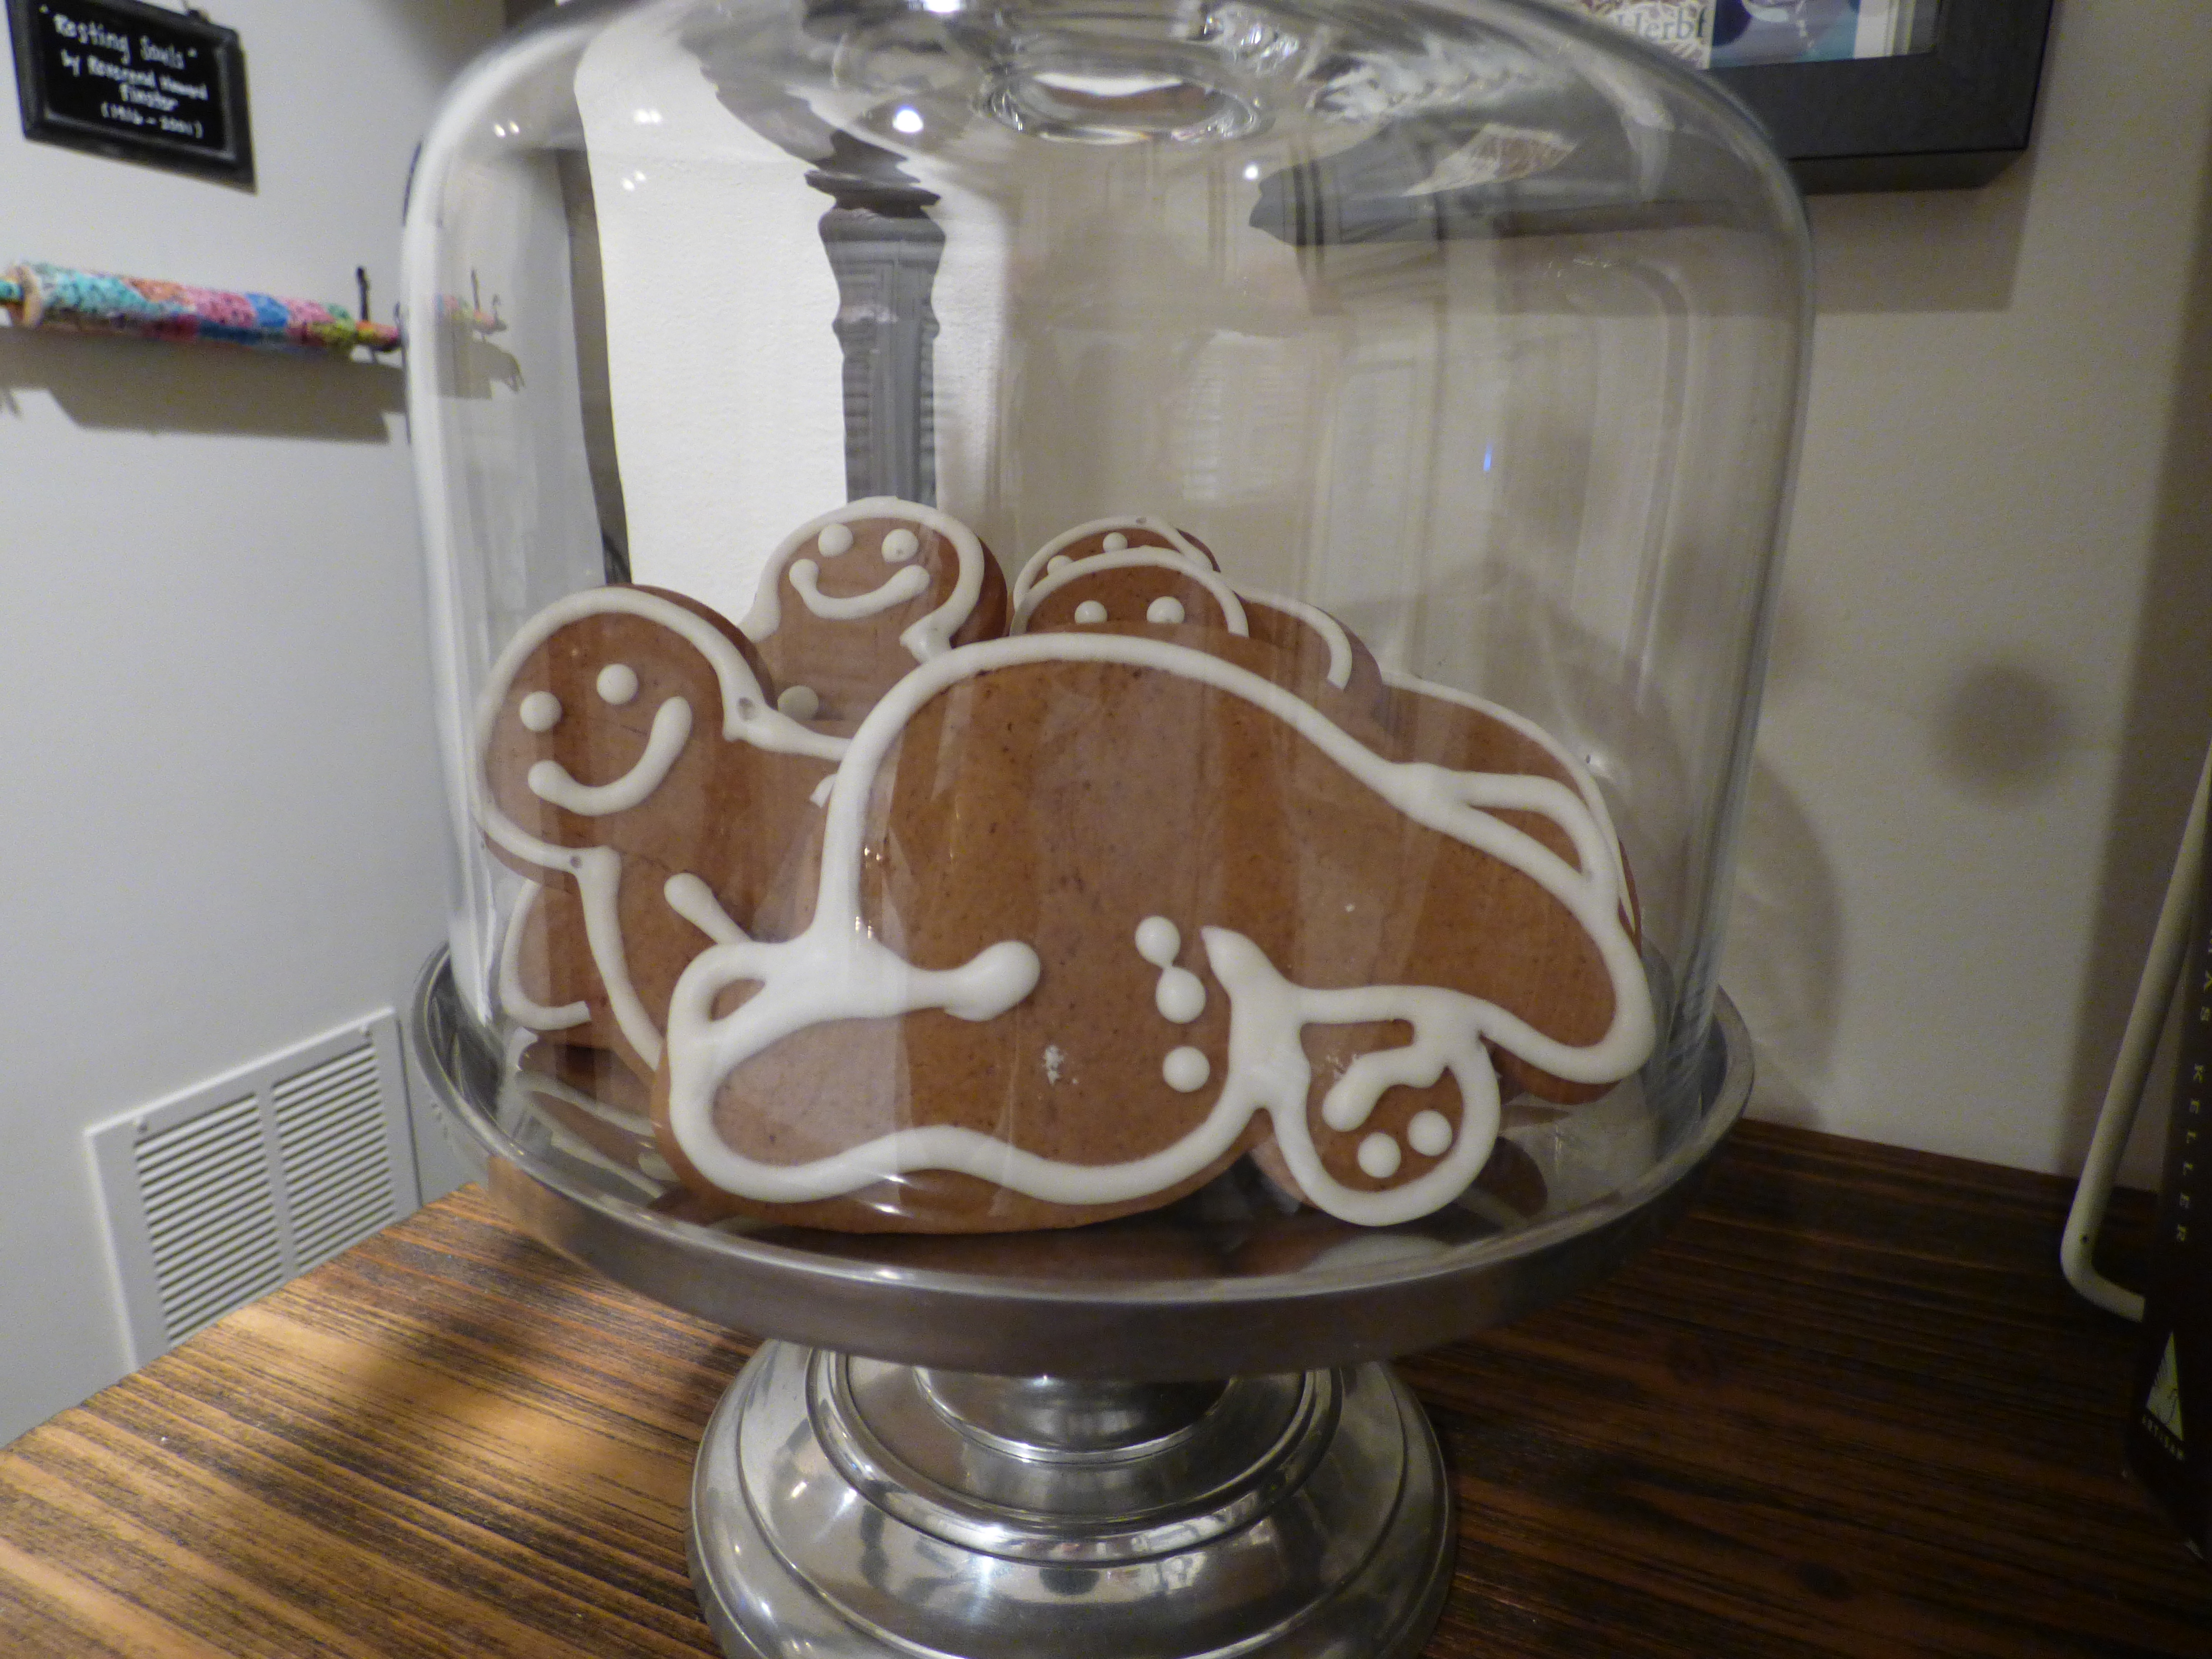
It’s been TOO long and I’ve made too many shareable delights to delay any longer. One of my favorites from December is my batch of yoga asana cookies. As adorable as they were for the Yuletide season, I think they’ll be even cuter for Valentine’s Day when I outline the gingerbread men in pink. See for yourself…
Firstly, here are the cookie cutters, available at Baked Ideas. I opted for the ten piece set, but you can buy them in sets of five.
Here’s the progression of dough to naked gingerbread men…
…followed by piping of royal icing…
…individually wrapped in baggies for gift giving…
…and pictures of a few of the individual asanas…
Corpse PosePlow PoseLotus PoseSide Angle TwistTree PoseFull Wheel Pose
…and as decorations in my kitchen…
I used Cook’s Illustrated’s Thick and Chewy Gingerbread Cookie Recipe, which I always use with great results.
For about twenty 5-inch gingerbread people or thirty 3-inch cookies
3 cups all-purpose flour
3/4 cup firmly packed dark brown sugar
1 tablespoon ground cinnamon
1 tablespoon ground ginger
1/2 teaspoon ground cloves
1/2 teaspoon salt
3/4 teaspoon baking soda
12 tablespoons (1 1/2 sticks) unsalted butter, cut into 12 pieces and softened slightly
3/4 cup unsulphured molasses
2 tablespoons milk
1. In food processor workbowl fitted with steel blade, process flour, sugar, cinnamon, ginger, cloves, salt, and baking soda until combined, about 10 seconds. Scatter butter pieces over flour mixture and process until mixture is sandy and resembles very fine meal, about 15 seconds. With machine running, gradually add molasses and milk; process until dough is evenly moistened and forms soft mass, about 10 seconds. Alternatively, in bowl of standing mixer fitted with paddle attachment, stir together flour, sugar, cinnamon, ginger, cloves, salt, and baking soda at low speed until combined, about 30 seconds. Stop mixer and add butter pieces; mix at medium-low speed until mixture is sandy and resembles fine meal, about 1 1/2 minutes. Reduce speed to low and, with mixer running, gradually add molasses and milk; mix until dough is evenly moistened, about 20 seconds. Increase speed to medium and mix until thoroughly combined, about 10 seconds.
2. Scrape dough onto work surface; divide in half. Working with one portion of dough at a time, roll 1/4-inch thick between two large sheets of parchment paper. Leaving dough sandwiched between parchment layers, stack on cookie sheet and freeze until firm, 15 to 20 minutes. (Alternatively, refrigerate dough 2 hours or overnight.)
3. Adjust oven racks to upper- and lower-middle positions and heat oven to 350 degrees. Line two cookie sheets with parchment paper.
4. Remove one dough sheet from freezer; place on work surface. Peel off top parchment sheet and gently lay it back in place. Flip dough over; peel off and discard second parchment layer. Cut dough into 5-inch gingerbread people or 3-inch gingerbread cookies, transferring shapes to parchment-lined cookie sheets with wide metal spatula, spacing them 3/4 inch apart; set scraps aside. Repeat with remaining dough until cookie sheets are full. Bake cookies until set in centers and dough barely retains imprint when touched very gently with fingertip, 8 to 11 minutes, rotating cookie sheets front to back and switching positions top to bottom halfway through baking time. Do not overbake. Cool cookies on sheets 2 minutes, then remove with wide metal spatula to wire rack; cool to room temperature.
5. Gather scraps; repeat rolling, cutting, and baking in steps 2 and 4. Repeat with remaining dough until all dough is used.
If you’ve come this far with the sourdough starter, then this is a bread walk. If you’d like to bake this AMAZING bread, click here for the sourdough starter that you’ll need to make first. It only takes fifteen days to make it, but who’s counting.
Ingredients:
2 pounds plus 2 ounces unbleached white bread flour, plus extra for dusting
1/2 cup raw wheat germ
3 1/2 teaspoons sea salt
1 tablespoon finely chopped fresh rosemary
4 tablespoons extra-virgin olive oil
Day 1
Place water, sourdough starter, flour, and wheat germ in the bowl of a mixer fitted with a doth hook. Mix on low speed for 4 minutes. The dough should be sticky and pliable. Cover the dough and allow it to rest 20 minutes.
Add salt and continue mixing on medium speed for 4 minutes, scraping down the side of the bowl as necessary with a rubber spatula.
Add rosemary and olive oil and mix on medium speed until ingredients are incorporated and the dough reaches an internal temperature of 78 degrees F, about 5 more minutes.
Remove the dough from the mixing bowl and lightly coat it with vegetable oil. Return the dough to the oiled bowl, cover in plastic wrap, and let it ferment at room temperature until it doubles in volume, about 3 to 4 hours.
Uncover the dough and turn it out onto a lightly floured work surface. Cut the dough into two equal pieces. Slap each piece against the work surface to deflate. Tuck under the edges of each piece, cover the dough with a cloth, and let it rest for 15 minutes.
Uncover the dough and round each piece into a boule. Place the boules, smooth side down, into a bowl (unless you have proofing baskets). Cover the dough in the bowl with a cloth and let proof at room temperature until it begins to show signs of movement, about 1 1/2 to 2 hours.
Remove the cloth and sprinkle the surface of the dough with flour. Wrap each bowl tightly in plastic wrap. Refrigerate for 8 to 12 hours.
Day 2
Remove the boules from the refrigerator, take off plastic wrap, and cover each with a cloth. Let the dough continue proofing at room temperature until it reaches an internal temperature of 58 degrees F, about 2 to 2 1/2 hours.
Preheat oven to 500 degrees F at least one hour before baking.
Remove the cloth and lightly dust boules with flour. Carefully loosen boules from bowls and gently invert onto lightly floured baker’s peel.
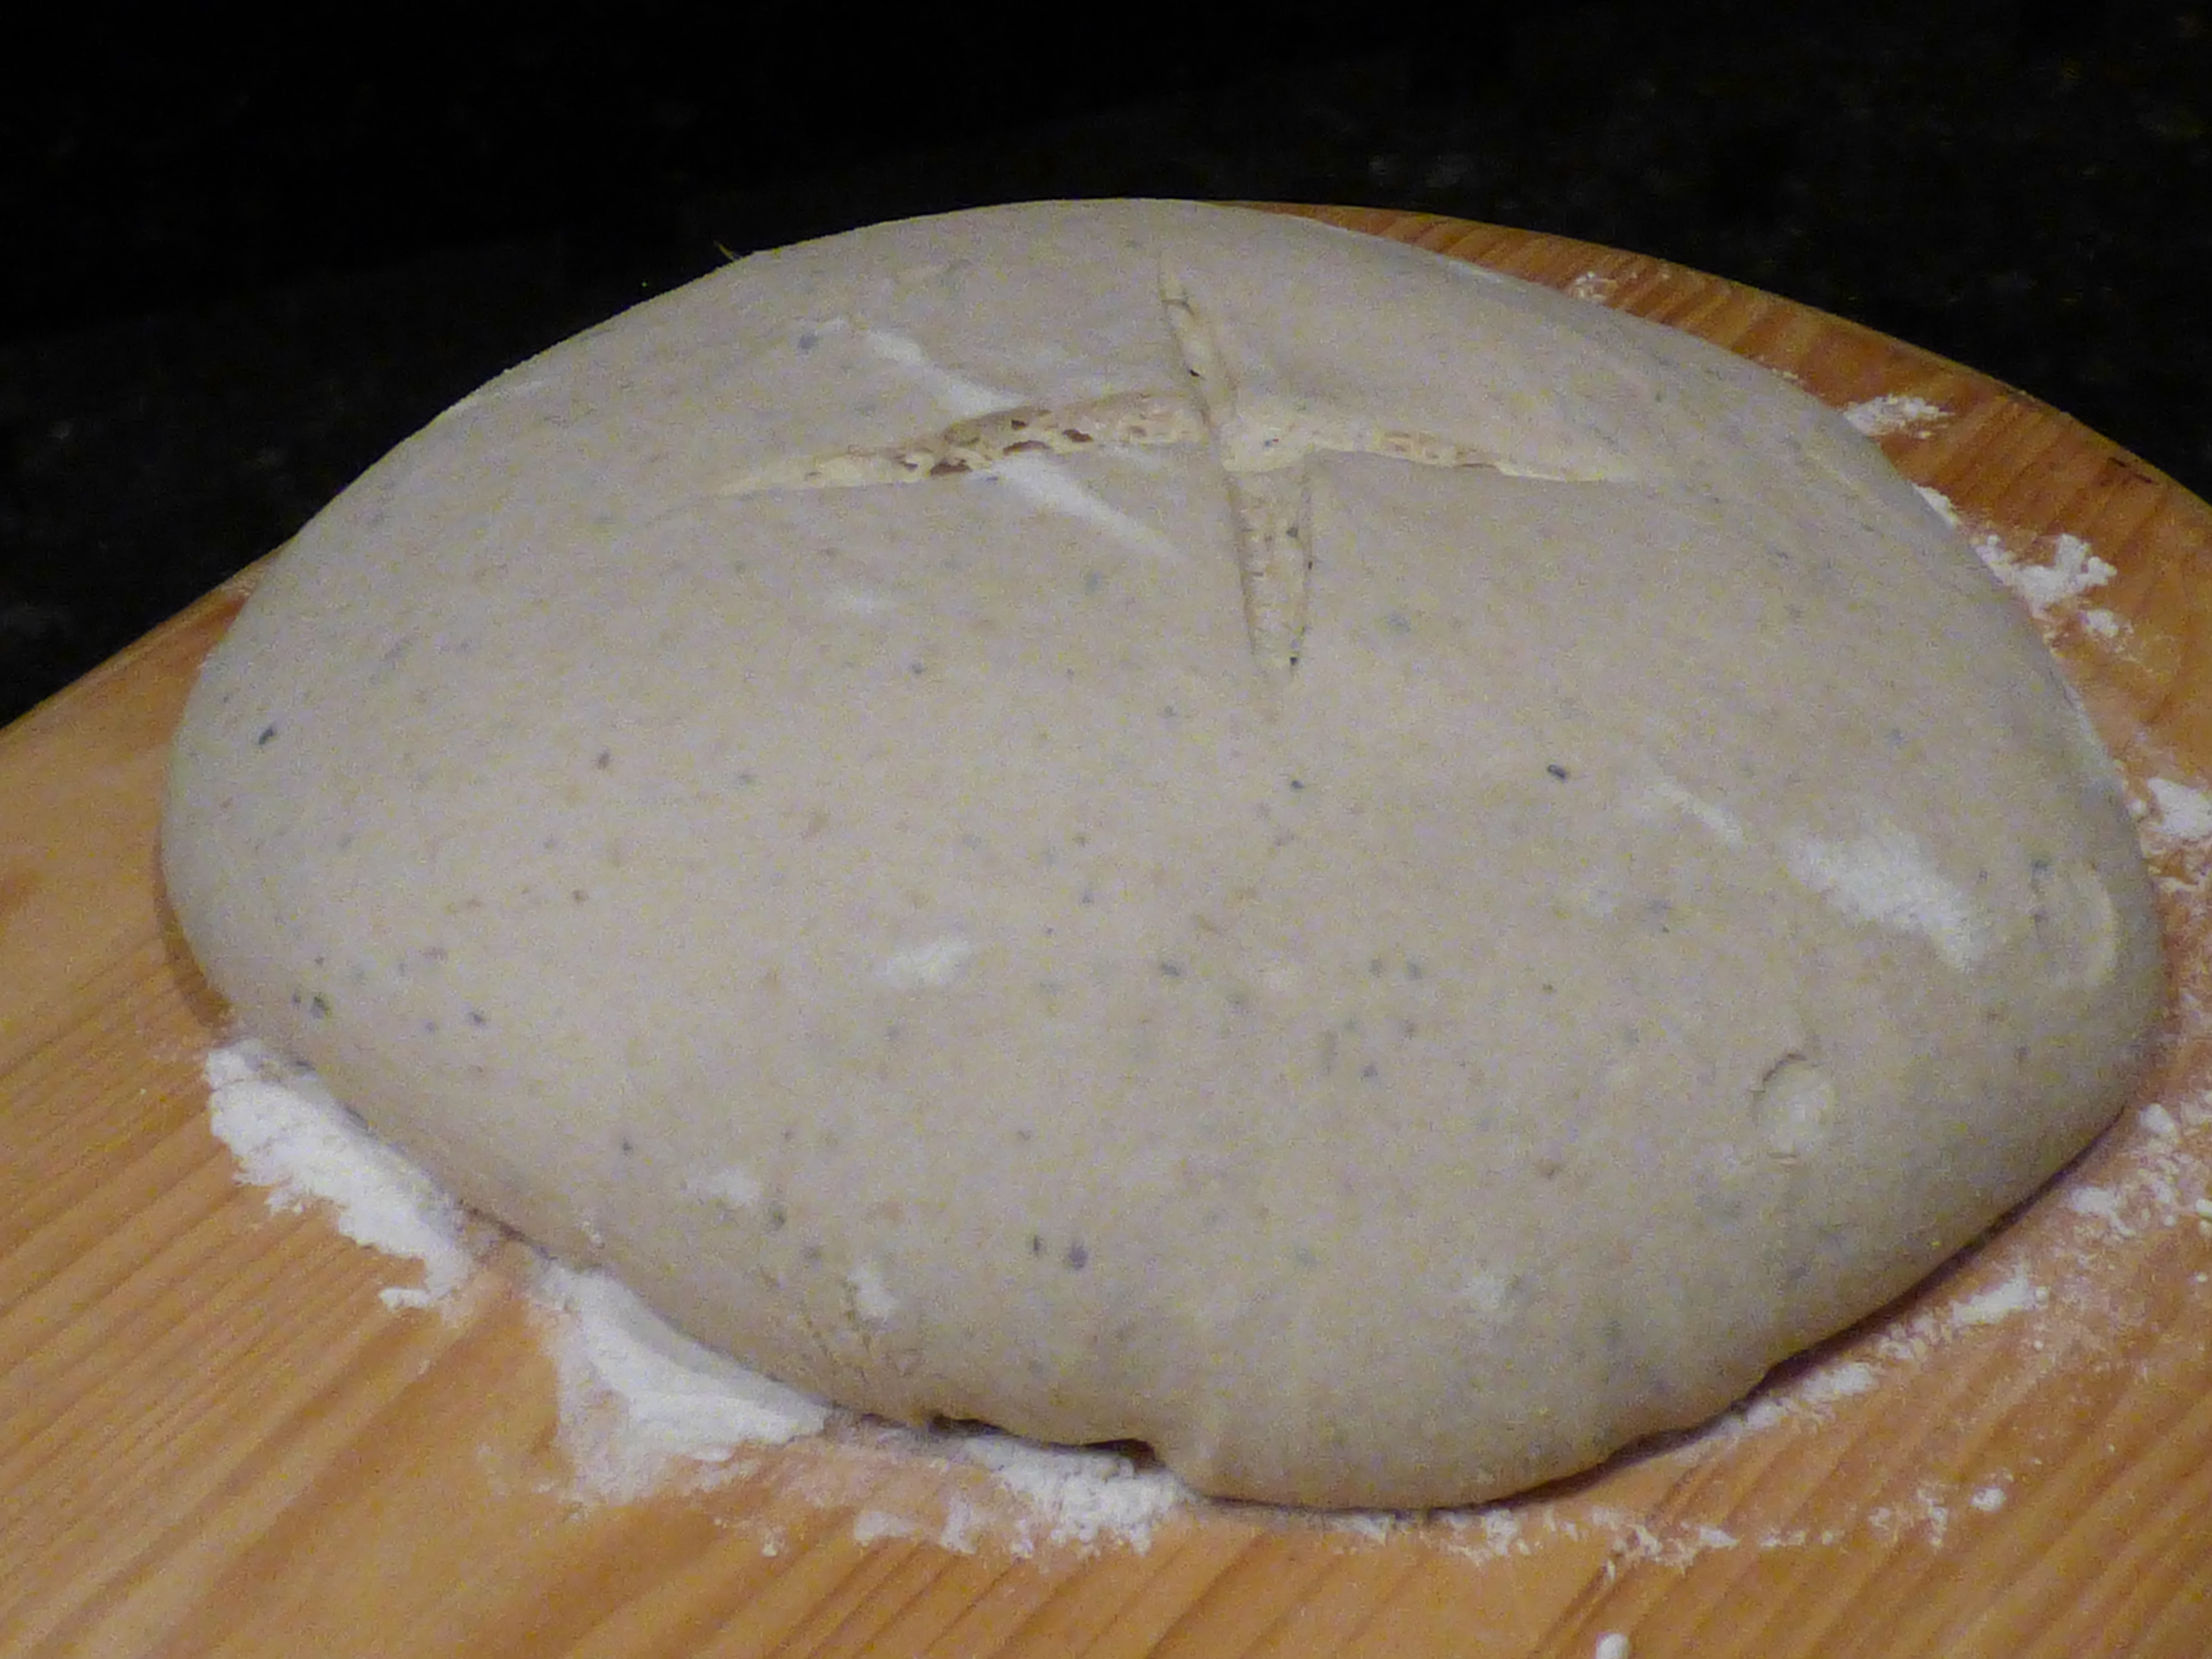
With a single-edged razor held perpendicular to the boule, slash a tic-tac-toe pattern on top of each.
Open the oven door, spritz the oven heavily with water from a spray bottle, and quickly close the door. Open the oven door again, slide the boule onto the pizza stone, and quickly close the door. Cut, spritz, and load the second boule in the same manner.
Reduce the oven temperature to 450 degrees F. Spritz the oven two more times during the next 5 minutes. Refrain from opening the oven door for the next 20 minutes.
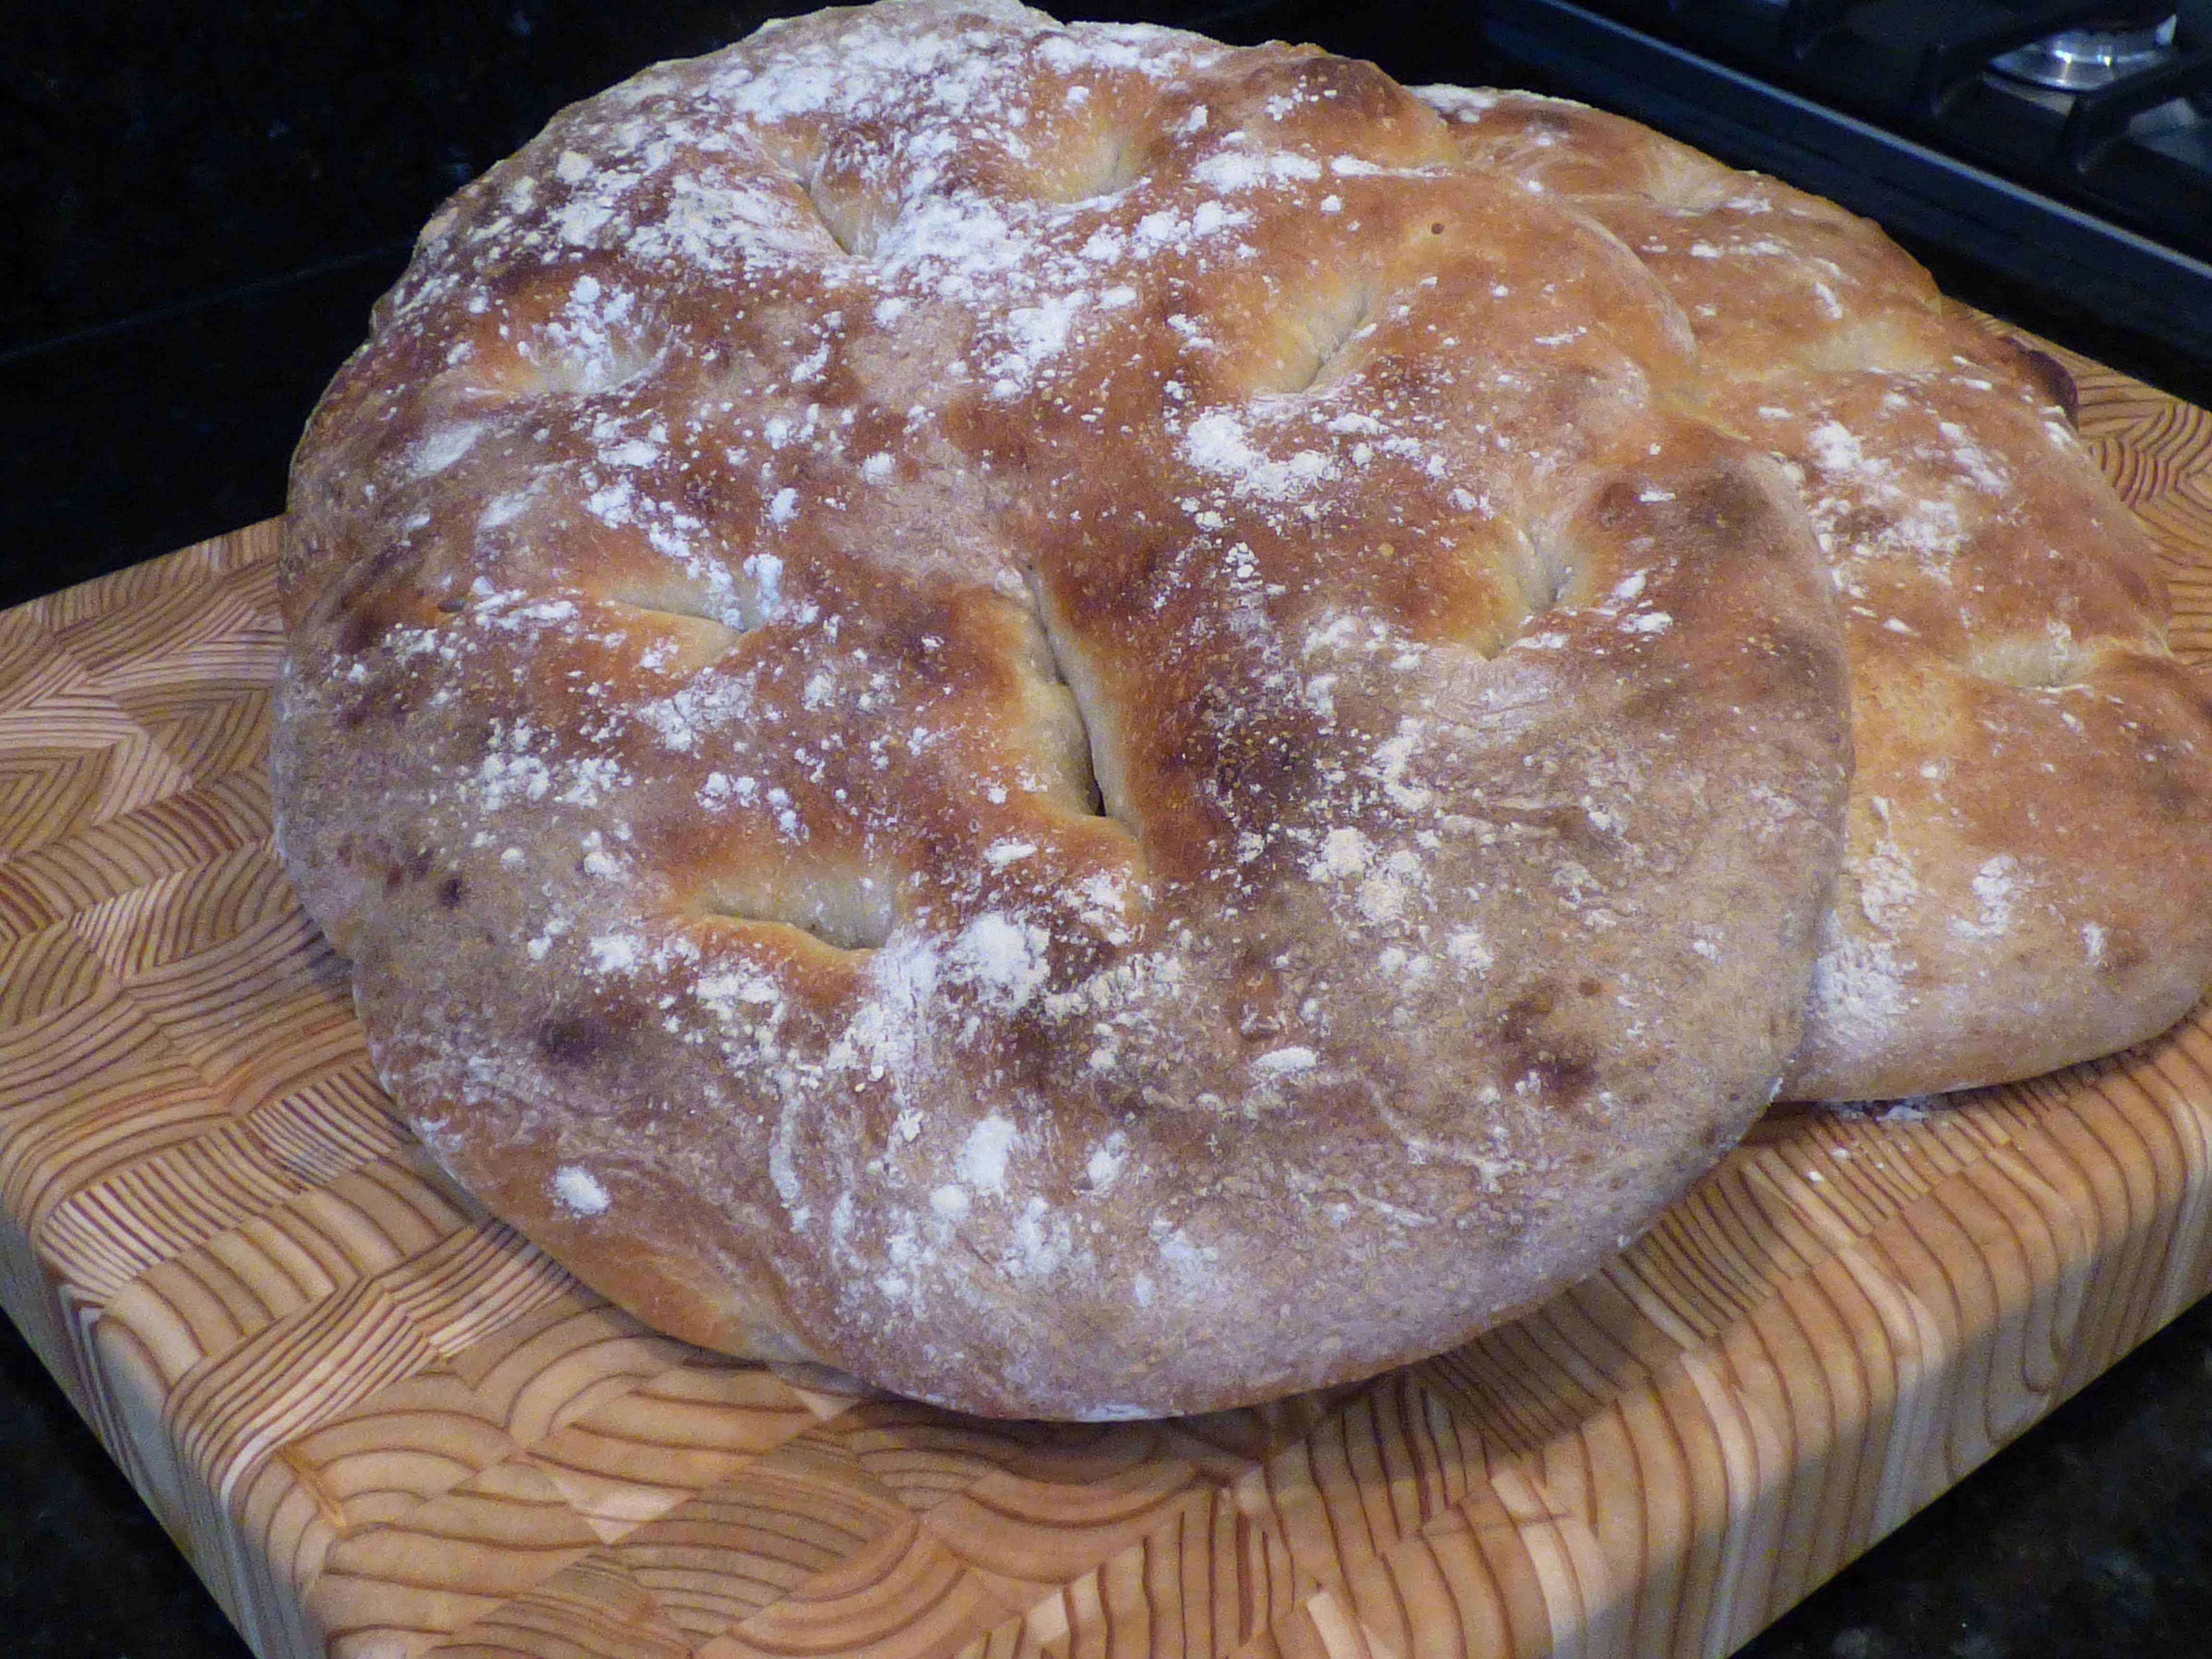
After 20 minutes, check the boules and rotate them if necessary to ensure even baking. Continue baking for 15 to 20 minutes more, for a total of 40 to 45 minutes.
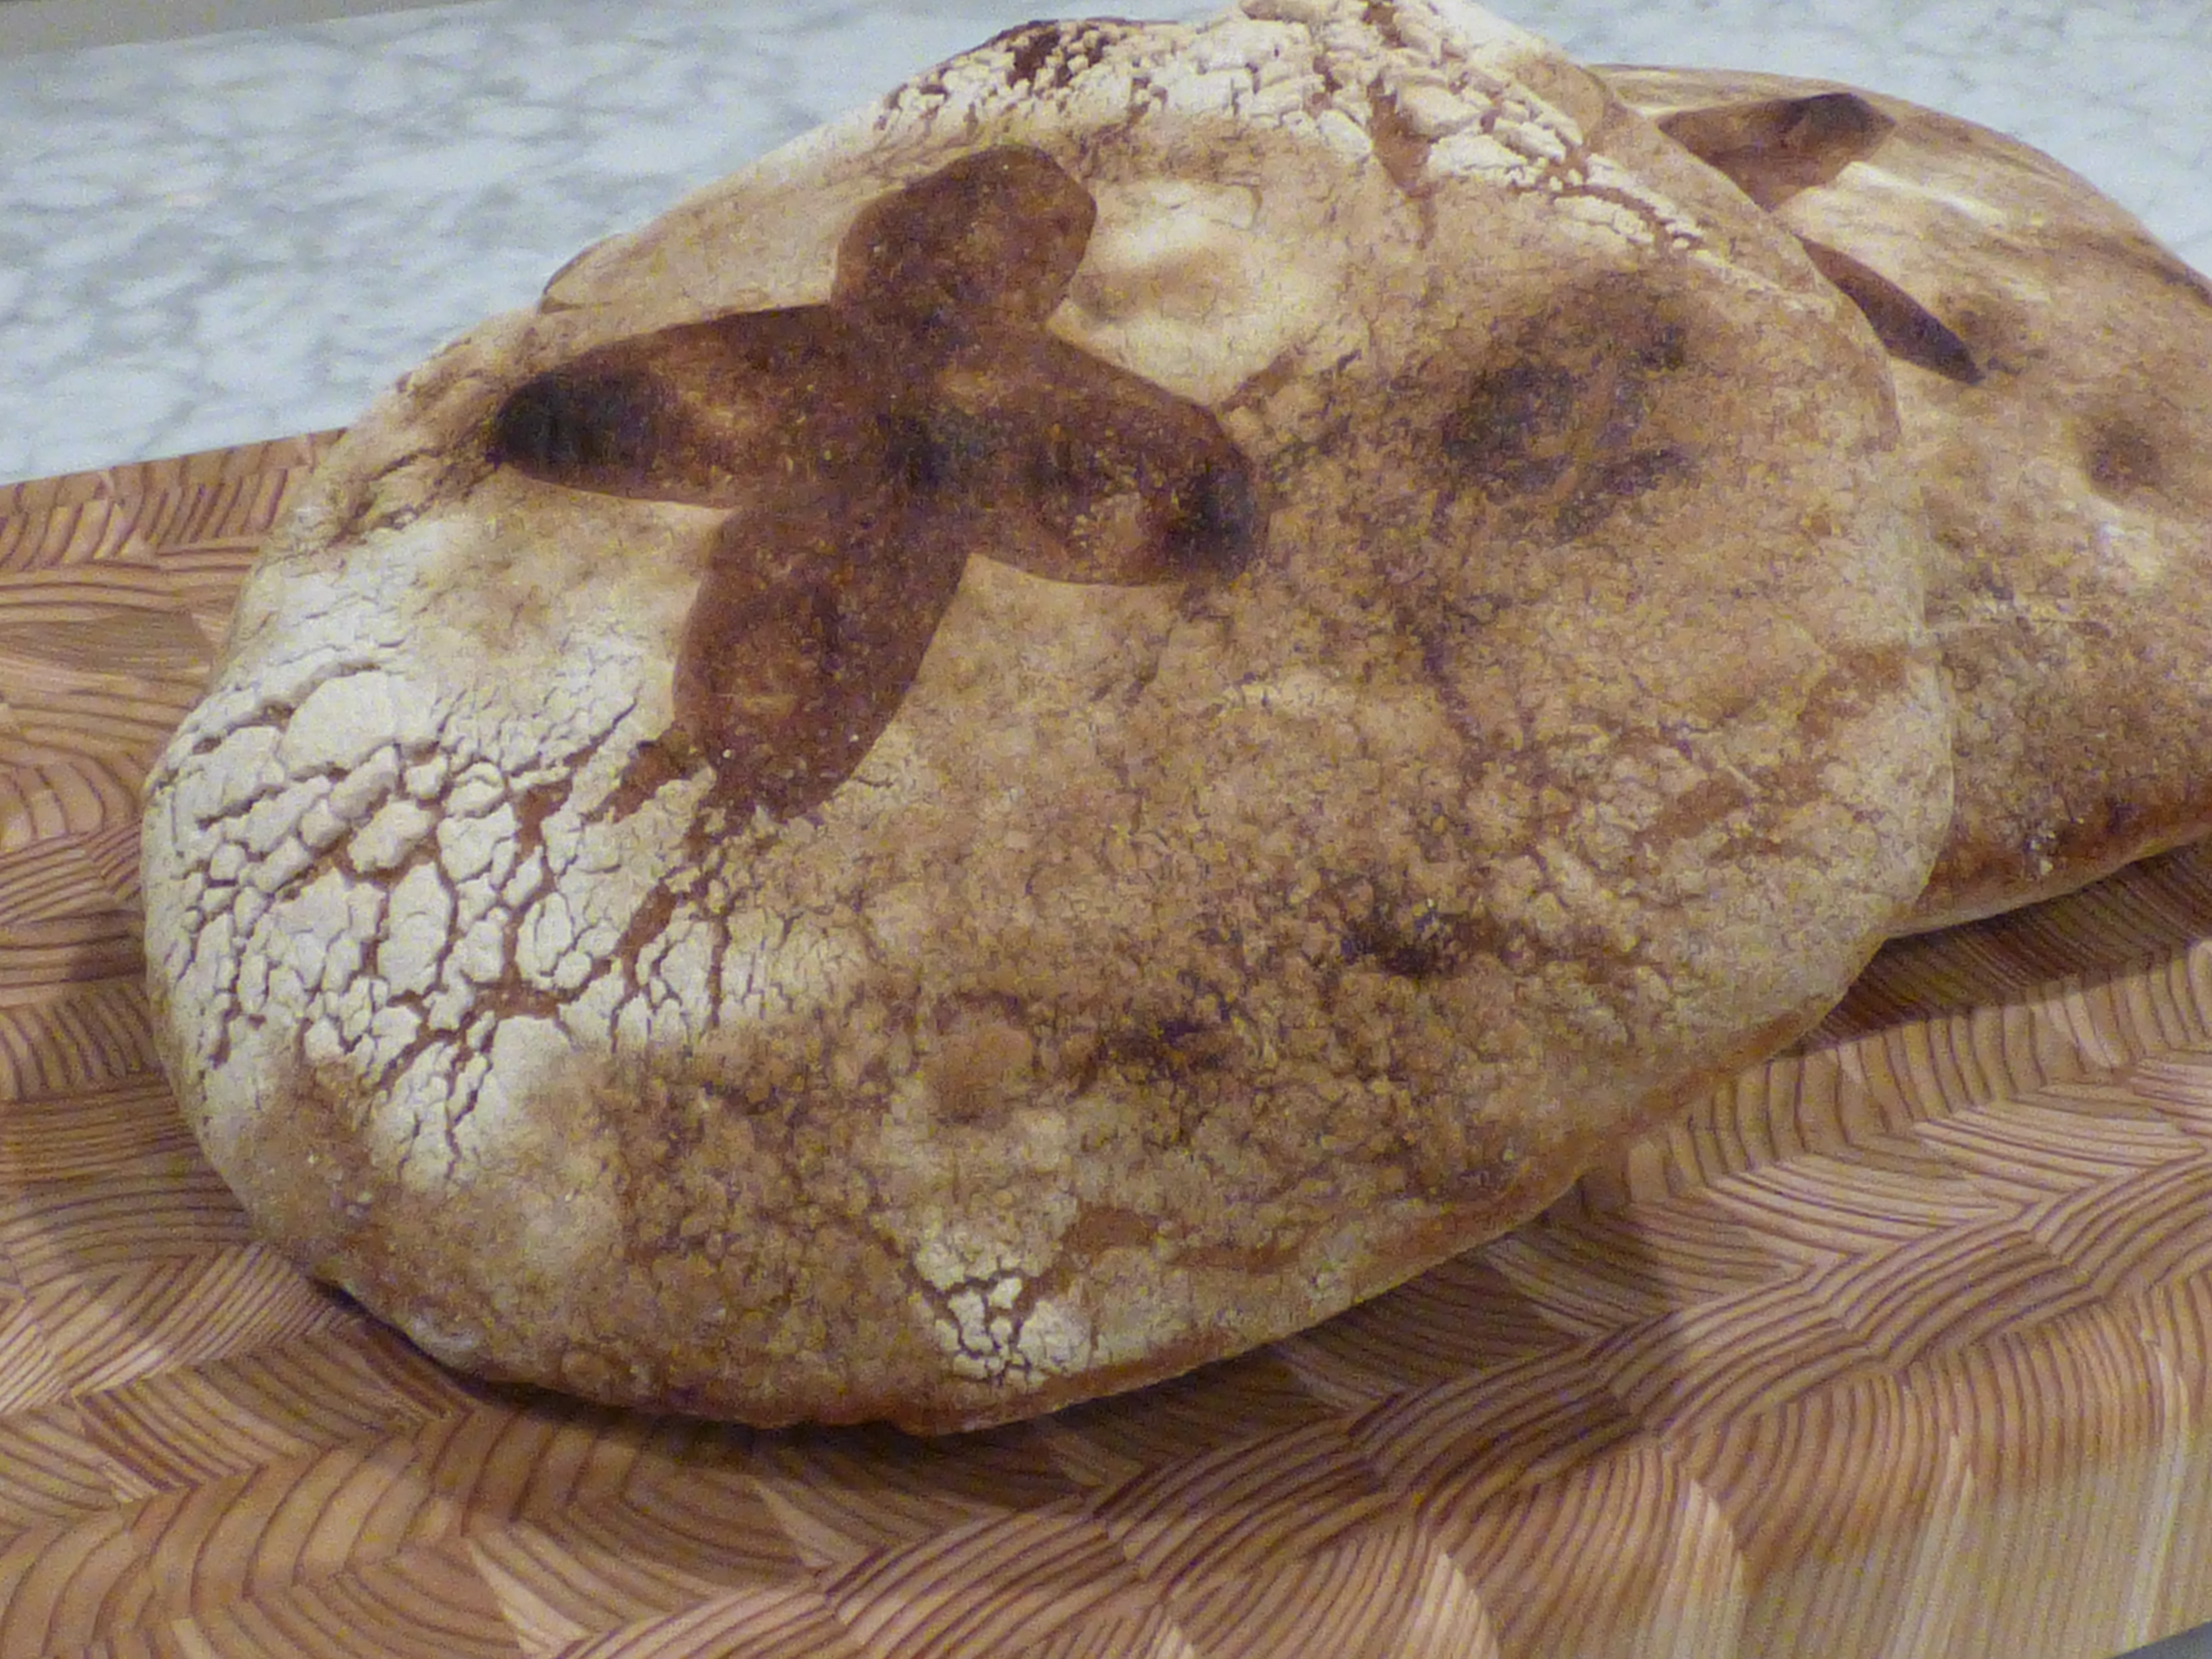
Remove boules to a cooling rack. The finished boules will have a rich brown color and look swollen.
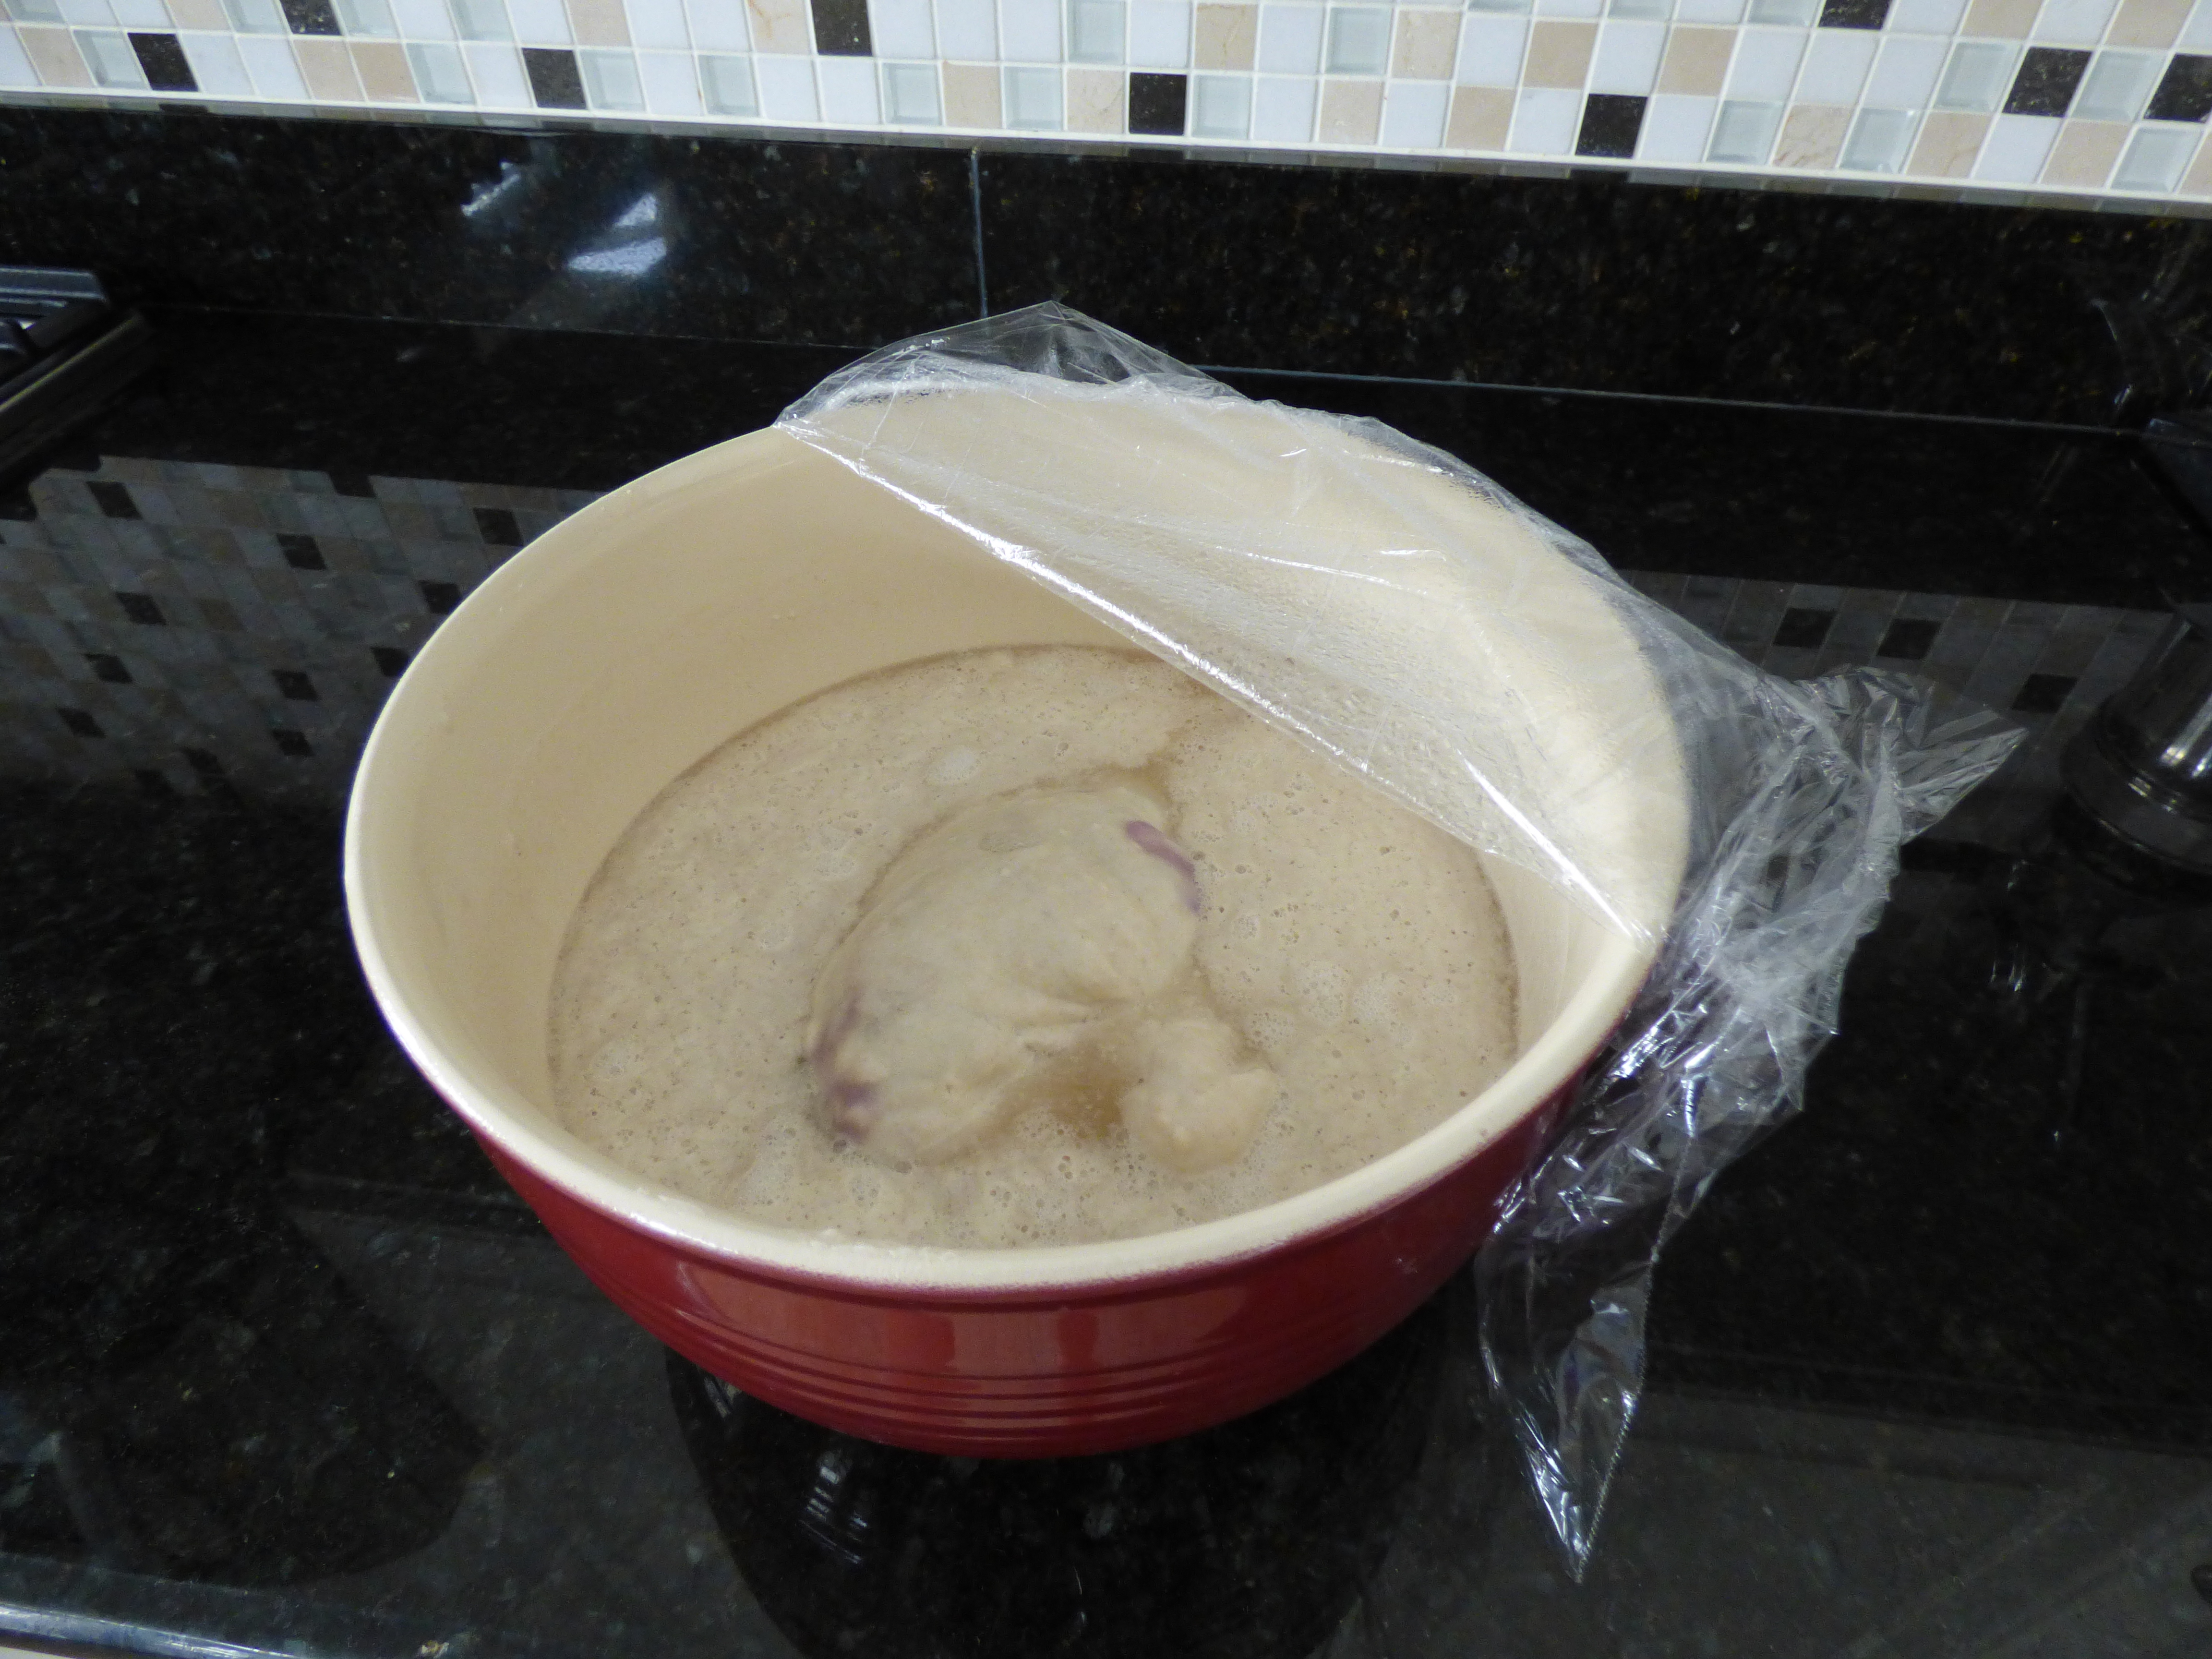
Making a sourdough starter is serious business–the type that requires you to quit your job or at least be able to devote almost a month of time towards its care and feeding. Alright, so this recipe may not take two hundred steps, but it’s pretty close.
You see, I devoted a month of my summer and my life (and the bread is now since long gone…) to the care and feeding of Nancy Silverton’s sourdough starter with the intention to make a bounty of rosemary olive oil boules and fougasse. The starter and the breads were no easy feat, but the process and the finished products were well worth the efforts.
Step 1, Making the Starter
The starter takes fifteen days! Seriously! But it’s worth the effort to say you’ve done this (at least once in your life).
Ingredients:
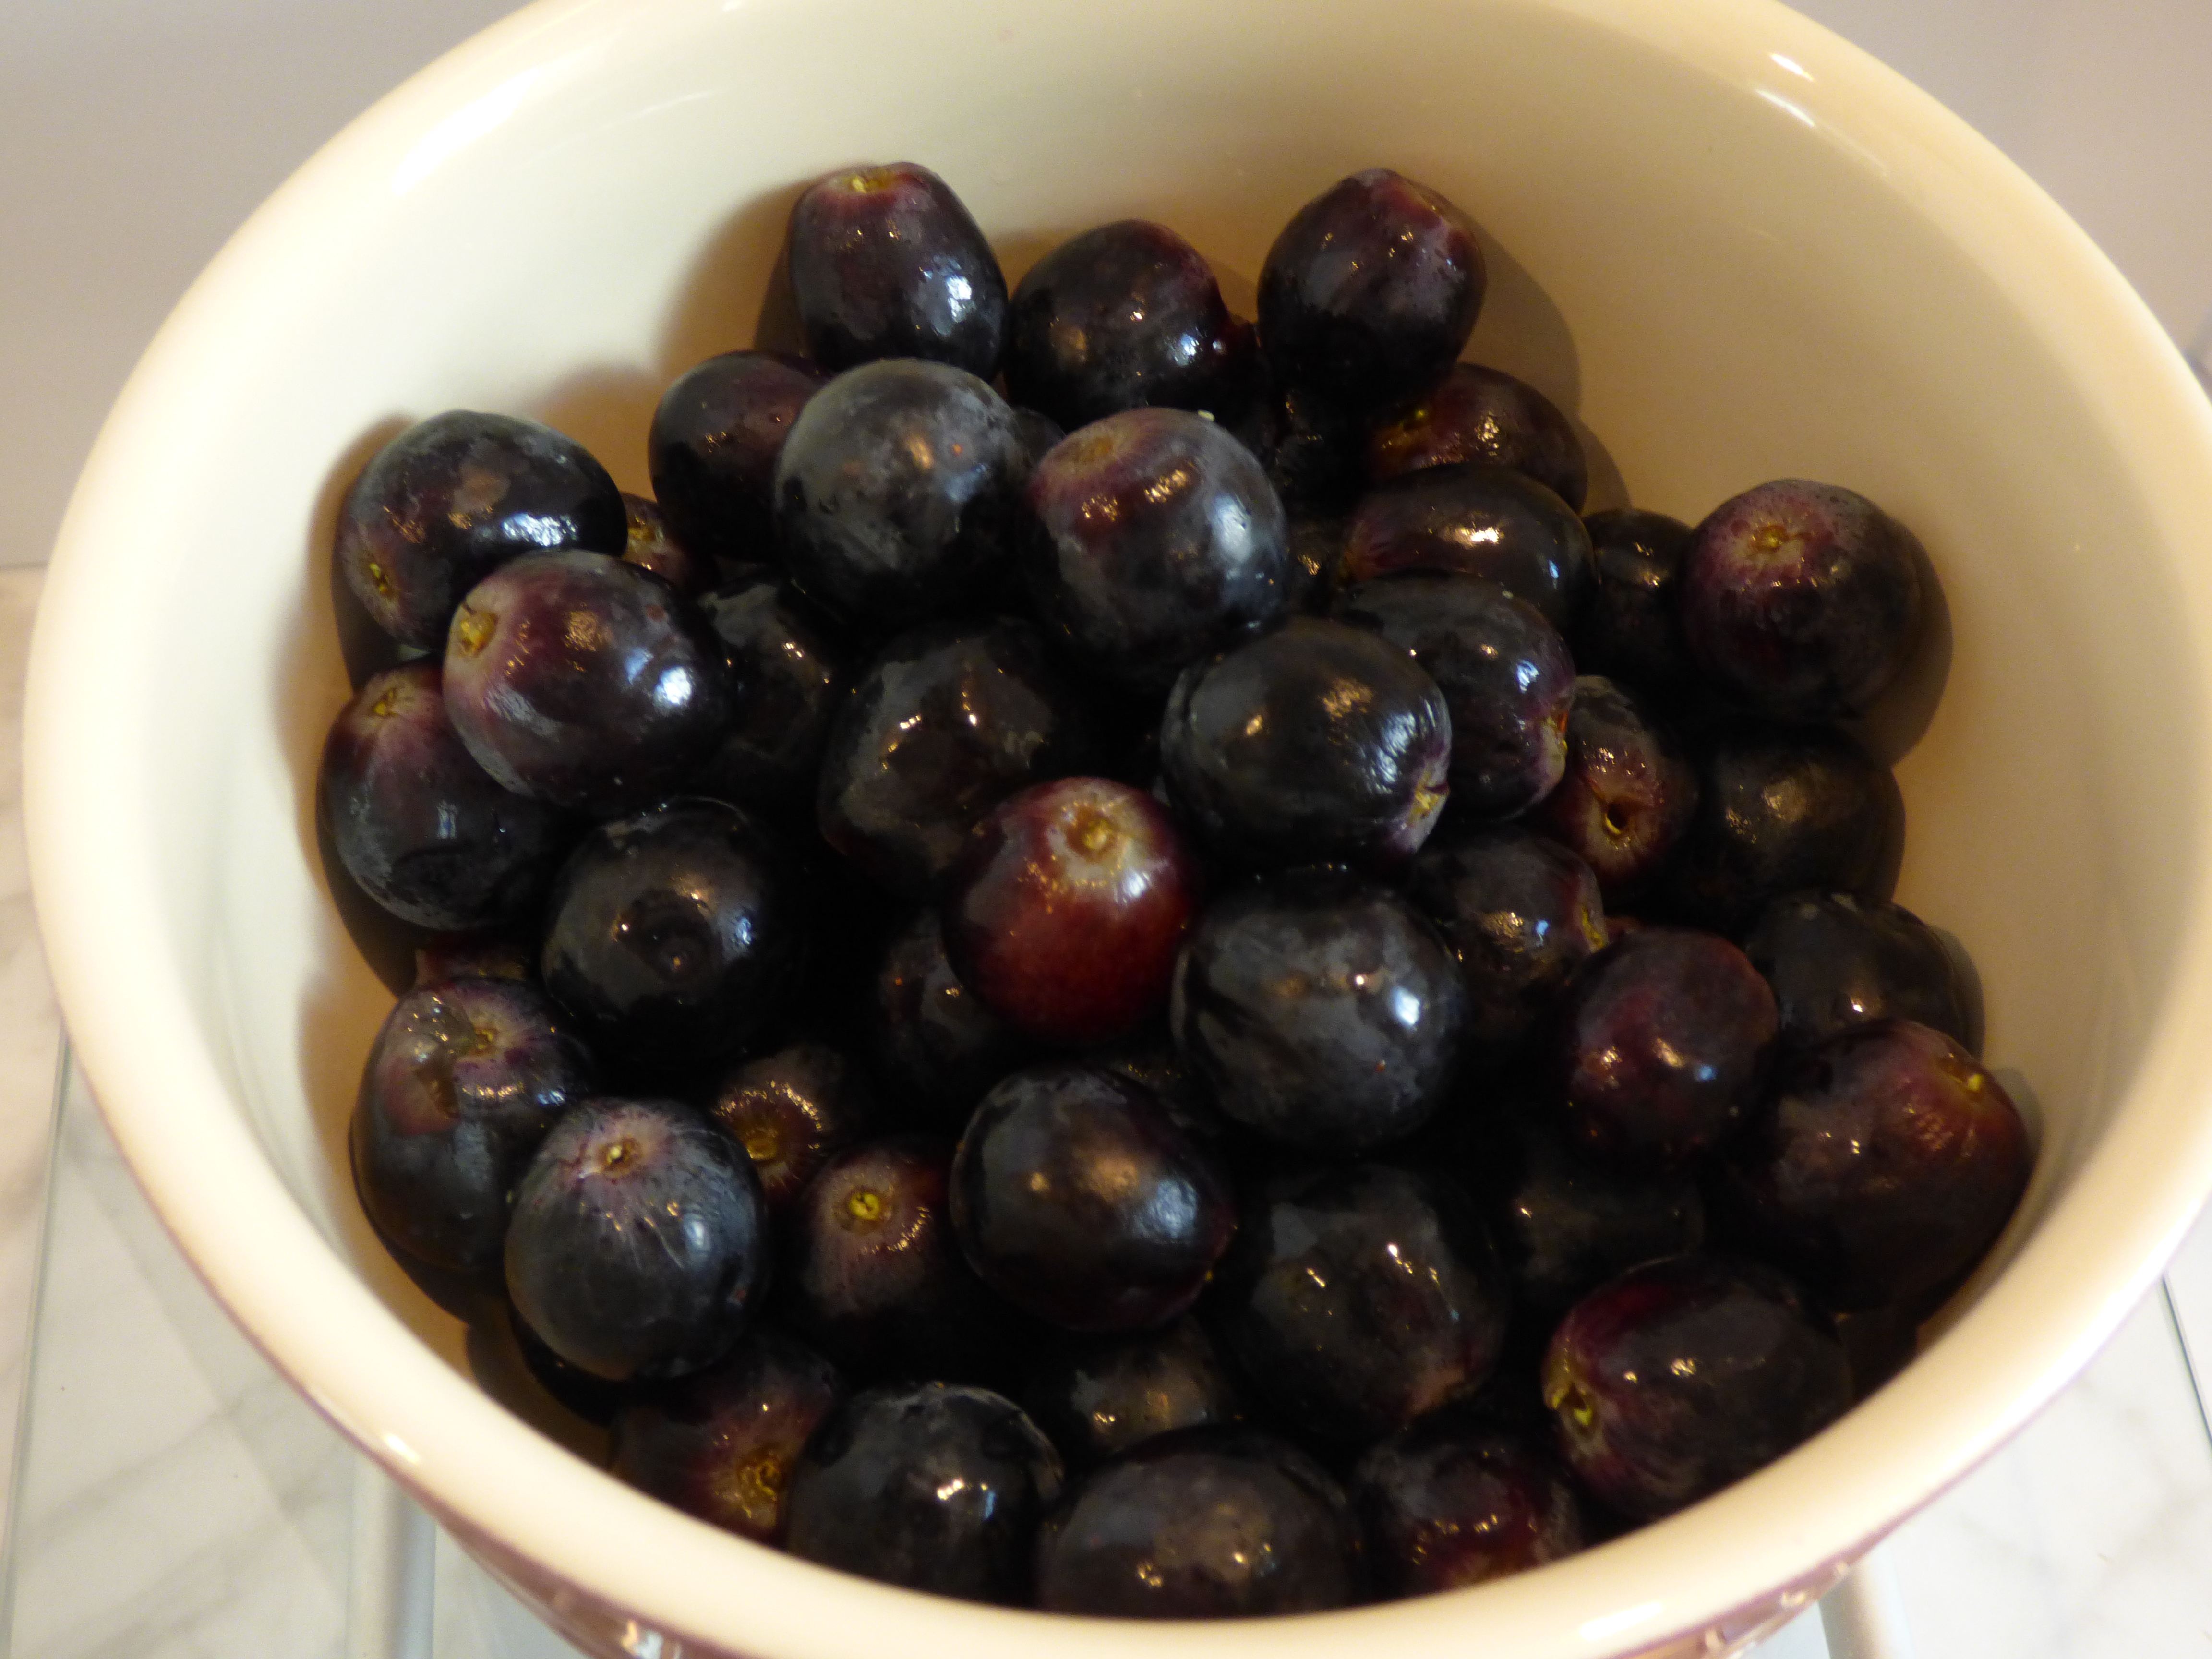
1 pound pesticide-free organic red or black grapes, unwashed
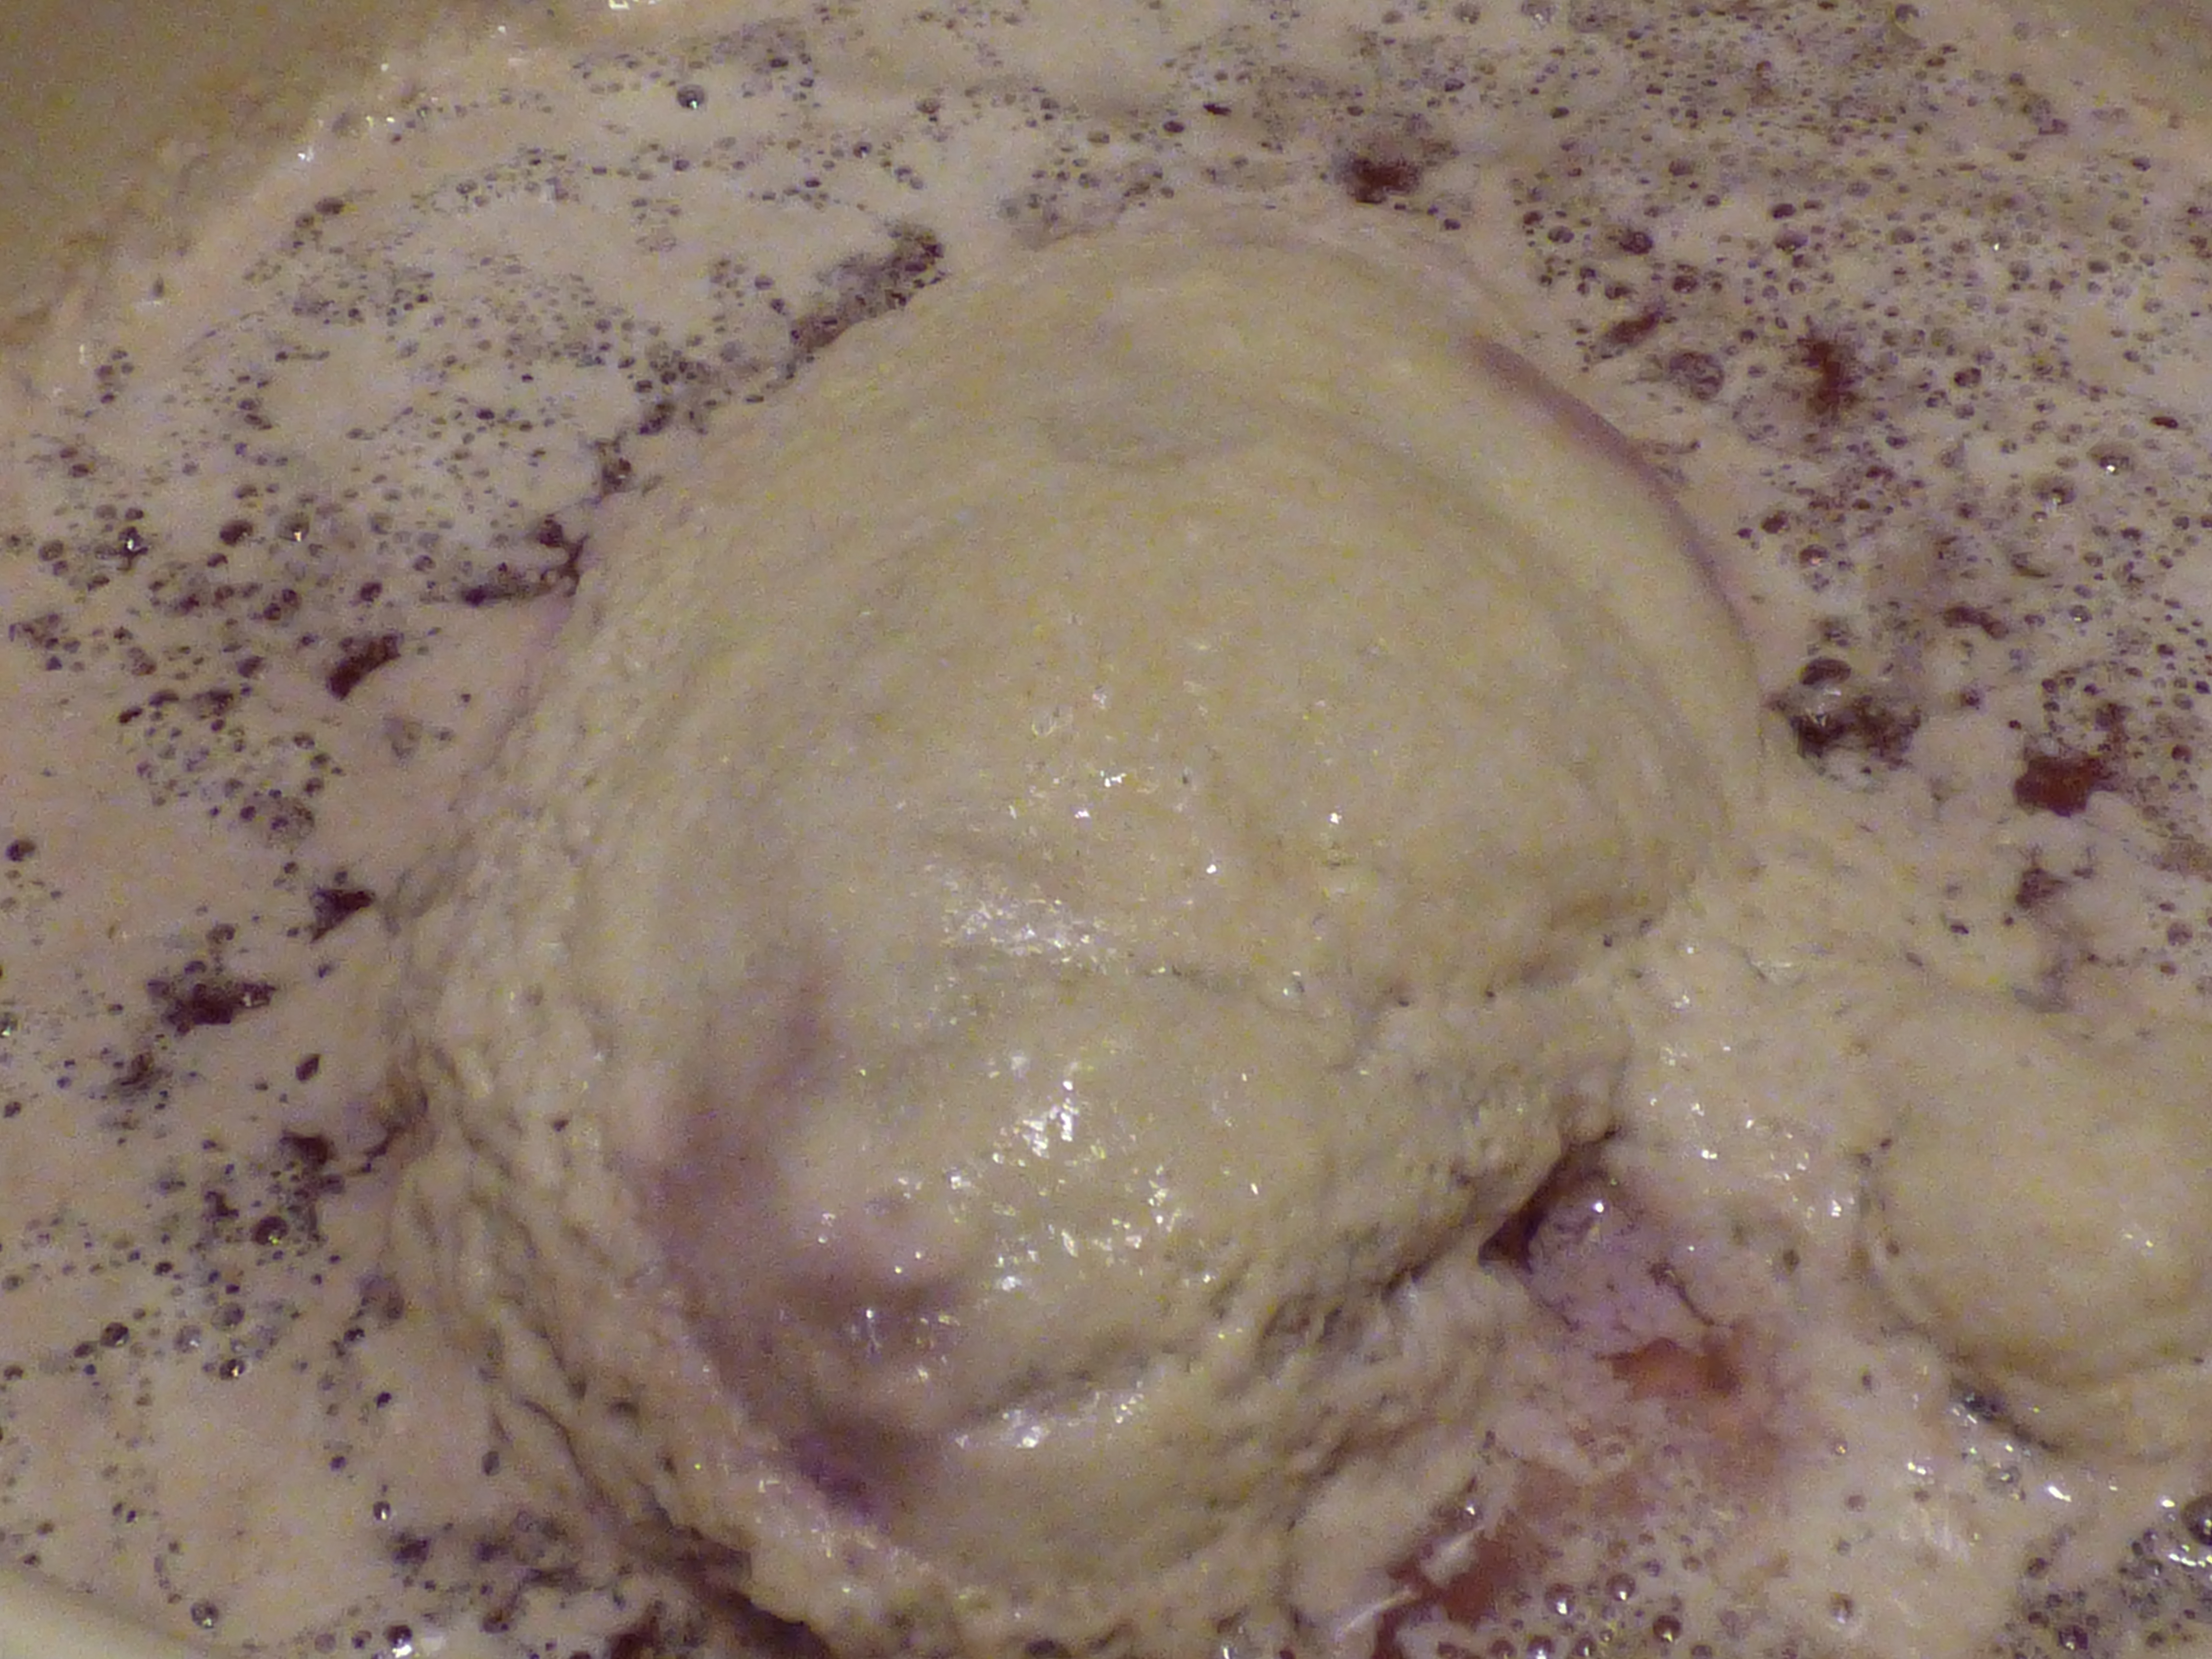
Place a bunch(es) of grapes on large double-layered piece of cheesecloth. Tie opposite corners together to form a bag around grapes. Combine water and flour in 1-gallon container and stir with rubber spatula until evenly moistened. Hold cheesecloth-wrapped grapes over container and squeeze them lightly with your hand, allowing juices to fall into container. Place grapes in container; use rubber spatula to stir mixture and then fully submerge grapes. Cover container with plastic wrap. Let container stand at room temperature (70 to 75 degrees).
Days 2 to 3:
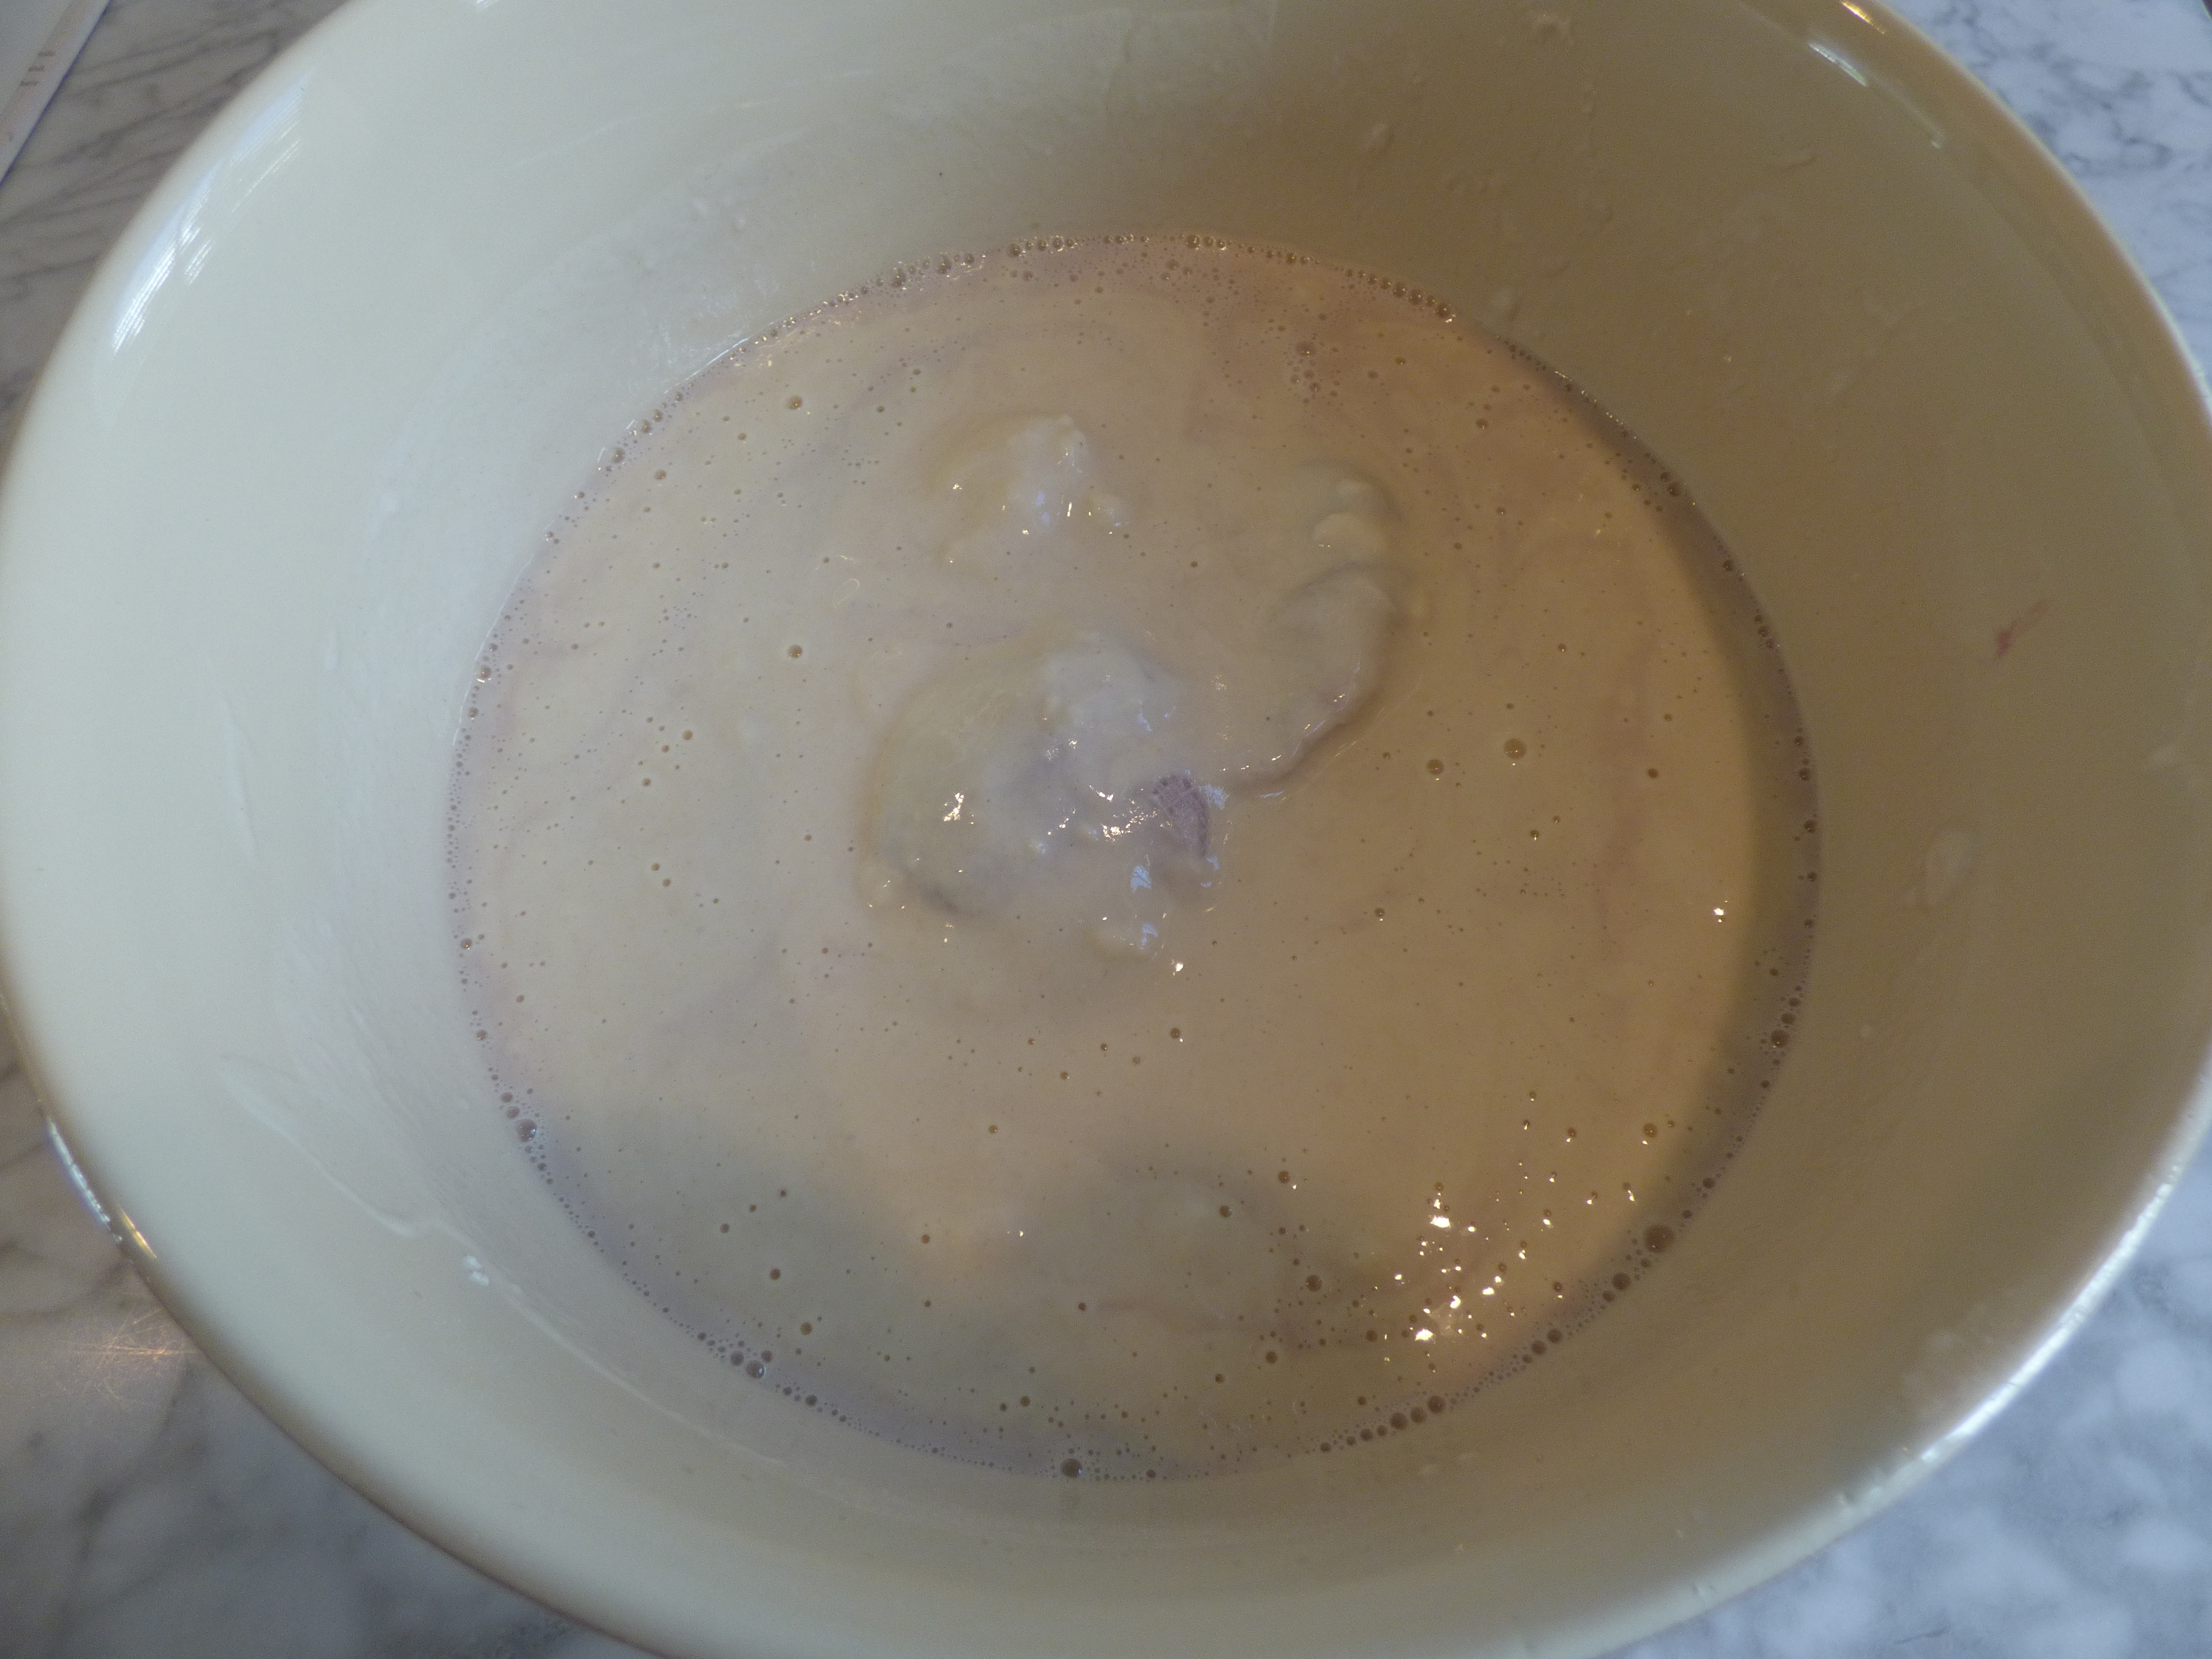
Here it was starting to get stinky. It almost looks like I’m growing organs.
Mixture should form bubbles.
Day 4:
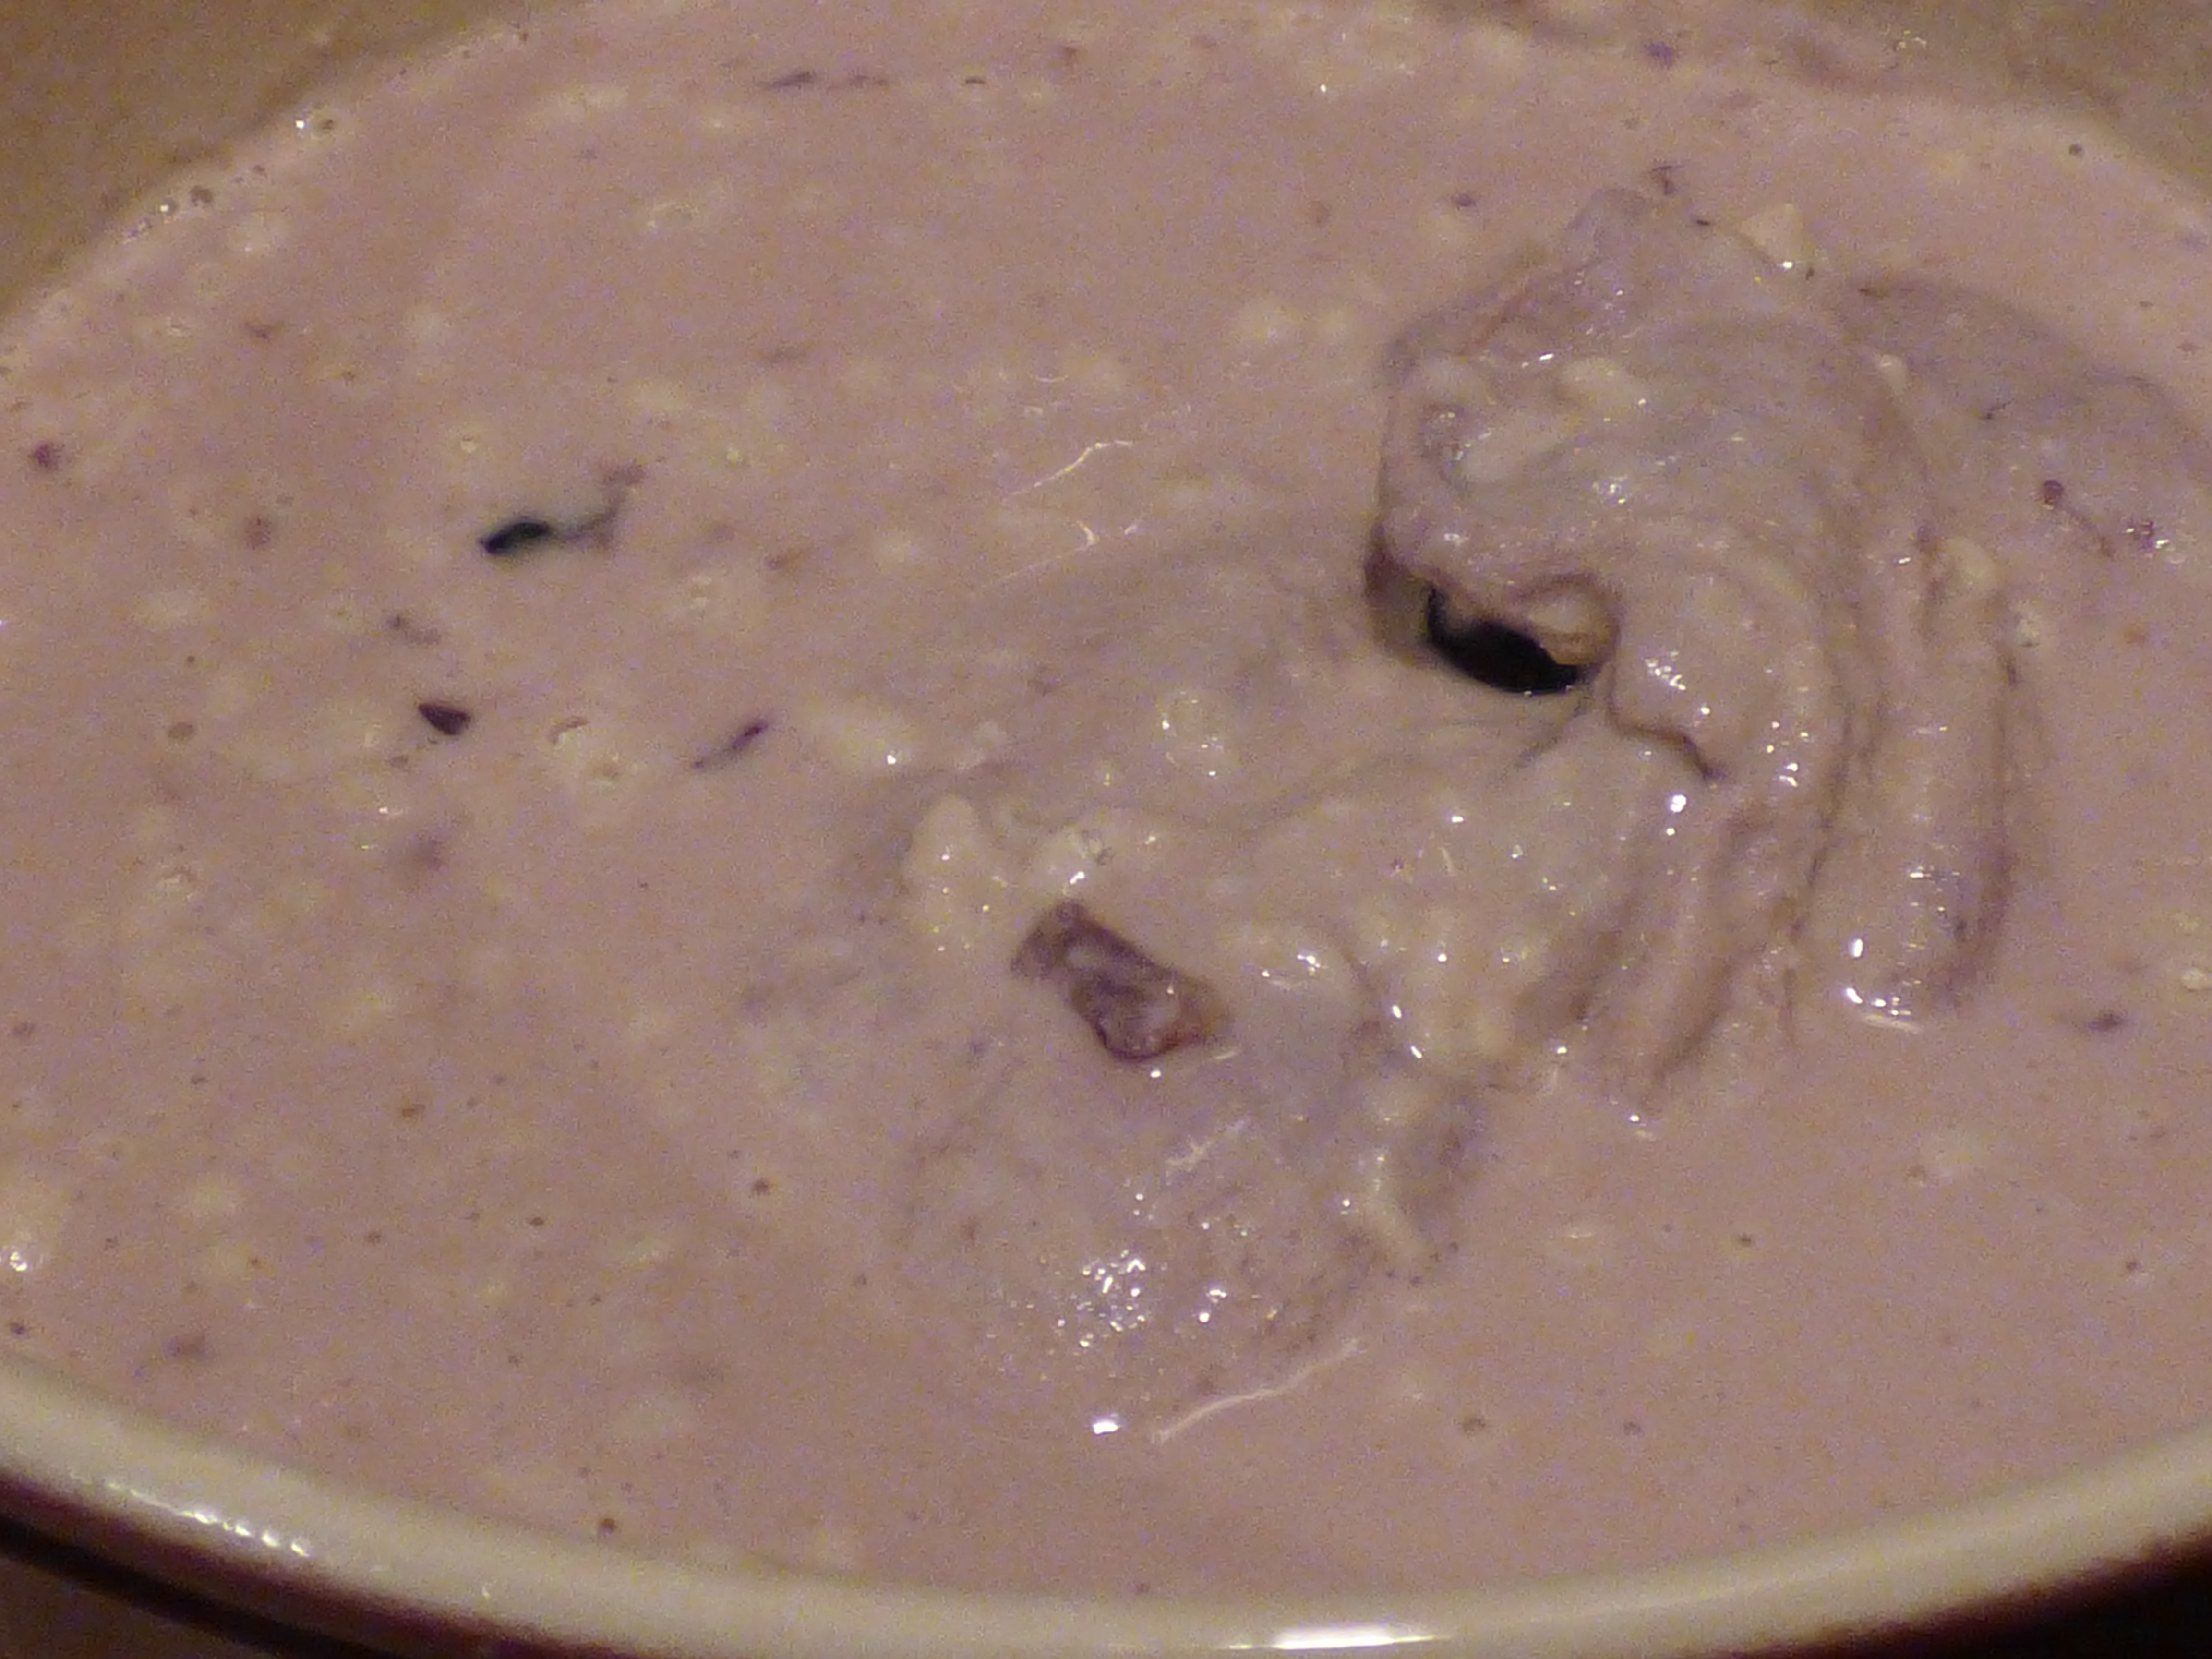
Very gaseous smelling.
Mixture should form large bubbles and smell alcoholic. Refresh mixture by stirring in 1 cup flour and 1 cup water, about 78 degrees. Replace cover and continue to let stand at room temperature.
Days 5 to 9:
Mixture may appear separated, with liquid rising to top. If mold forms, remove it, then stir in 1 cup flour and 1 cup water.
Days 10 to 14:
(Triple daily feeding begins.) In morning, remove bag of grapes, squeezing to extract liquid; discard grapes. Stir mixture well, then pour off and discard all but about 2 cups (amount you discard can be reserved and turned into additional starters, if desired). First feeding: Stir in 1 1/4 cups flour and 1 cup water, about 78 degrees. Cover and let stand at room temperature 4 to 6 hours. Second feeding: Stir in 2 1/2 cups flour and 2 cups water, about 78 degrees. Cover and let stand at room temperature 4 to 6 hours longer. Third feeding: Stir in 5 cups flour and 4 cups water, about 78 degrees. Cover and let stand at room temperature for 12 to 15 hours. Repeat process next 4 days, pouring off all but 2 cups before feeding begins.
Day 15:
Starter is ready to use; it should form bubbles and should smell yeasty and nutty.
Here’s the good news: once you have the starter, you can store it away in your refrigerator until you have another summer off or perhaps until Christmas vacation when you’ll have a couple of weeks to devote to the feeding schedule again.
If you’re still with me after day 15, you’ve only got THREE more days until you get your first loaf.
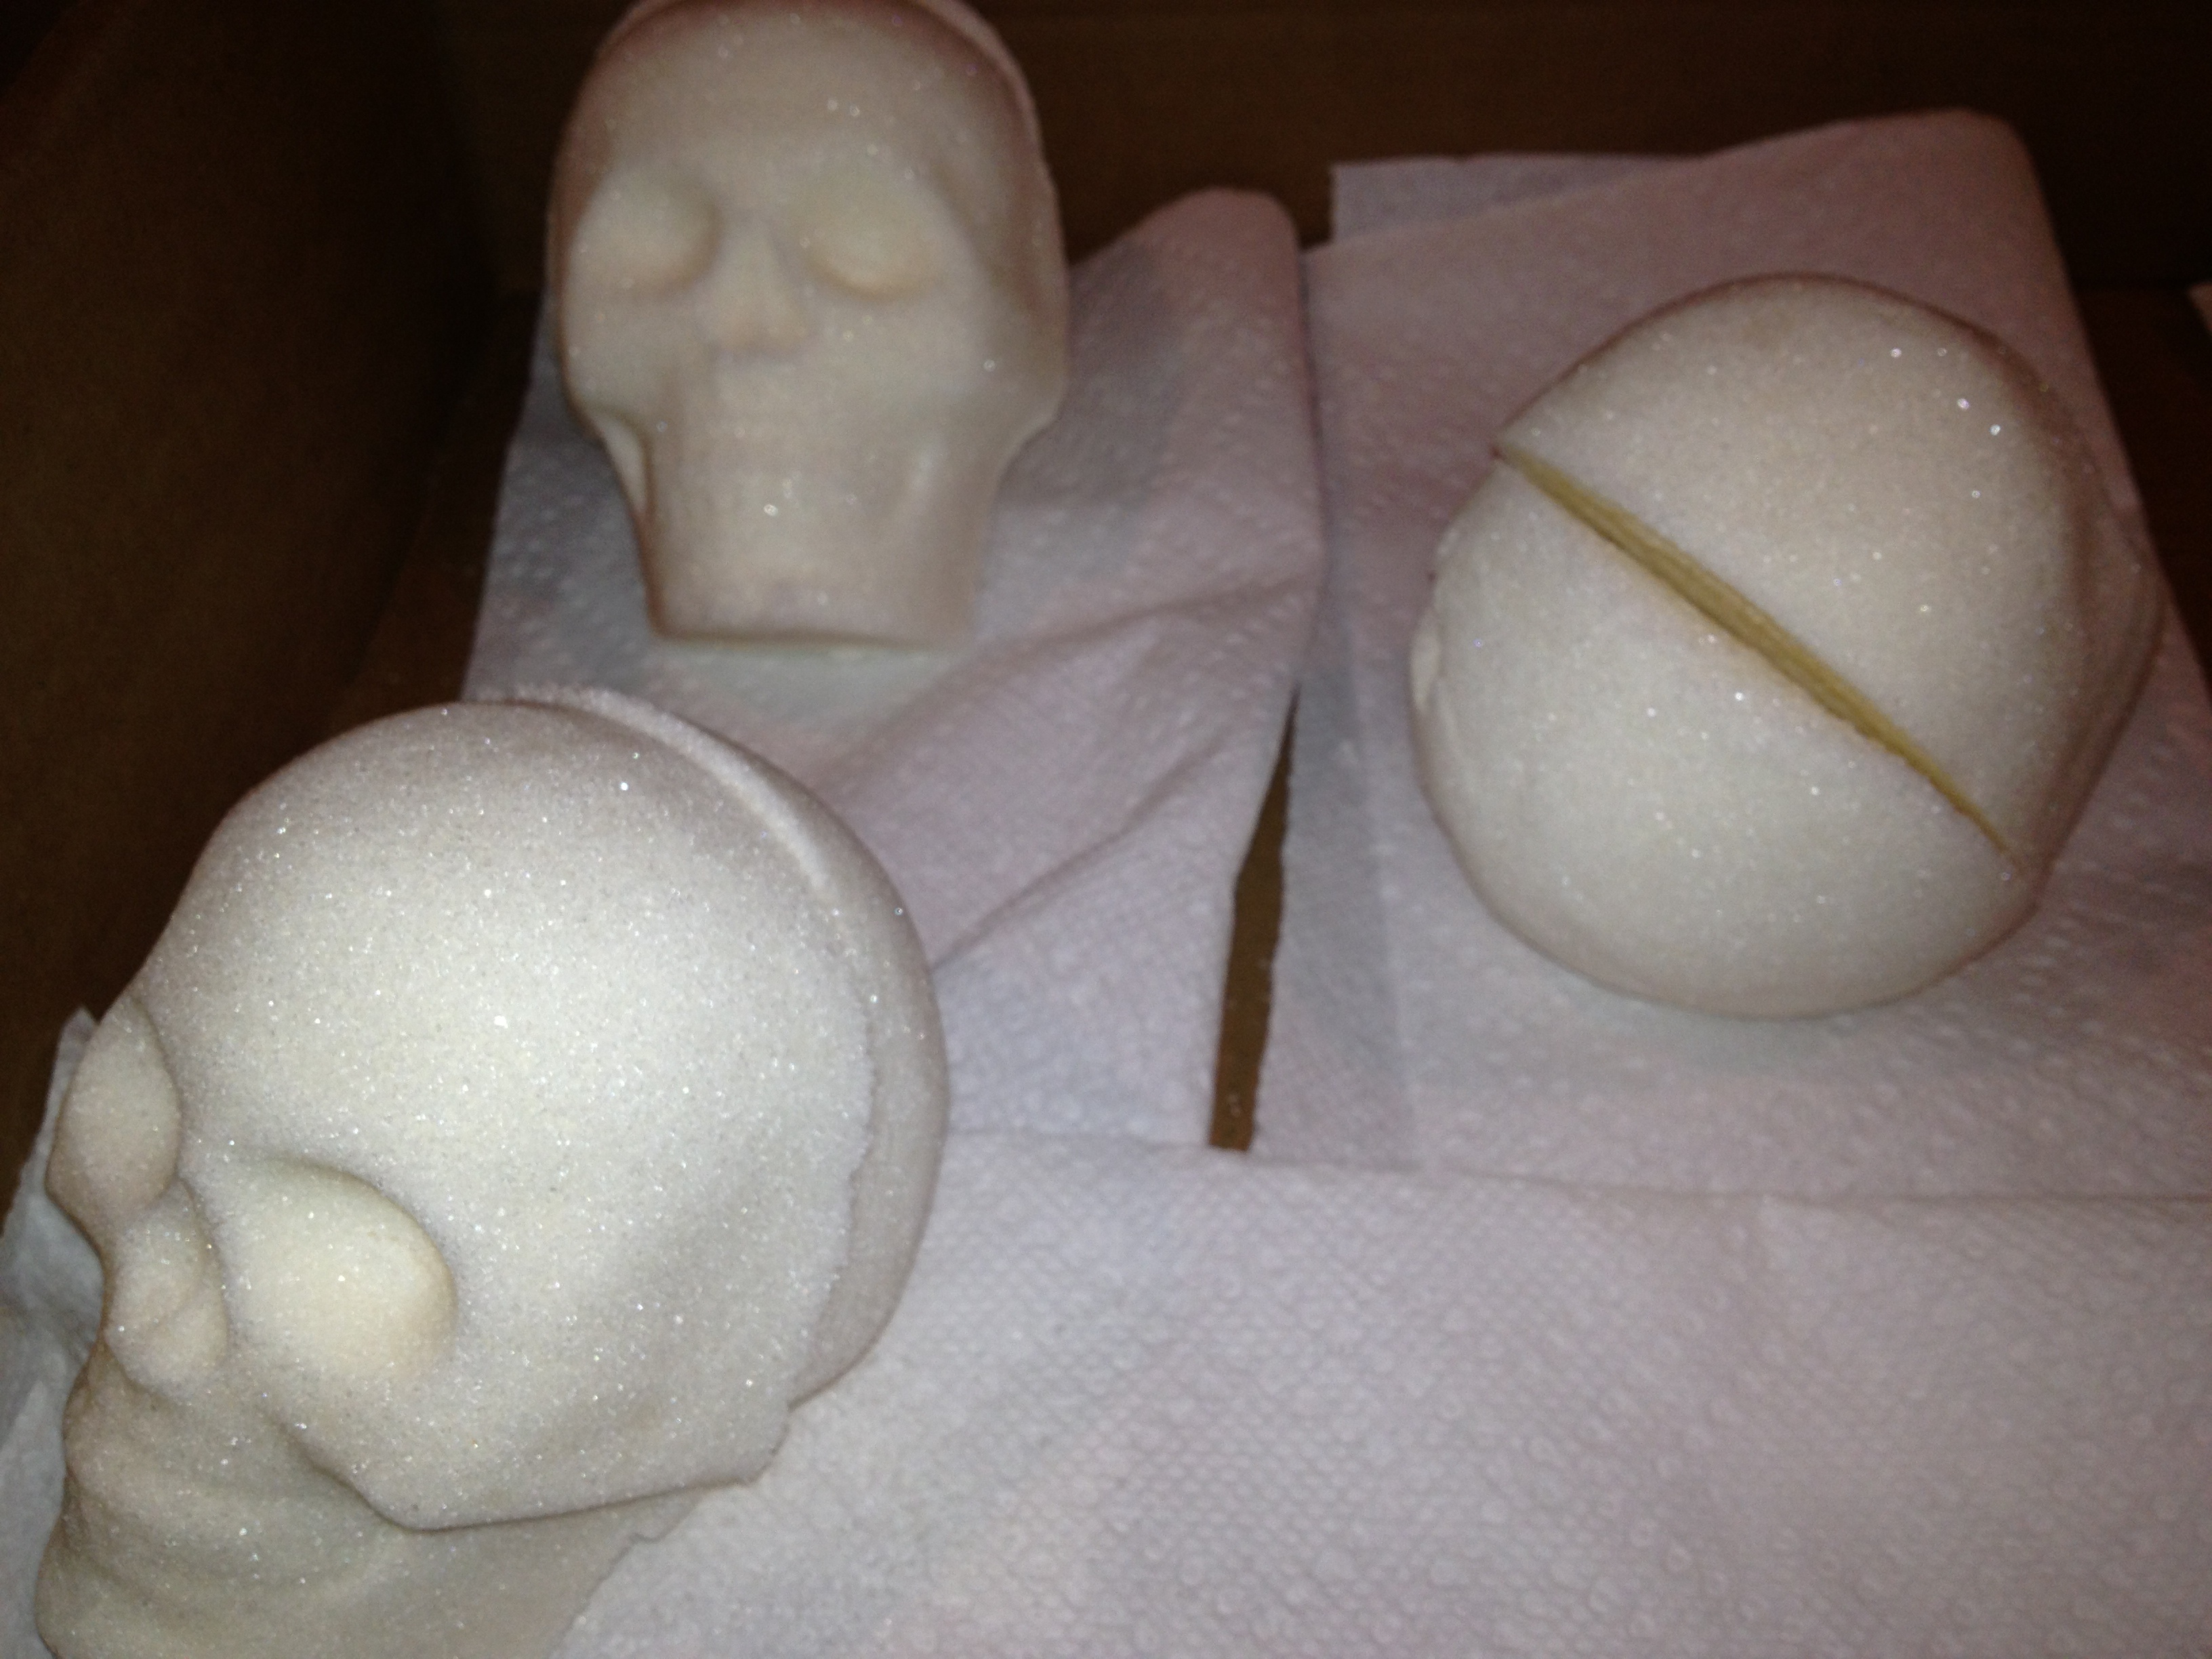
When we used to live in Orange County, California, my sister and I (and later Raj), would occasionally make the trek up to Olvera Street, the oldest part of downtown Los Angeles, via the train. It was an annual trip at the end of September that signaled the beginning of Halloween decorating season and an excuse to buy Day of the Dead items. If you’ve never been to Olvera Street, you need to go. It makes a great day trip to eat authentic Mexican food and to stroll around cool and hip shops full of Day of the Dead figurines, sugar skulls, and lots more. A few years back, I tried to find a local shop or bakery in Virginia that sold sugar skulls and/or Pan de Muerto (Day of the Dead bread), but with no such luck, I’ve had to create my own.
Making your own sugar skulls is really easy, but it does take time and LOTS of granulated sugar. I only made four large skulls and two smalls ones and used 5 pounds of granulated sugar for the skulls and 2 pounds of powdered sugar for the Royal Icing, but your hard work will pay off AND they last for years!
Sugar Skulls
Ingredients
5 pounds granulated sugar
1/4 cup meringue powder (a must; it helps the sugar stick together)
3 tablespoons of water
Directions
Mix all of the ingredients into a large bowl using your hands until all of the sugar is moistened. It should feel like wet sand.
Pack the plastic sugar skull molds (I purchased a small one at Sur la Table and a large one online) firmly with sugar, using a straight edge to scrape the back of the mold flat–I used a piece of cardboard for this.
Tip sugar out of mold and place on a flat surface to dry overnight.
Royal Icing
After the sugar skulls have been allowed to dry at least overnight, prepare Royal Icing recipe to piece the two halves of the skulls together and to decorate them.
Ingredients
2 pound bag of powdered sugar (7 cups)
1/2 cup meringue powder
2/3 cup water
Directions
Mix 2/3 cup water, 1/2 cup meringue powder and 2 pounds of powdered sugar with an electric mixer until icing peaks (about 9 minutes).
Mix icing with food coloring.
I use Ziploc bags with tips for decorating.
Making Your Skulls
My molds are made of two pieces, a face and the back of the skull. With the plain white Royal Frosting, add a small amount to each half and place together, wiping away any excess that comes out of the seams.
Decorate your skulls using sequins foil paper (I ordered this online as well)
The foil that I used to fill in the eyes and to cover up mistakes I made when decorating.
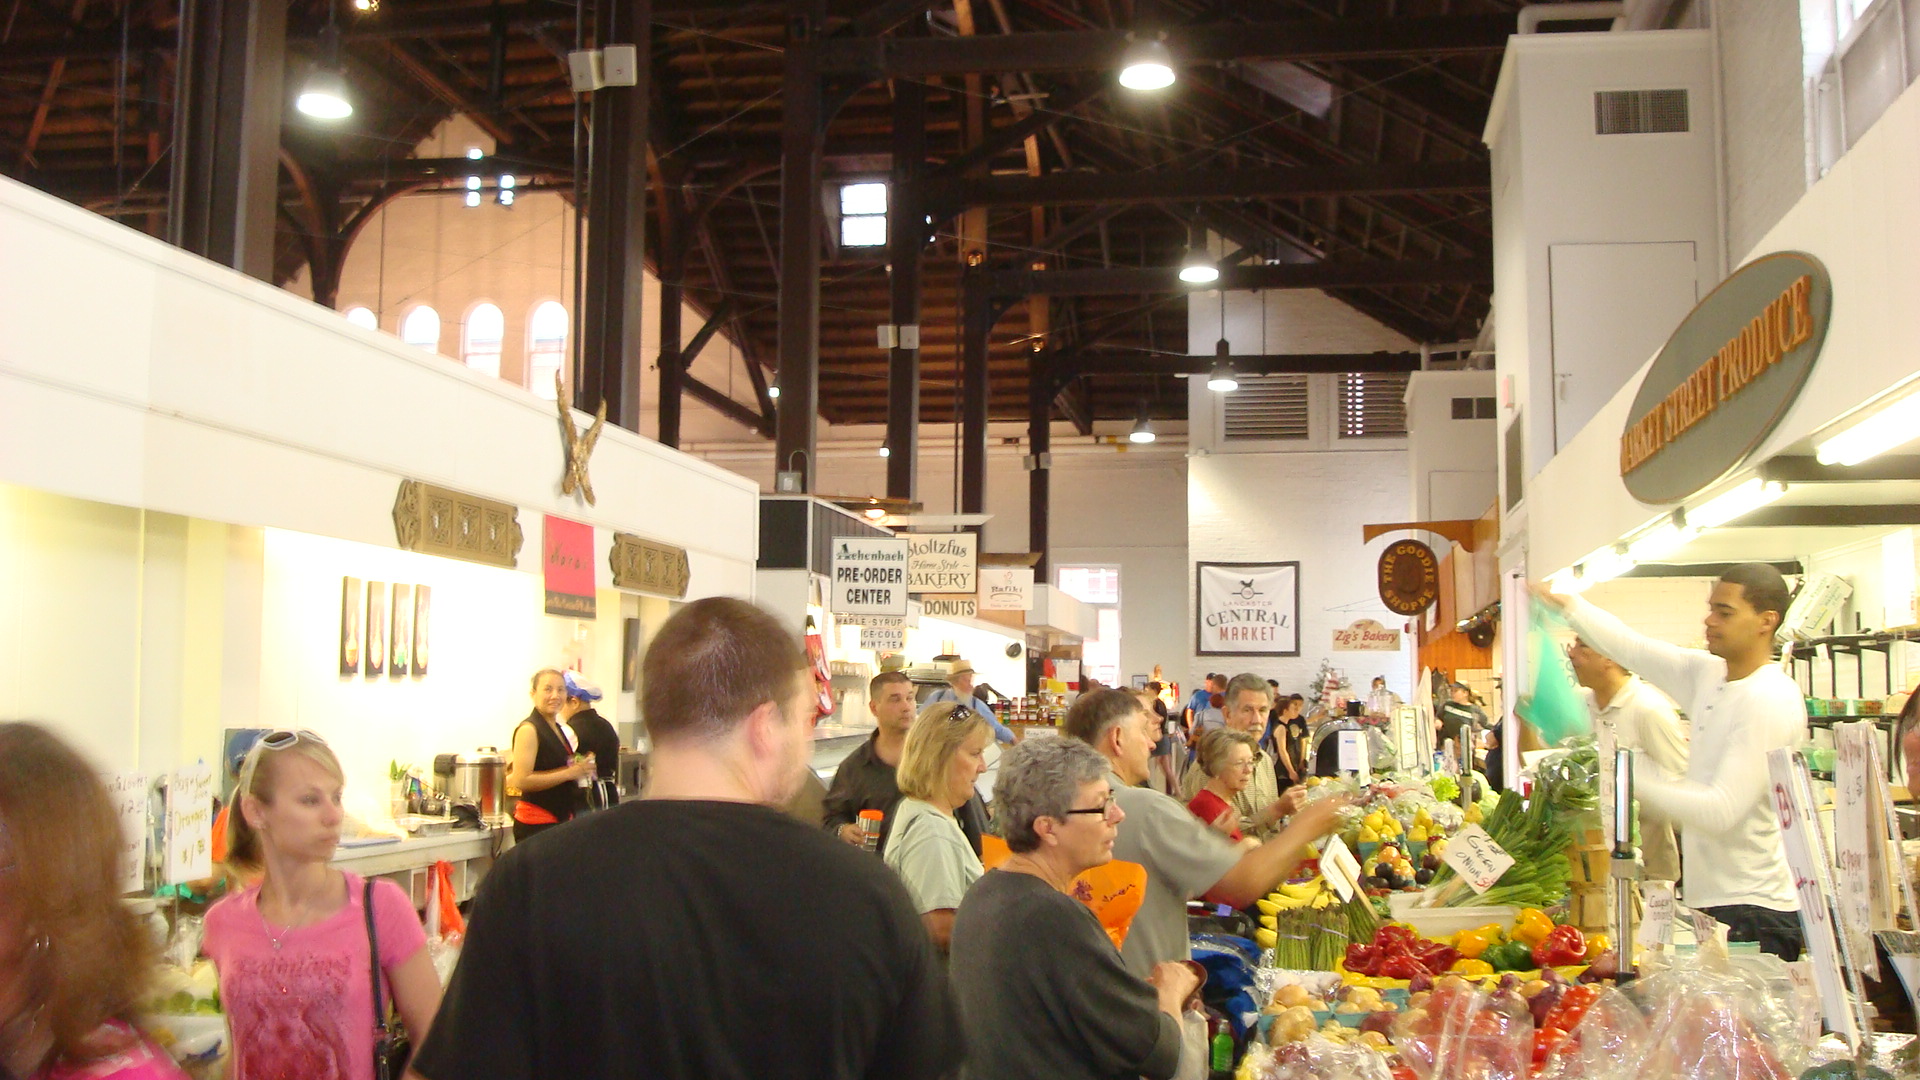
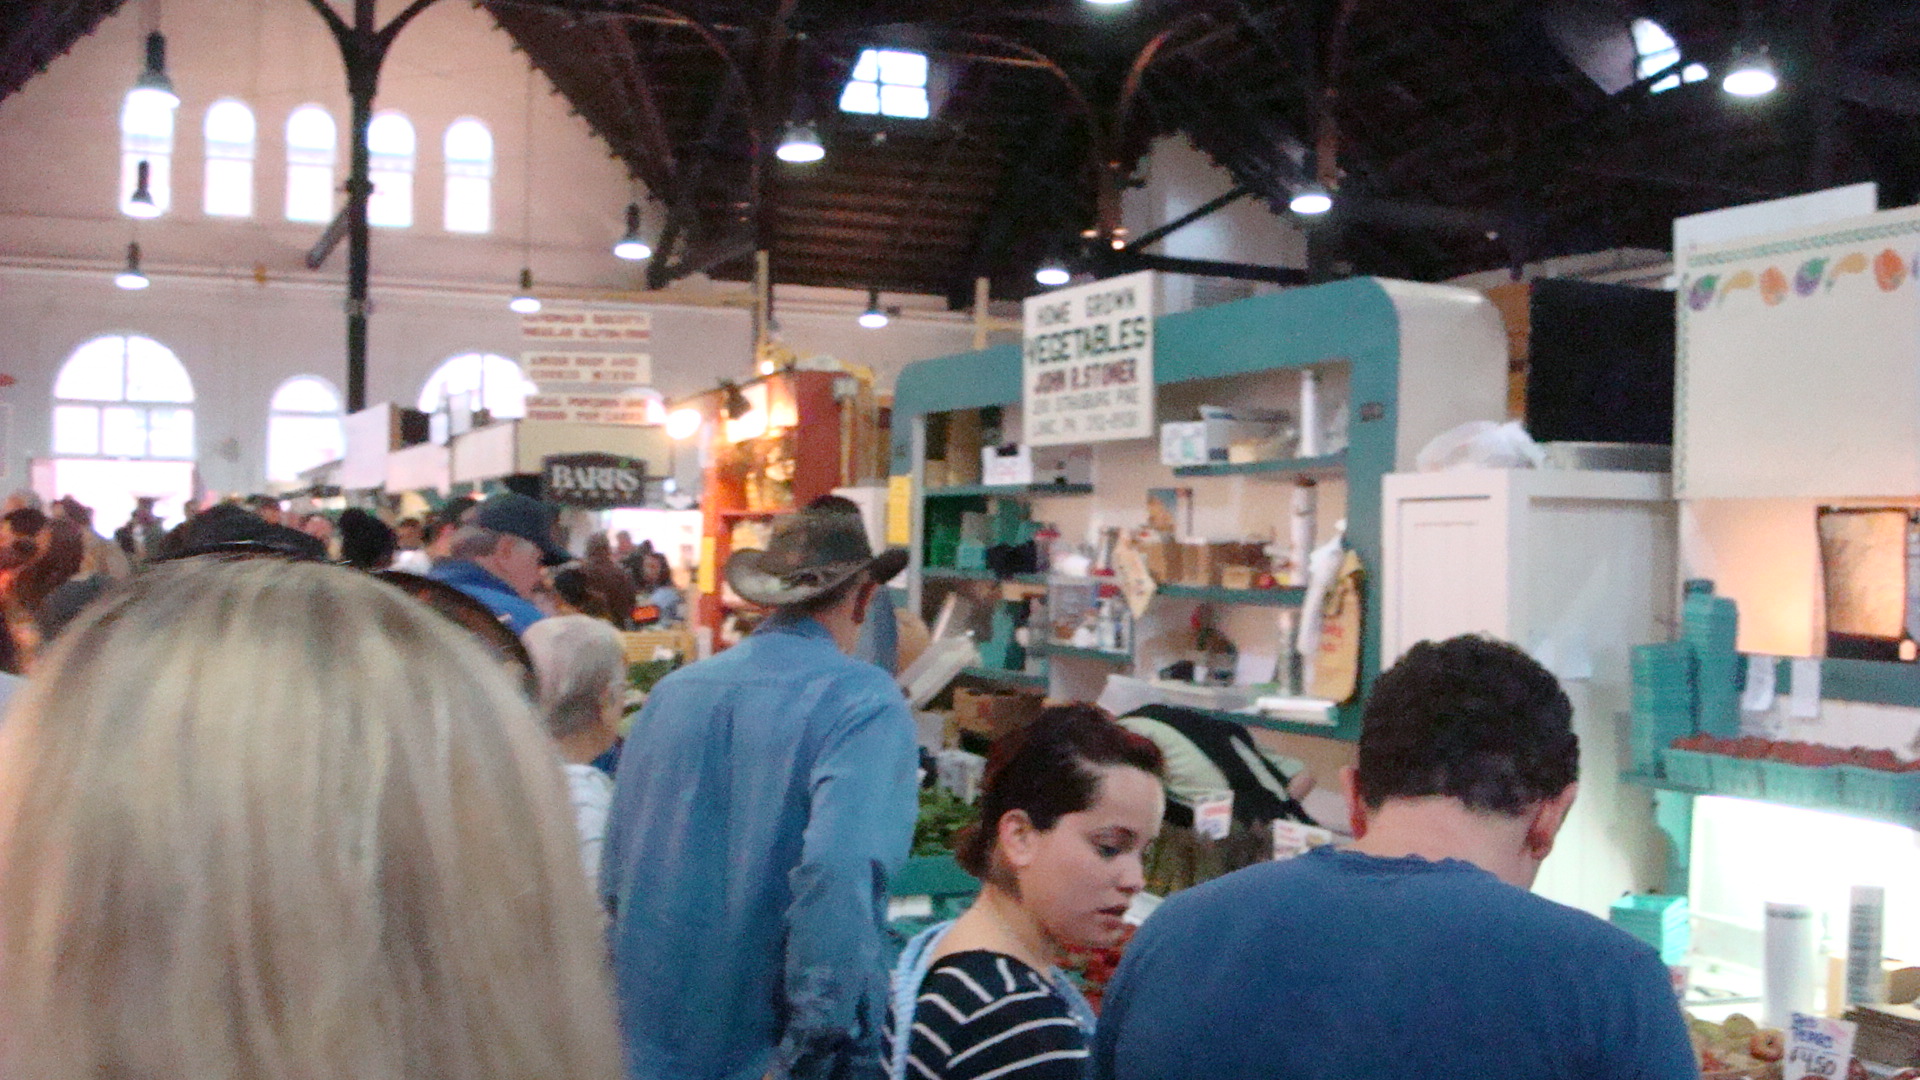
I love farmer’s markets and Raj and I frequent Old Town’s very own regularly on Saturday mornings to buy produce, flowers, and freshly baked bread. [In case you didn’t know, Old Town’s market is thought to be one of the nation’s oldest continually operating farmer’s markets and George Washington sent his produce from Mount Vernon (just down the road) to be sold here.] Anyway, we were searching for a day trip to take and I came across this CNN Travel article, Ten of the World’s Best Fresh Markets. Considering the article’s glowing recommendation and pairing it with my desire to shop for Amish jams and jellies (and perhaps a quilt–Lancaster is the heart of Amish country), it sounded like a perfect day!
Lancaster’s Central Market is located in the downtown area of Lancaster, Pennsylvania. It’s nice, but in no way, shape, or form does it belong on a list of the ‘Ten Best’ in the WORLD (let alone the country). It’s relatively small (think Eastern Market in DC), indoors, and not particularly Amish (as I mistakenly presumed). There were a couple Mennonite and Amish (not sure which and I’m no expert) merchants selling their wares, a couple of flower vendors, a fair sampling of beautiful farm raised vegetables, herbs, fruit…, a few bakeries, a small food court where sandwiches and such were prepared, along with the requisite tchotchke profferers. We bought a couple of loaves of bread from a cute couple and three jars “Amish” jam, which turns out are ‘made in the Amish style,’ meaning we were hoodwinked.
After a short jaunt through the market, I wanted to get out of the city and onto the country roads where I envisioned bucolic farms and out-of-the-way stands selling unique, one of a kind items along with jams and jellies packaged by unjaded Amish women and girls and made in’ authentic’ ways (without corn syrup–the first ingredient on one of the jams we purchased). We headed towards the towns of Bird in Hand and Intercourse, but my fantasy was left unfulfilled. We stopped at a few ‘Amish’ markets that were less than noteworthy and ended up buying nothing. Nada. Zilch.
This was an enjoyable day trip that I would highly recommend (preferably on a sunny day), but one needs to go with the understanding that this is a nice fresh market, not a mecca of amazing foodstuffs. Your local farmer’s market is probably better than this one, and if you’re in the mood for authentic Amish wares, you’re better off driving to Philadelphia’s Reading Terminal Market, where a much more impressive array of items are readily available.
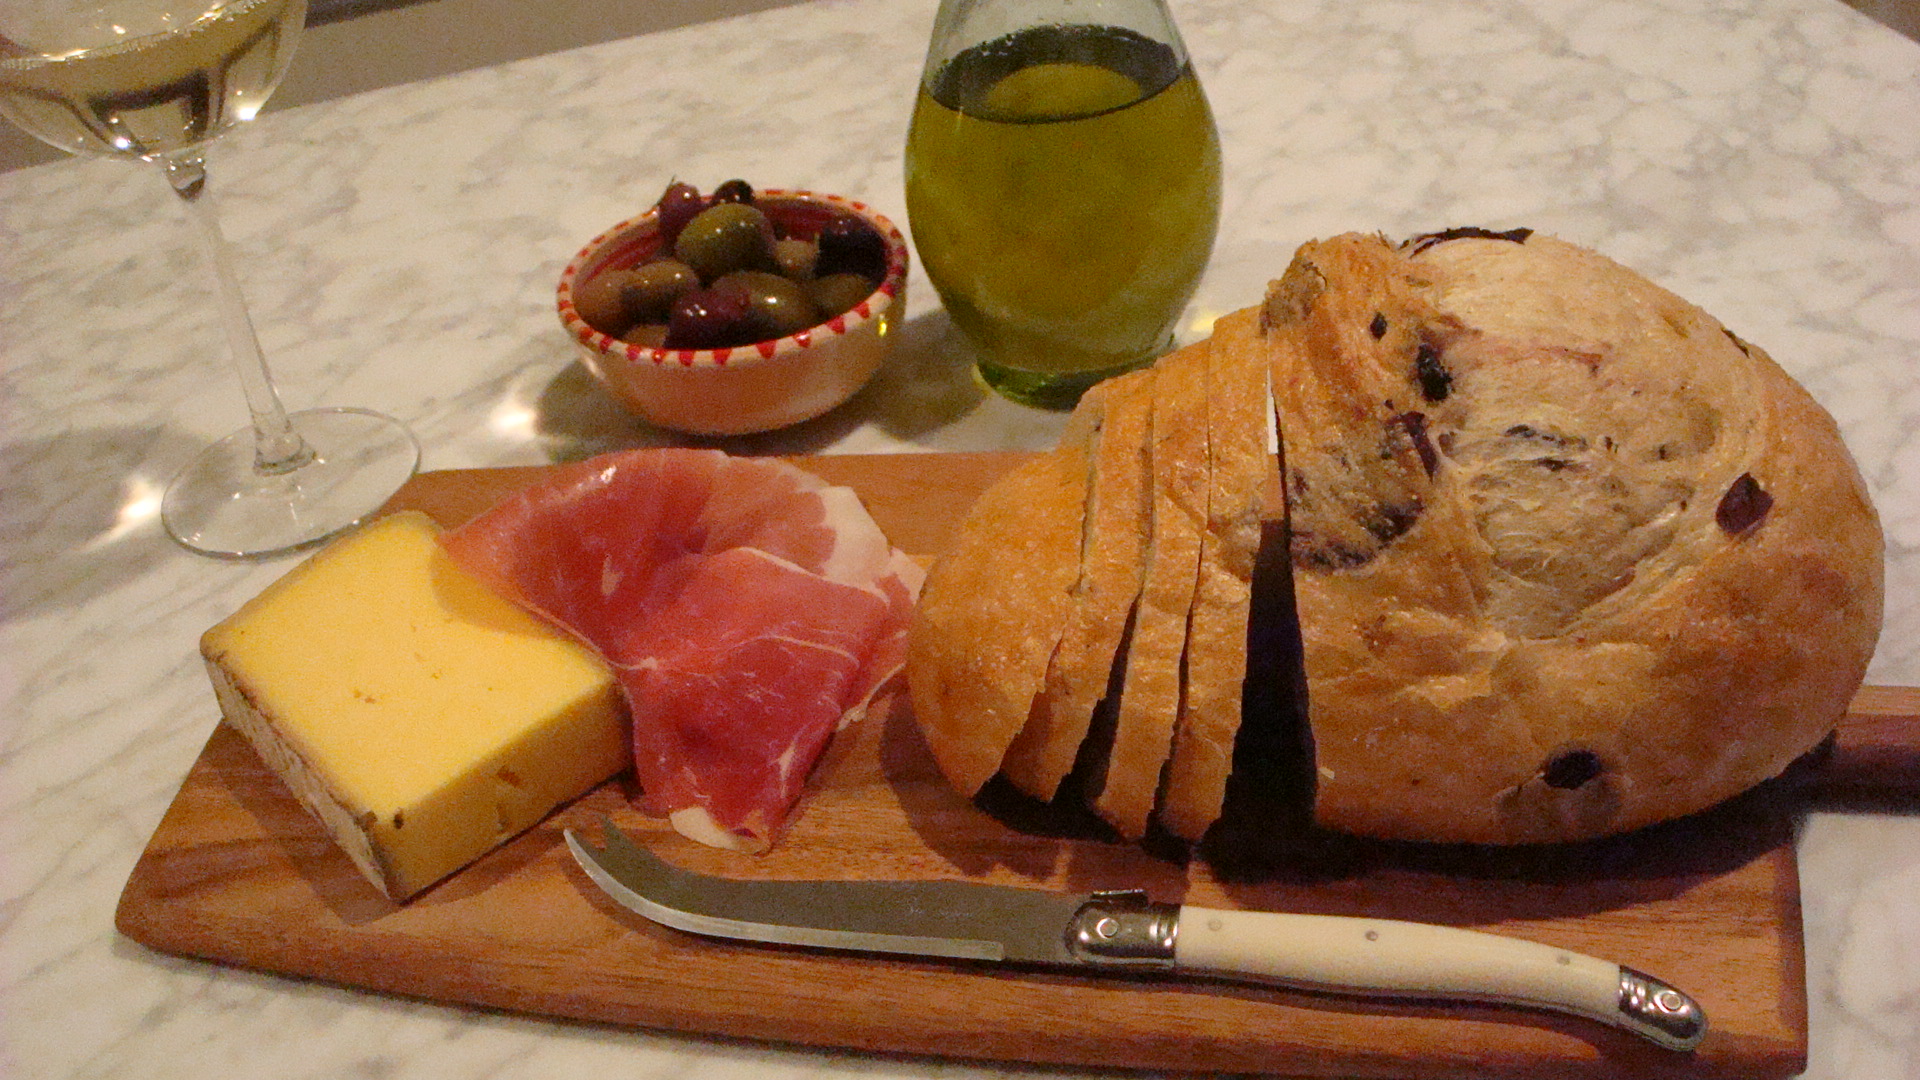
After a long drive home, we settled in for the night with a few items we picked up along the way.
I’ve been a lazy, slothful blogger again despite already having this post ready to go since Valentine’s Day. I’m not a big mousse fan, but these little, easy beauties provided me with an excuse to pull out my utterly useless, yet adorable Le Creuset mini cocottes. It’s amazing what little you can do with them, so any opportunity is cause for celebration. This can be made ahead a few days in advance and then dressed up just before serving. I served mine with a dollop od whipped cream with a sprinkling of cocoa powder and fresh strawberries.
Classic Chocolate Mousse
6 Servings
3/4 cup chilled heavy cream, divided
4 large egg yolks
1/4 cup espresso, room temperature
1/8 tsp. kosher salt
3 Tbsp. sugar, divided
6 oz. semisweet chocolate (61-72% cacao), chopped
2 large egg whites
Beat 1/2 cup cream in a medium bowl until stiff peaks form; cover and chill.
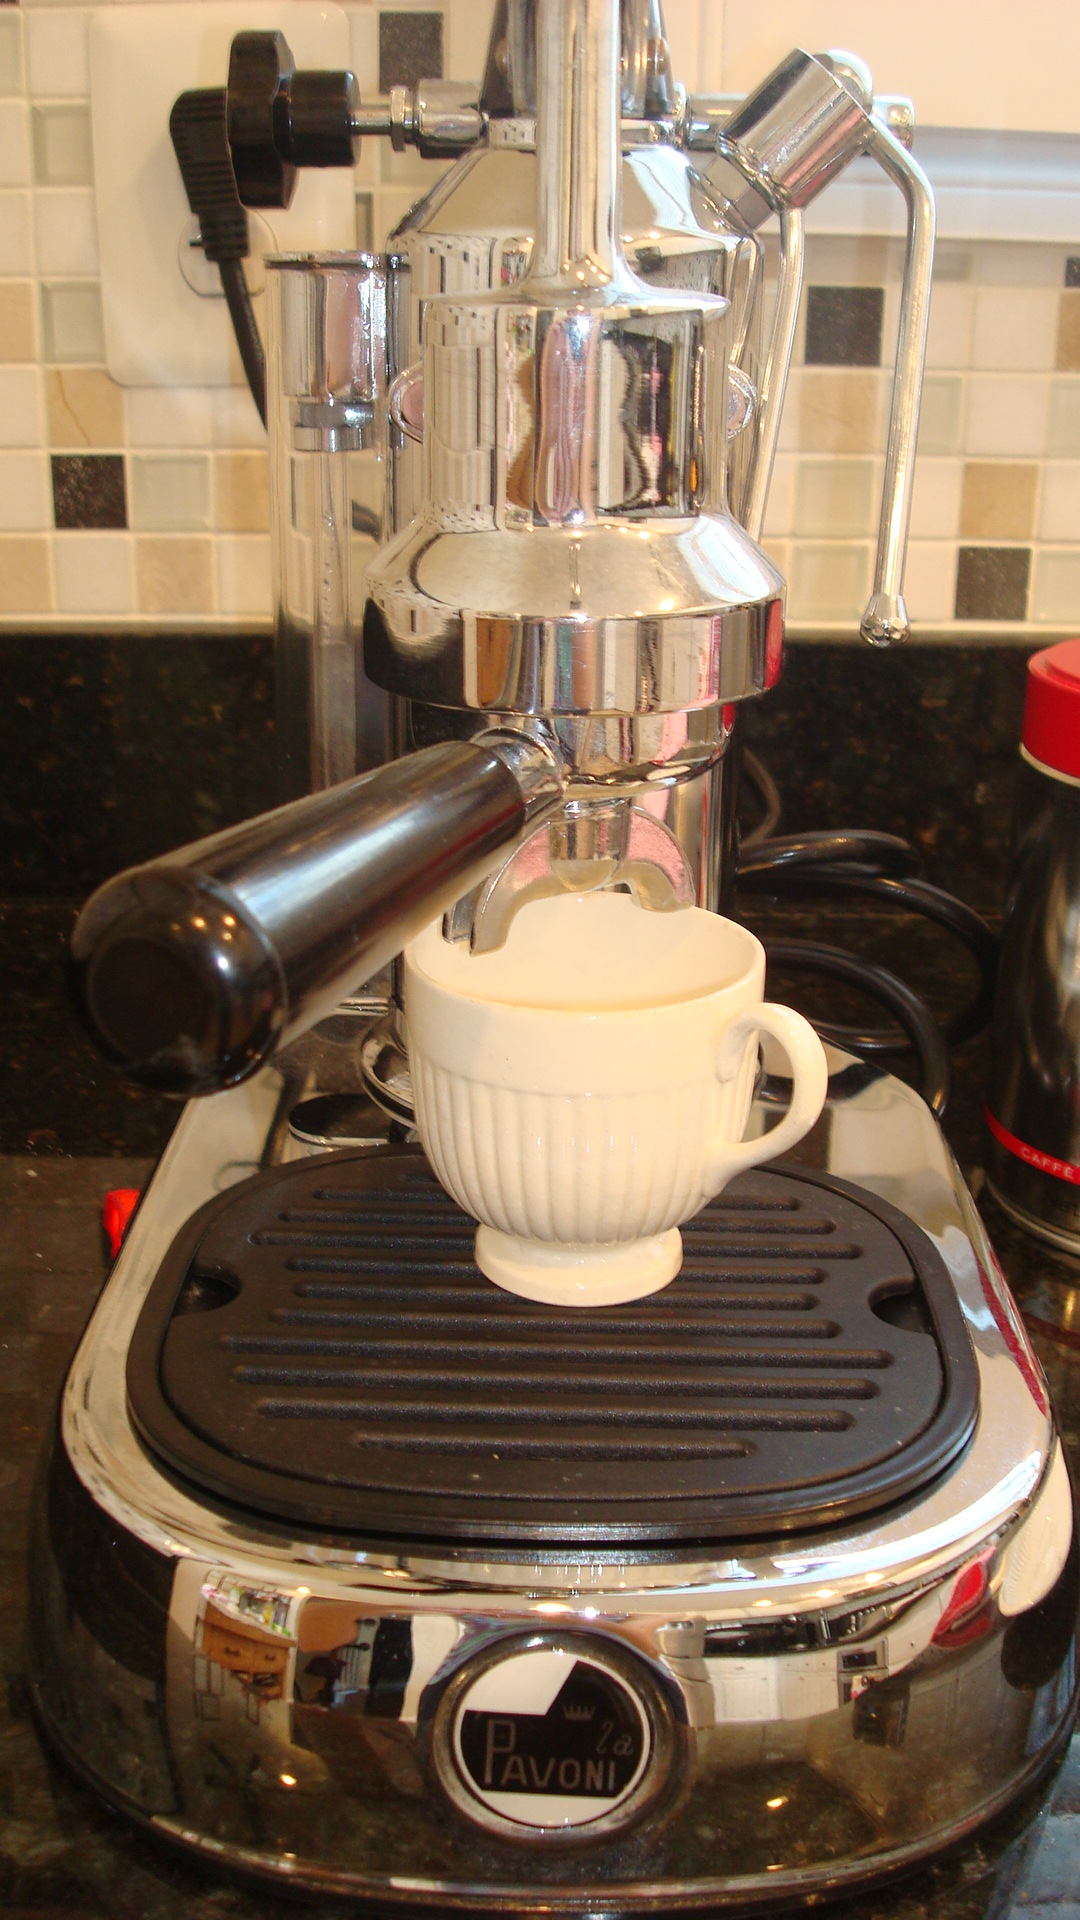
This recipe calls for yet another excuse to pull out rarely used equipment such as the espresso machine.
Combine egg yolks, espresso, salt, and 2 Tbsp. sugar in a large metal bowl. Set over a saucepan of gently simmering water (do not allow bowl to touch water). Cook, whisking constantly, until mixture is lighter in color and almost doubled in volume and an instant-read thermometer inserted into the mixture registers 160 degrees, about 1 minute.
Remove bowl from pan. Add chocolate; whisk until melted and smooth. Let stand, whisking occasionally, until room temperature.
Using an electric mixer, beat egg whites in another medium bowl on medium speed until foamy. With mixer running, gradually beat in remaining 1 Tbsp. sugar. Increase speed to high and beat until firm peaks form.
Fold egg whites into chocolate in 2 additions; folded whipped cream into mixture just to blend.
Divide mousse among ramekins or mini cocottes. Chill until firm, at least 2 hours. Do Ahead: Mousse can be made a few days ahead; cover and keep chilled. Let stand at room temperature for 10 minutes before serving.
The serving size of these is more like two servings, not one as it would be in a ramekin.
Before serving, whisk remaining 1/4 cup cream in a small bowl until soft peaks form; dollop over mousse.
A friend of ours just recently purchased a new home and I took it upon myself to be kind and neighborly and to make something sweet from scratch…the only problem? She wasn’t home and wouldn’t be for hours. Raj couldn’t bear the thought to leave these muffins out in the cold on her porch…SO? We ate them. ALL. And have no regrets!
We’re not as rude as this sounds, but they were WARM and smelled delicious and why leave something out in the cold when WE could enjoy them? Plus, they’re easy enough to bake again some other day when I’m feeling especially kind and charitable (not often). The fact that they have currants in them and Raj still loved them says a lot. As you know, currants are fancy for raisins, which I’m not especially fond of either, but in this recipe, they add the right amount of layer on top of the carrots, orange zest and spices.
Carrot Muffins with Brown Butter and Currants
(makes 12 muffins)
1 cup (2 sticks) unsalted butter
1/2 cup dried currants
1/2 cup water
1 3/4 cup all-purpose flour
2 tsp baking powder
3/4 ground cinnamon
3/4 tsp ground ginger
4 large eggs at room temperature
1 cup granulated sugar
1 1/2 tsp grated orange zest
2 tsp pure vanilla extract
3/4 tsp kosher salt
1 cup (about 2 medium) peeled, grated carrots
Turbinado sugar for sprinkling
Preheat oven to 375 degrees. Line muffin pan with paper liners and set aside.
To make brown butter, place butter in a small saucepan over medium-high heat and cook until the butter solids are browned and smell toasty, stirring constantly, about 3 minutes or a little longer. Watch carefully so the butter does not burn. As the butter browns, the foam rises to the top and dark brown particles stick to the bottom of the pan. As soon as the butter is dark golden brown, pour it into a small bowl and set aside to cool to room temperature.
Combine the currants with the water in a small saucepan and bring to a simmer over medium-high heat. Simmer until the currants are plump, about 10 minutes. Remove the currants from the heat, drain, and transfer to a small bowl to cool to room temperature.
Into a bowl, sift the flour, baking powder, cinnamon, and ginger together twice, then set the dry ingredients aside.
In the bowl of an electric mixer, combine the eggs, sugar, orange zest, vanilla, and salt. Using the whisk attachment, whip on medium-high speed until thick and pale, about 3 minutes. The egg mixture should begin to “ribbon” but not hold the ribbon.
Remove the bowl from the mixer. Without stirring, place the carrots and currants on top of the egg mixture. Then pour the dry ingredients on top, and using a rubber spatula, gently fold everything together. Finally, fold in the browned butter, combining everything thoroughly and gently.
Scoop the muffins into paper-lined muffin cups, dividing it evenly, using about 1/3 cup, of batter per muffin.
Lightly sprinkle about 1/4 teaspoon of the turbinado sugar on top of each muffin. Bake until the muffins are cooked through and golden, about 18 minutes, rotating the pan once halfway through the baking time. A wooden skewer inserted into a muffin should come out with a few crumbs clinging but no batter.
Remove the pan rom the over and cool on a wire rack about 10 minutes before unmolding.
DO NOT LEAVE THESE MUFFINS UNATTENDED. Someone may decide to steal them. They are best enjoyed warm with a cup of afternoon coffee or tea.
Last year for Christmas we were in Cairo…this year Alexandria–not Egypt, but Virginia. As a result, last Christmas Eve, we promised to do next year’s Christmas BIG…well, not that big, but anything is bigger than last year. What a difference a year can make.
Check it out…I’m pretty pleased…but now I have more pressing things to do, like unpack our final shipment of furniture and such from Jordan that arrived yesterday.
Here are the steps:
1. I created a template from thin cardboard, fashioned after a picture of our house.
The bay window on the third floor in my attempt at perspective.
This picture is really just to show off my new mixer.
3. Roll out the dough; place template pieces over dough to cut out shapes; bake.
4. Here’s my favorite part. I smashed up butterscotch candy to melt into the windows so that they would light up.
butterscotch candiesPlace smashed candy into window and bake at 350 degrees, watching closely until melted.Perfectly melted window…and some more windows…
5. Assemble all of the pieces.
6. Assemble the house using royal icing as the glue. This step got a little dicey with no one to help hold the roof into place, resulting in a slight slope.
7. And the finished product…
Taken in full light……and in the dark, but with the flash you can barely tell there’s light behind the windows…
Side view of the Necco rooflineI cut out a square on the back of the house and placed a battery operate tea light like this one into the center to illuminate the stained butterscotch glass windows.


