Yogaopolis: Yoga Asana Cookies–Better Late Than Never


P1000658

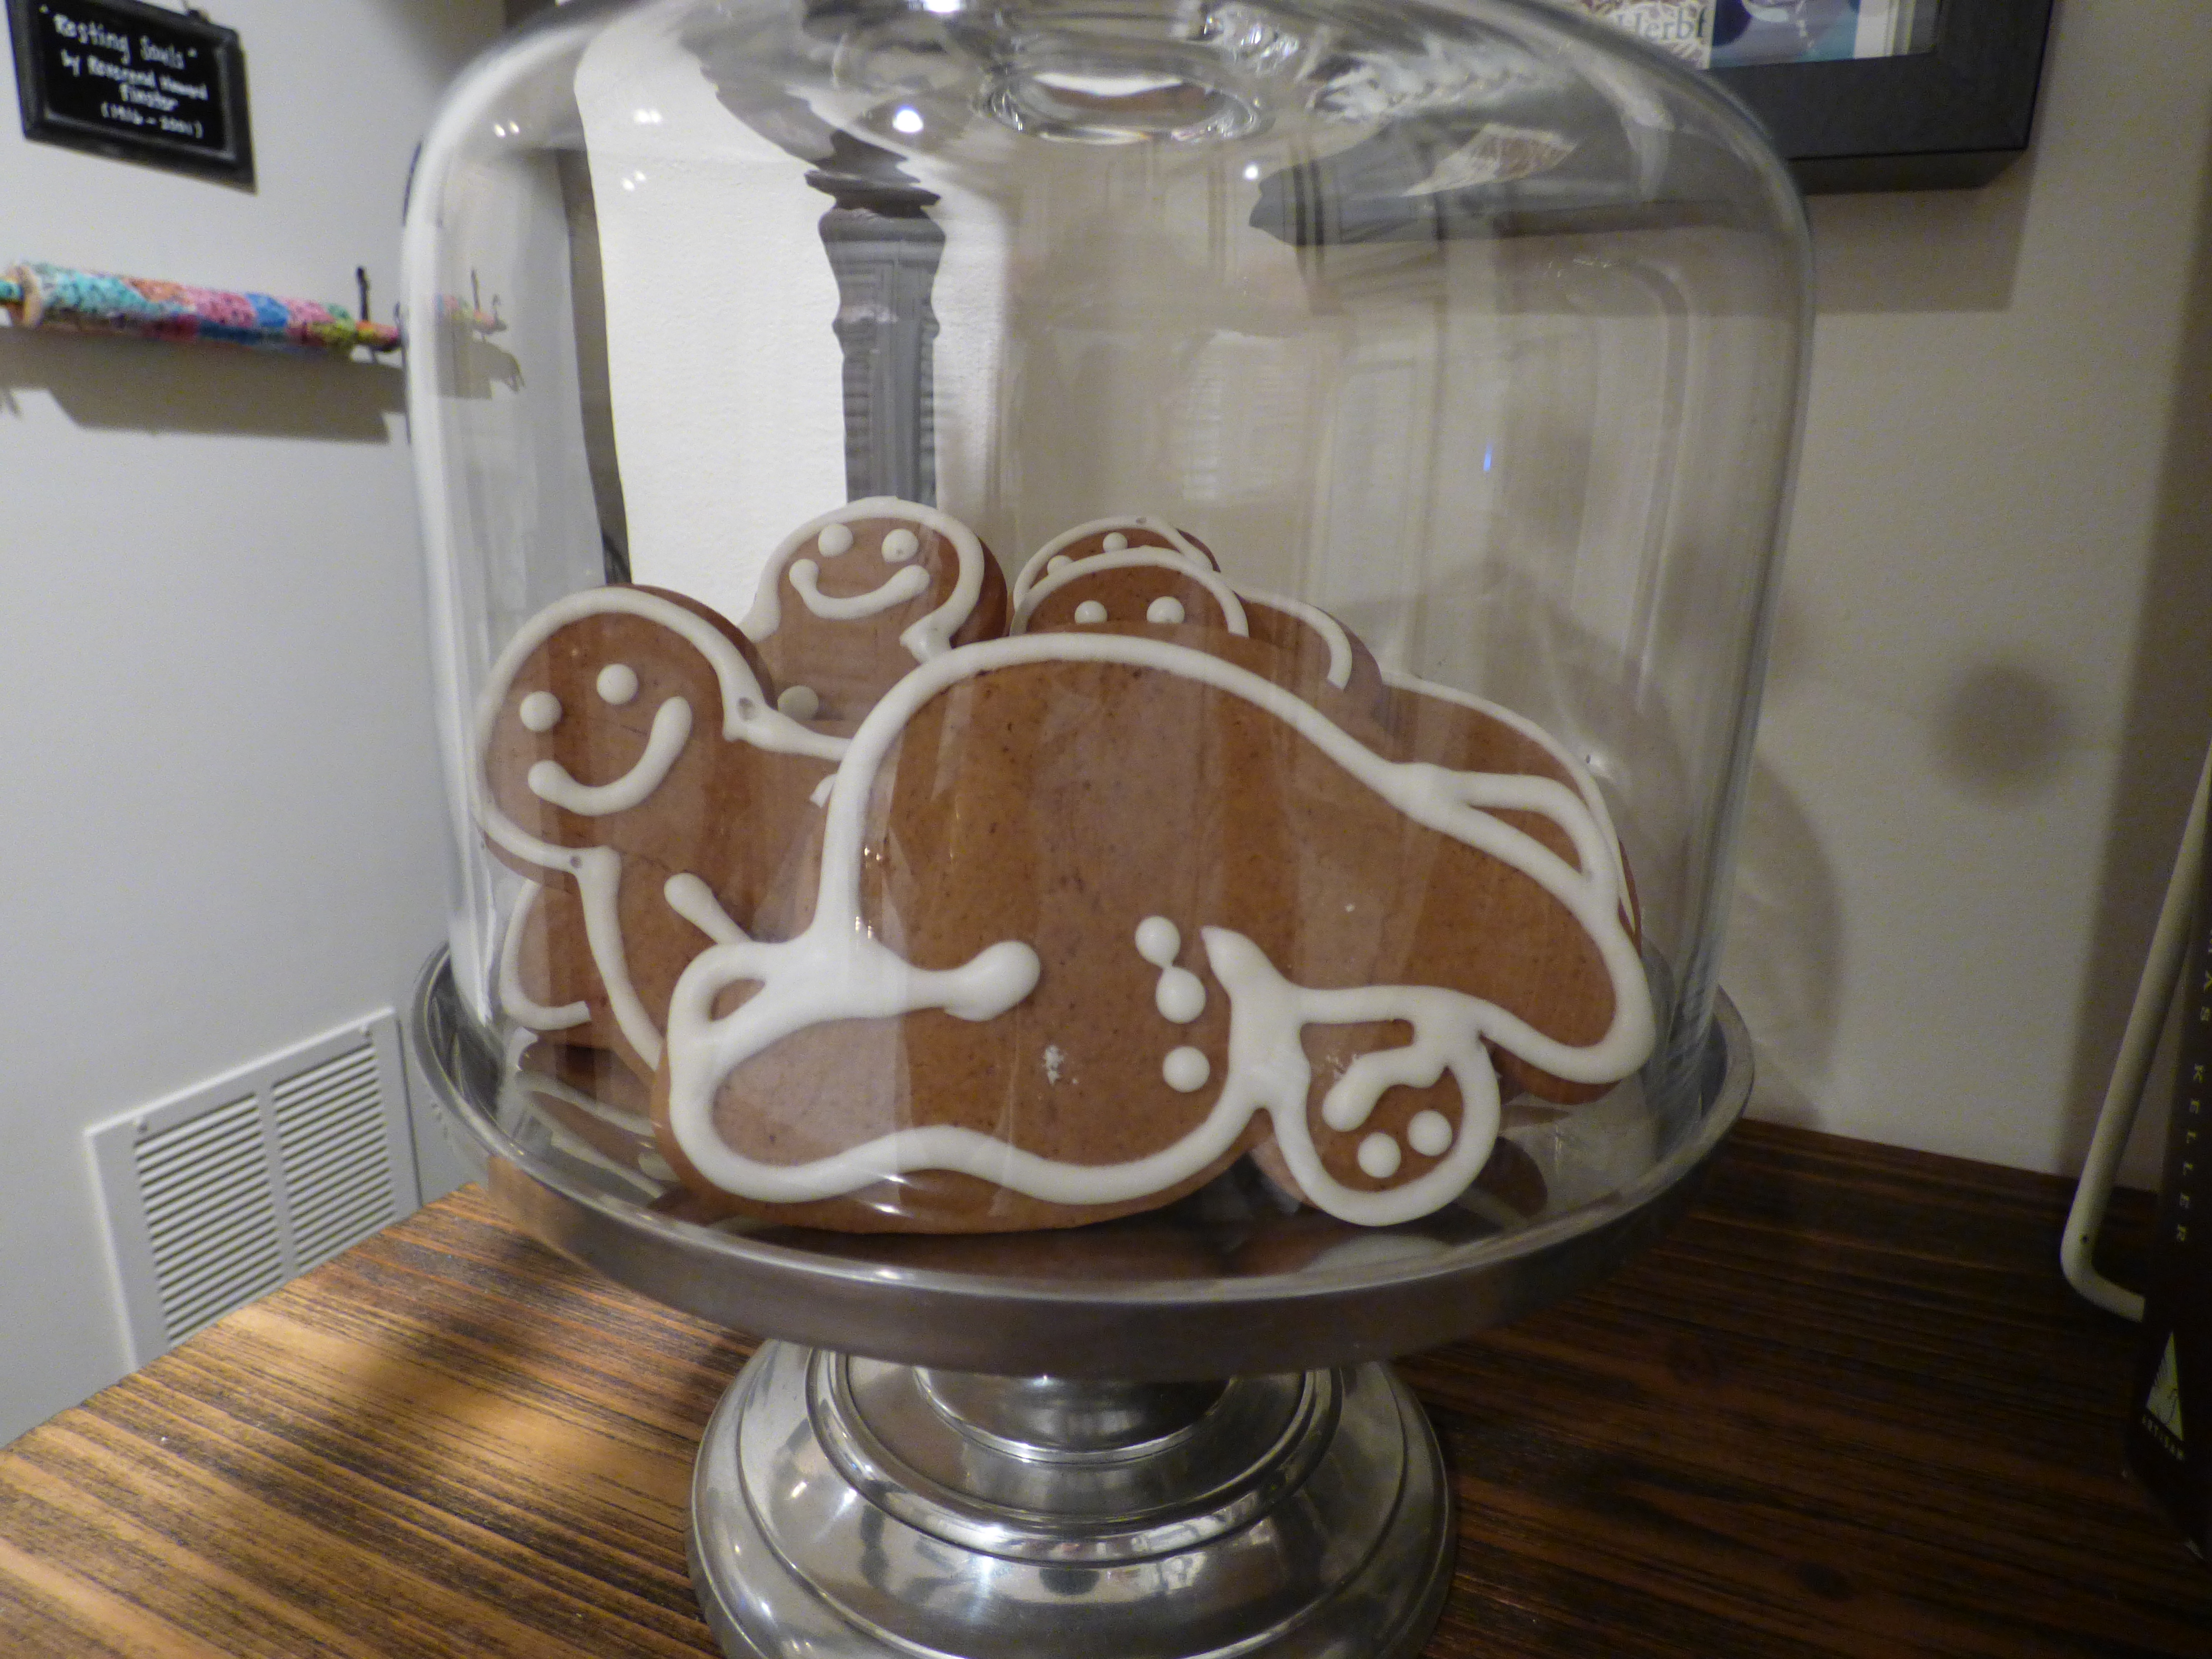
It’s been TOO long and I’ve made too many shareable delights to delay any longer. One of my favorites from December is my batch of yoga asana cookies. As adorable as they were for the Yuletide season, I think they’ll be even cuter for Valentine’s Day when I outline the gingerbread men in pink. See for yourself…

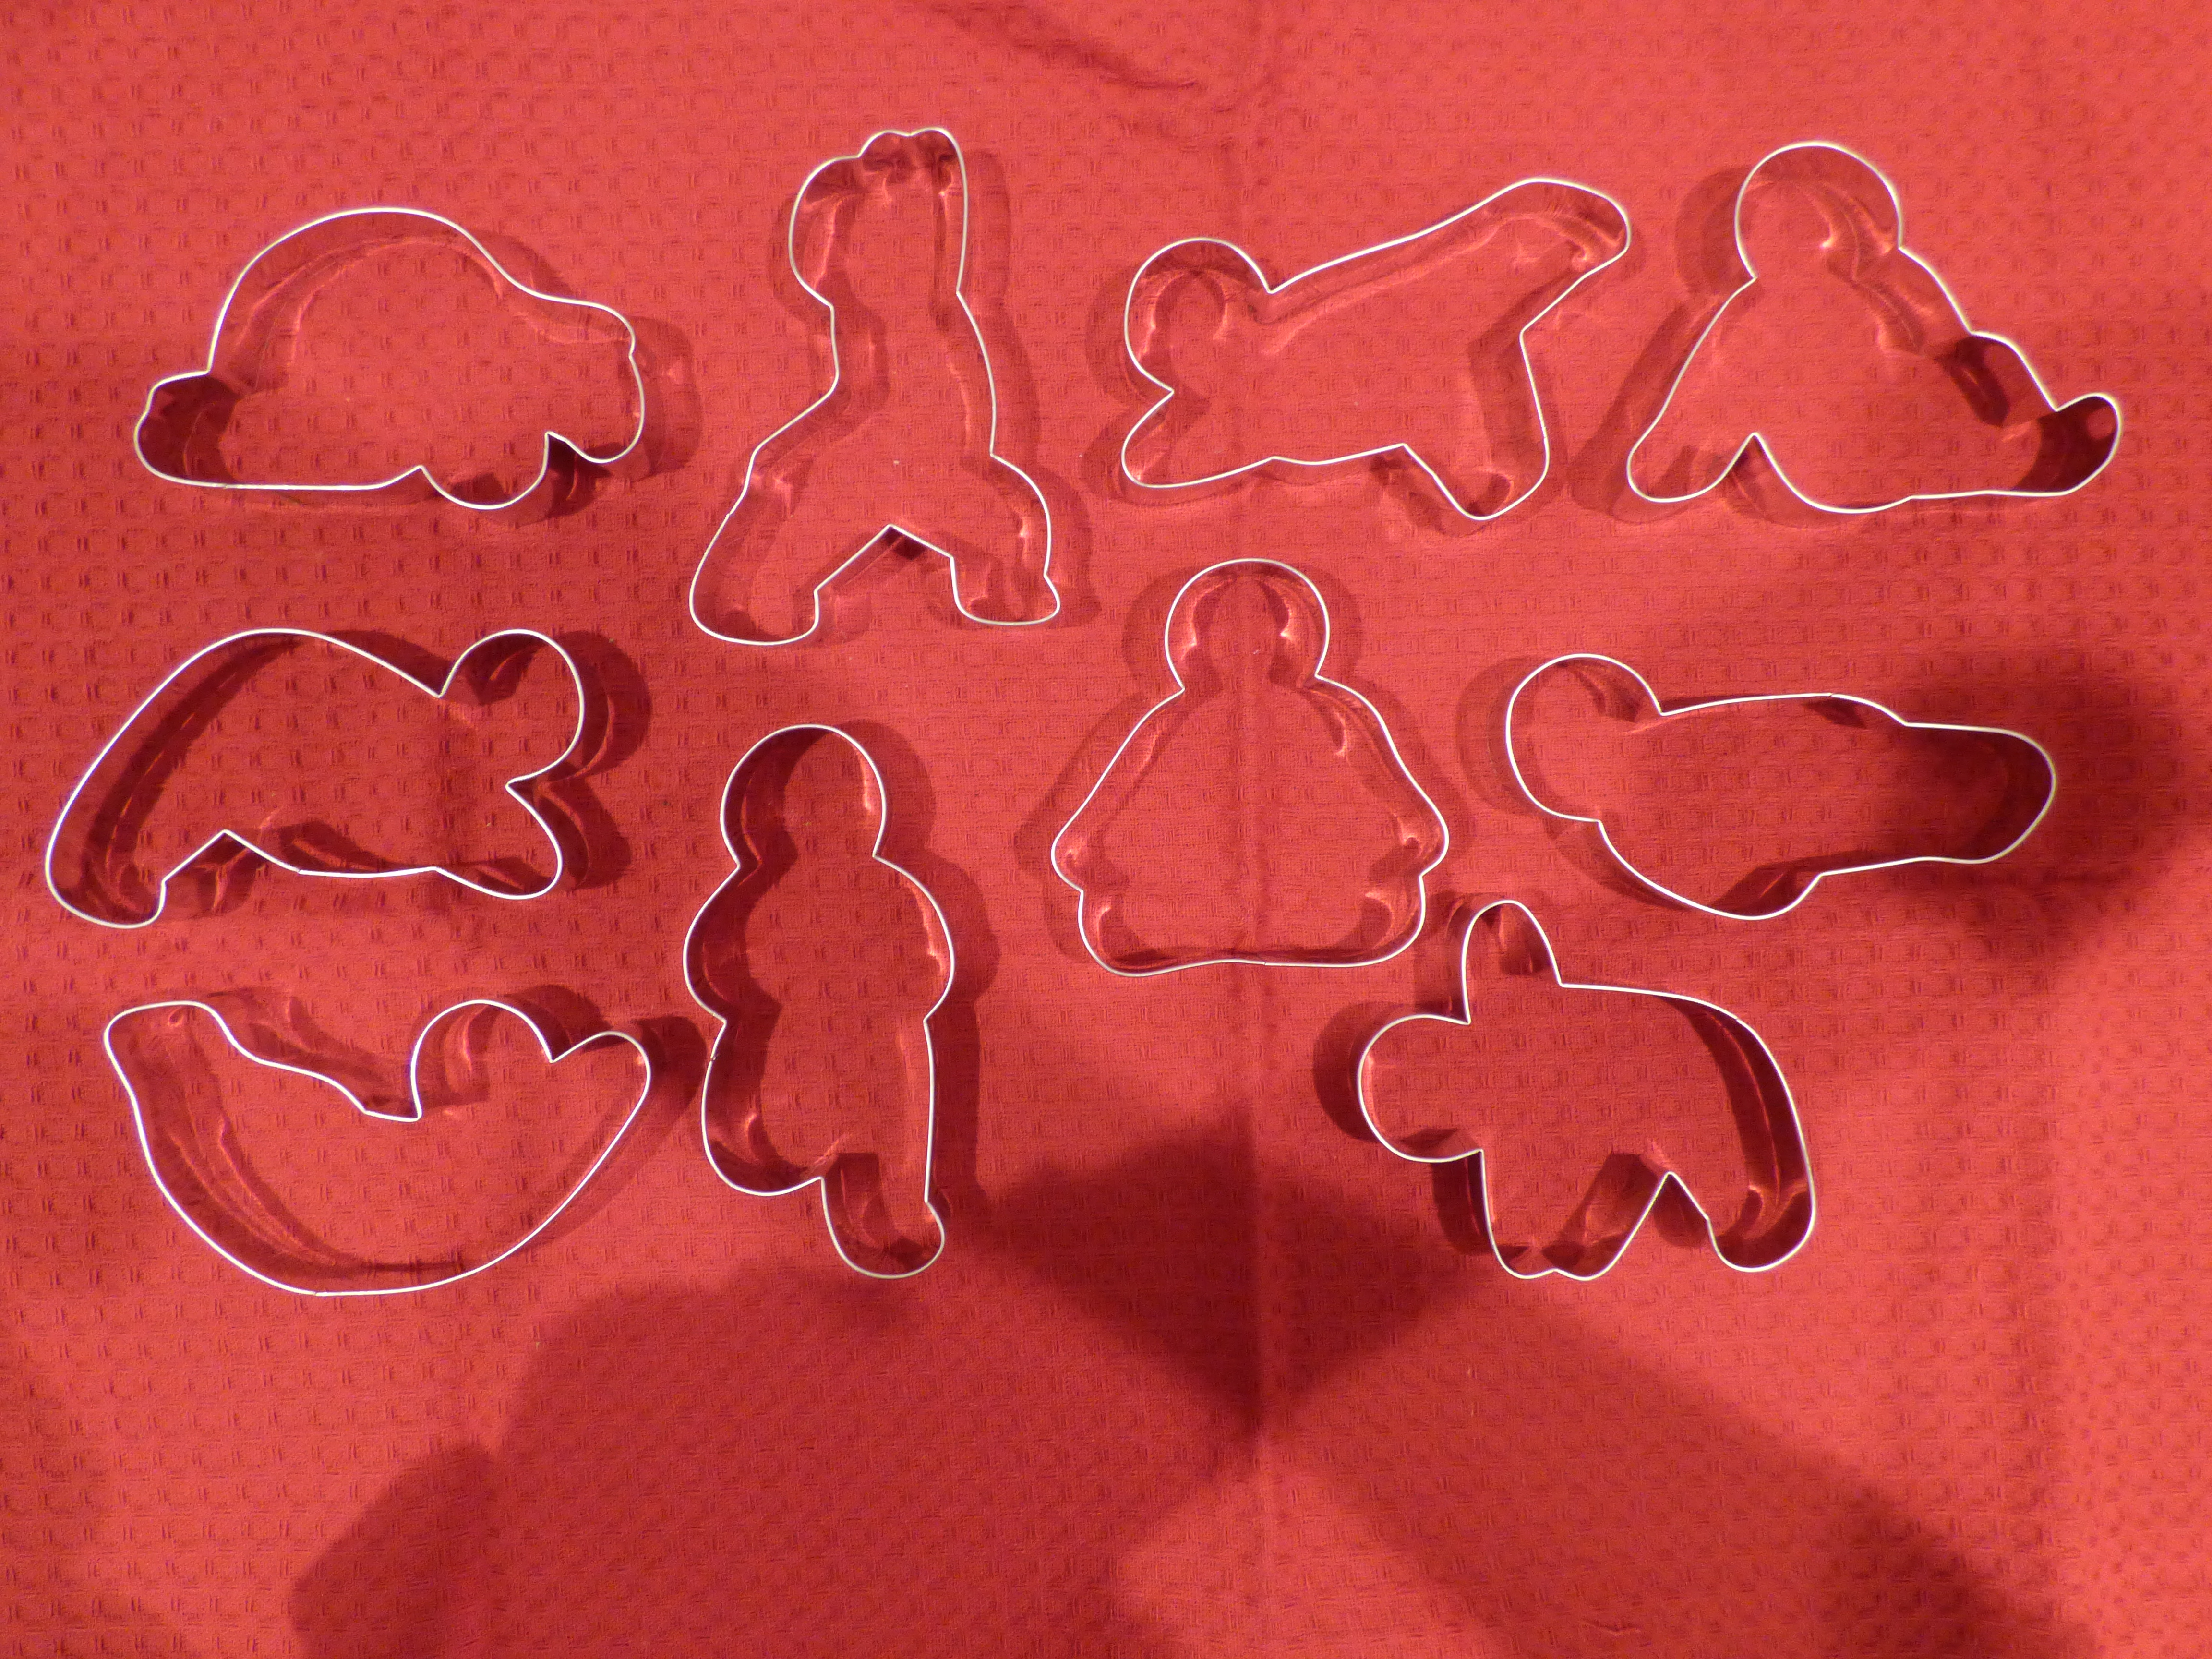
Firstly, here are the cookie cutters, available at Baked Ideas. I opted for the ten piece set, but you can buy them in sets of five.

P1000633

Here’s the progression of dough to naked gingerbread men…

P1000634

P1000639

…followed by piping of royal icing…

P1000642

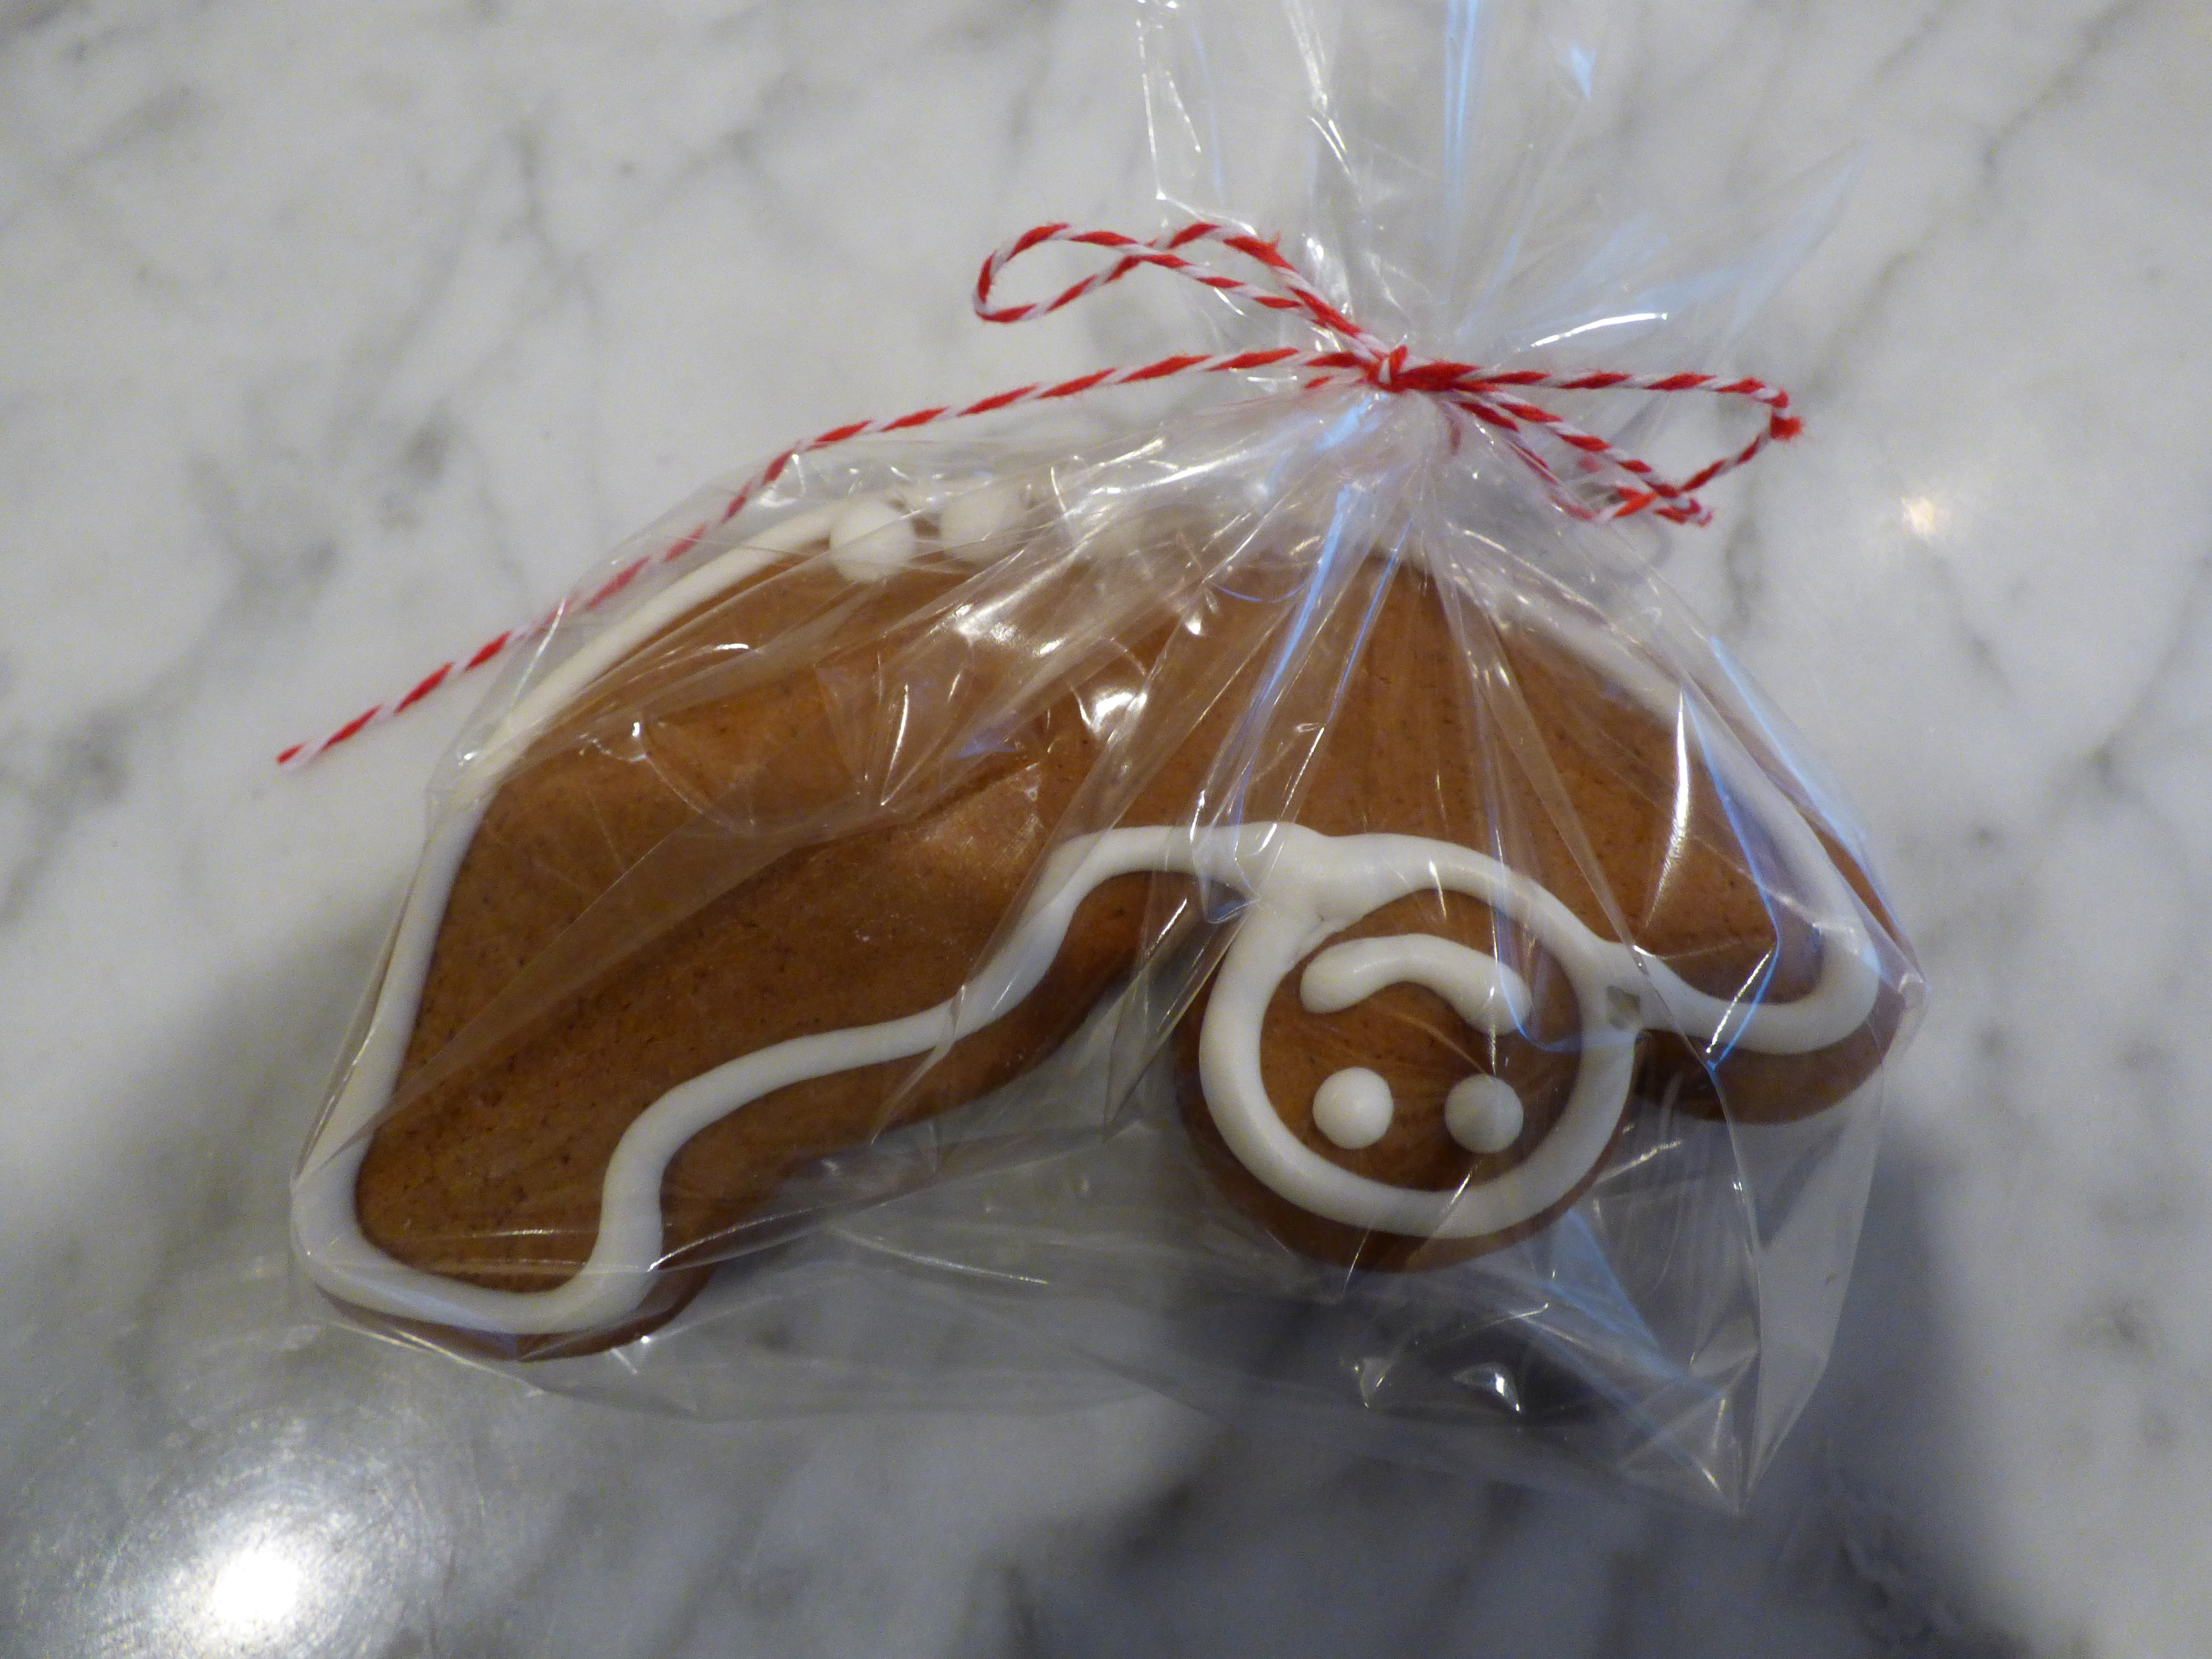
…individually wrapped in baggies for gift giving…

P1000648

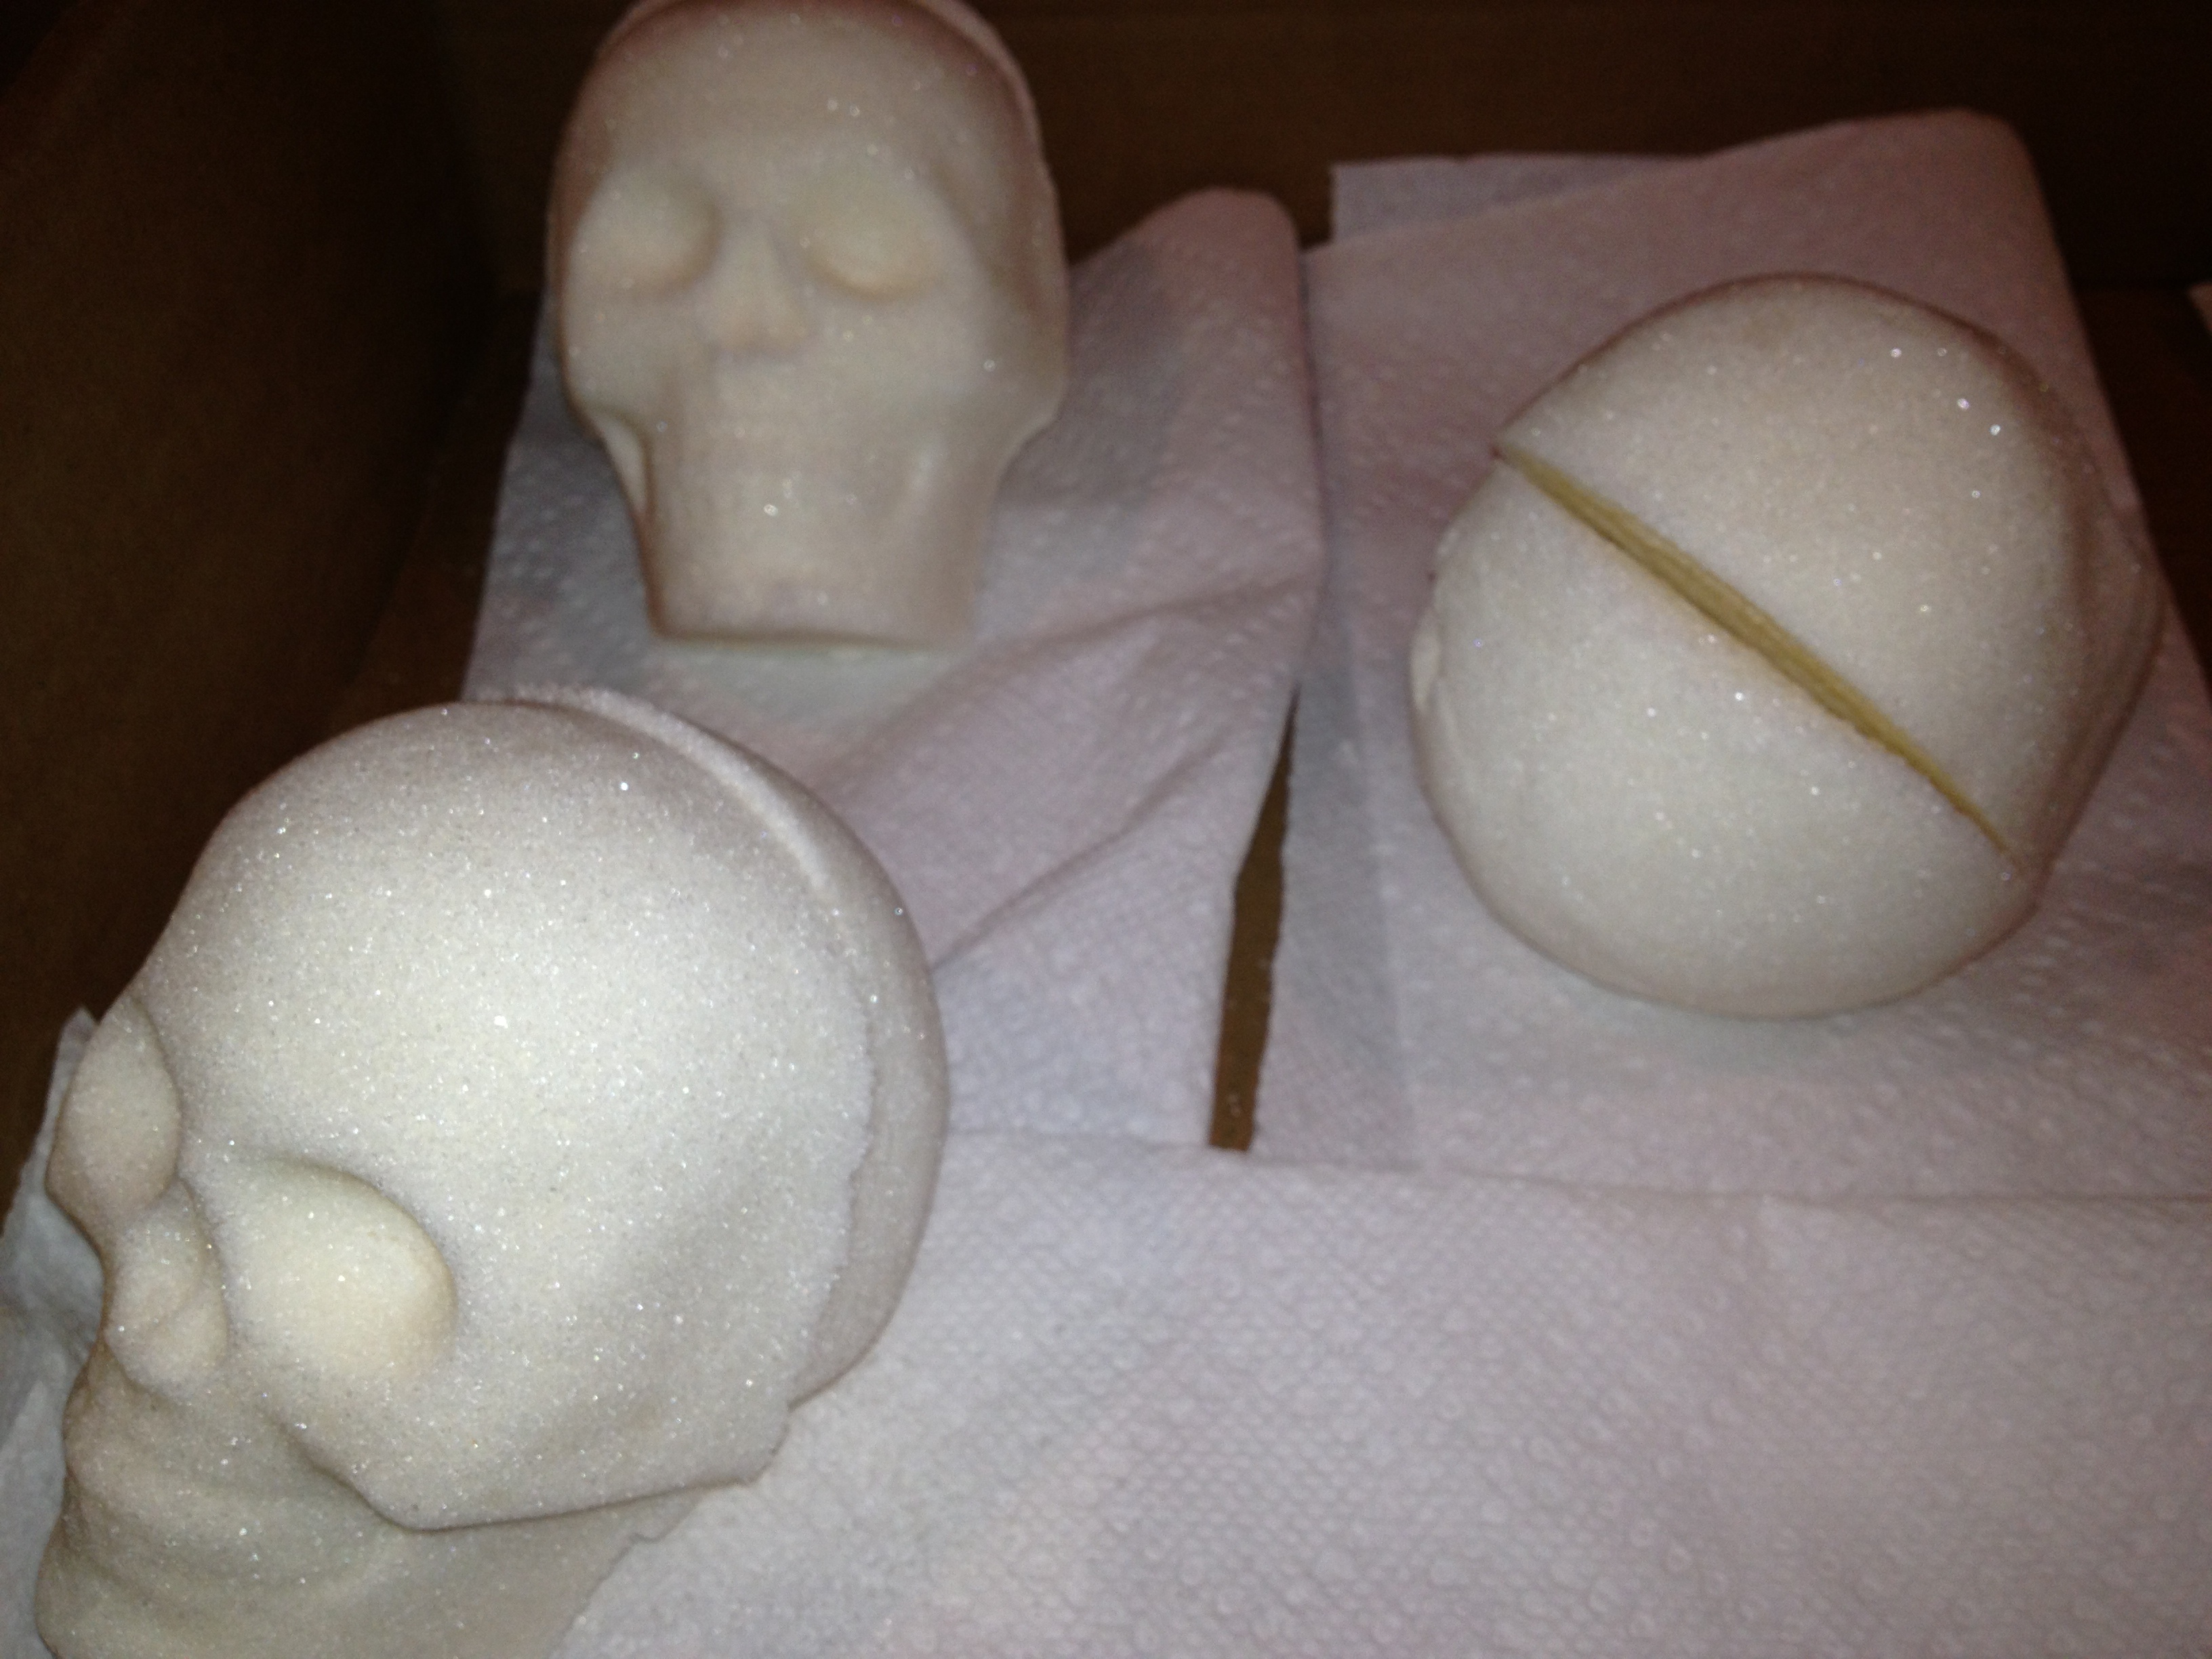
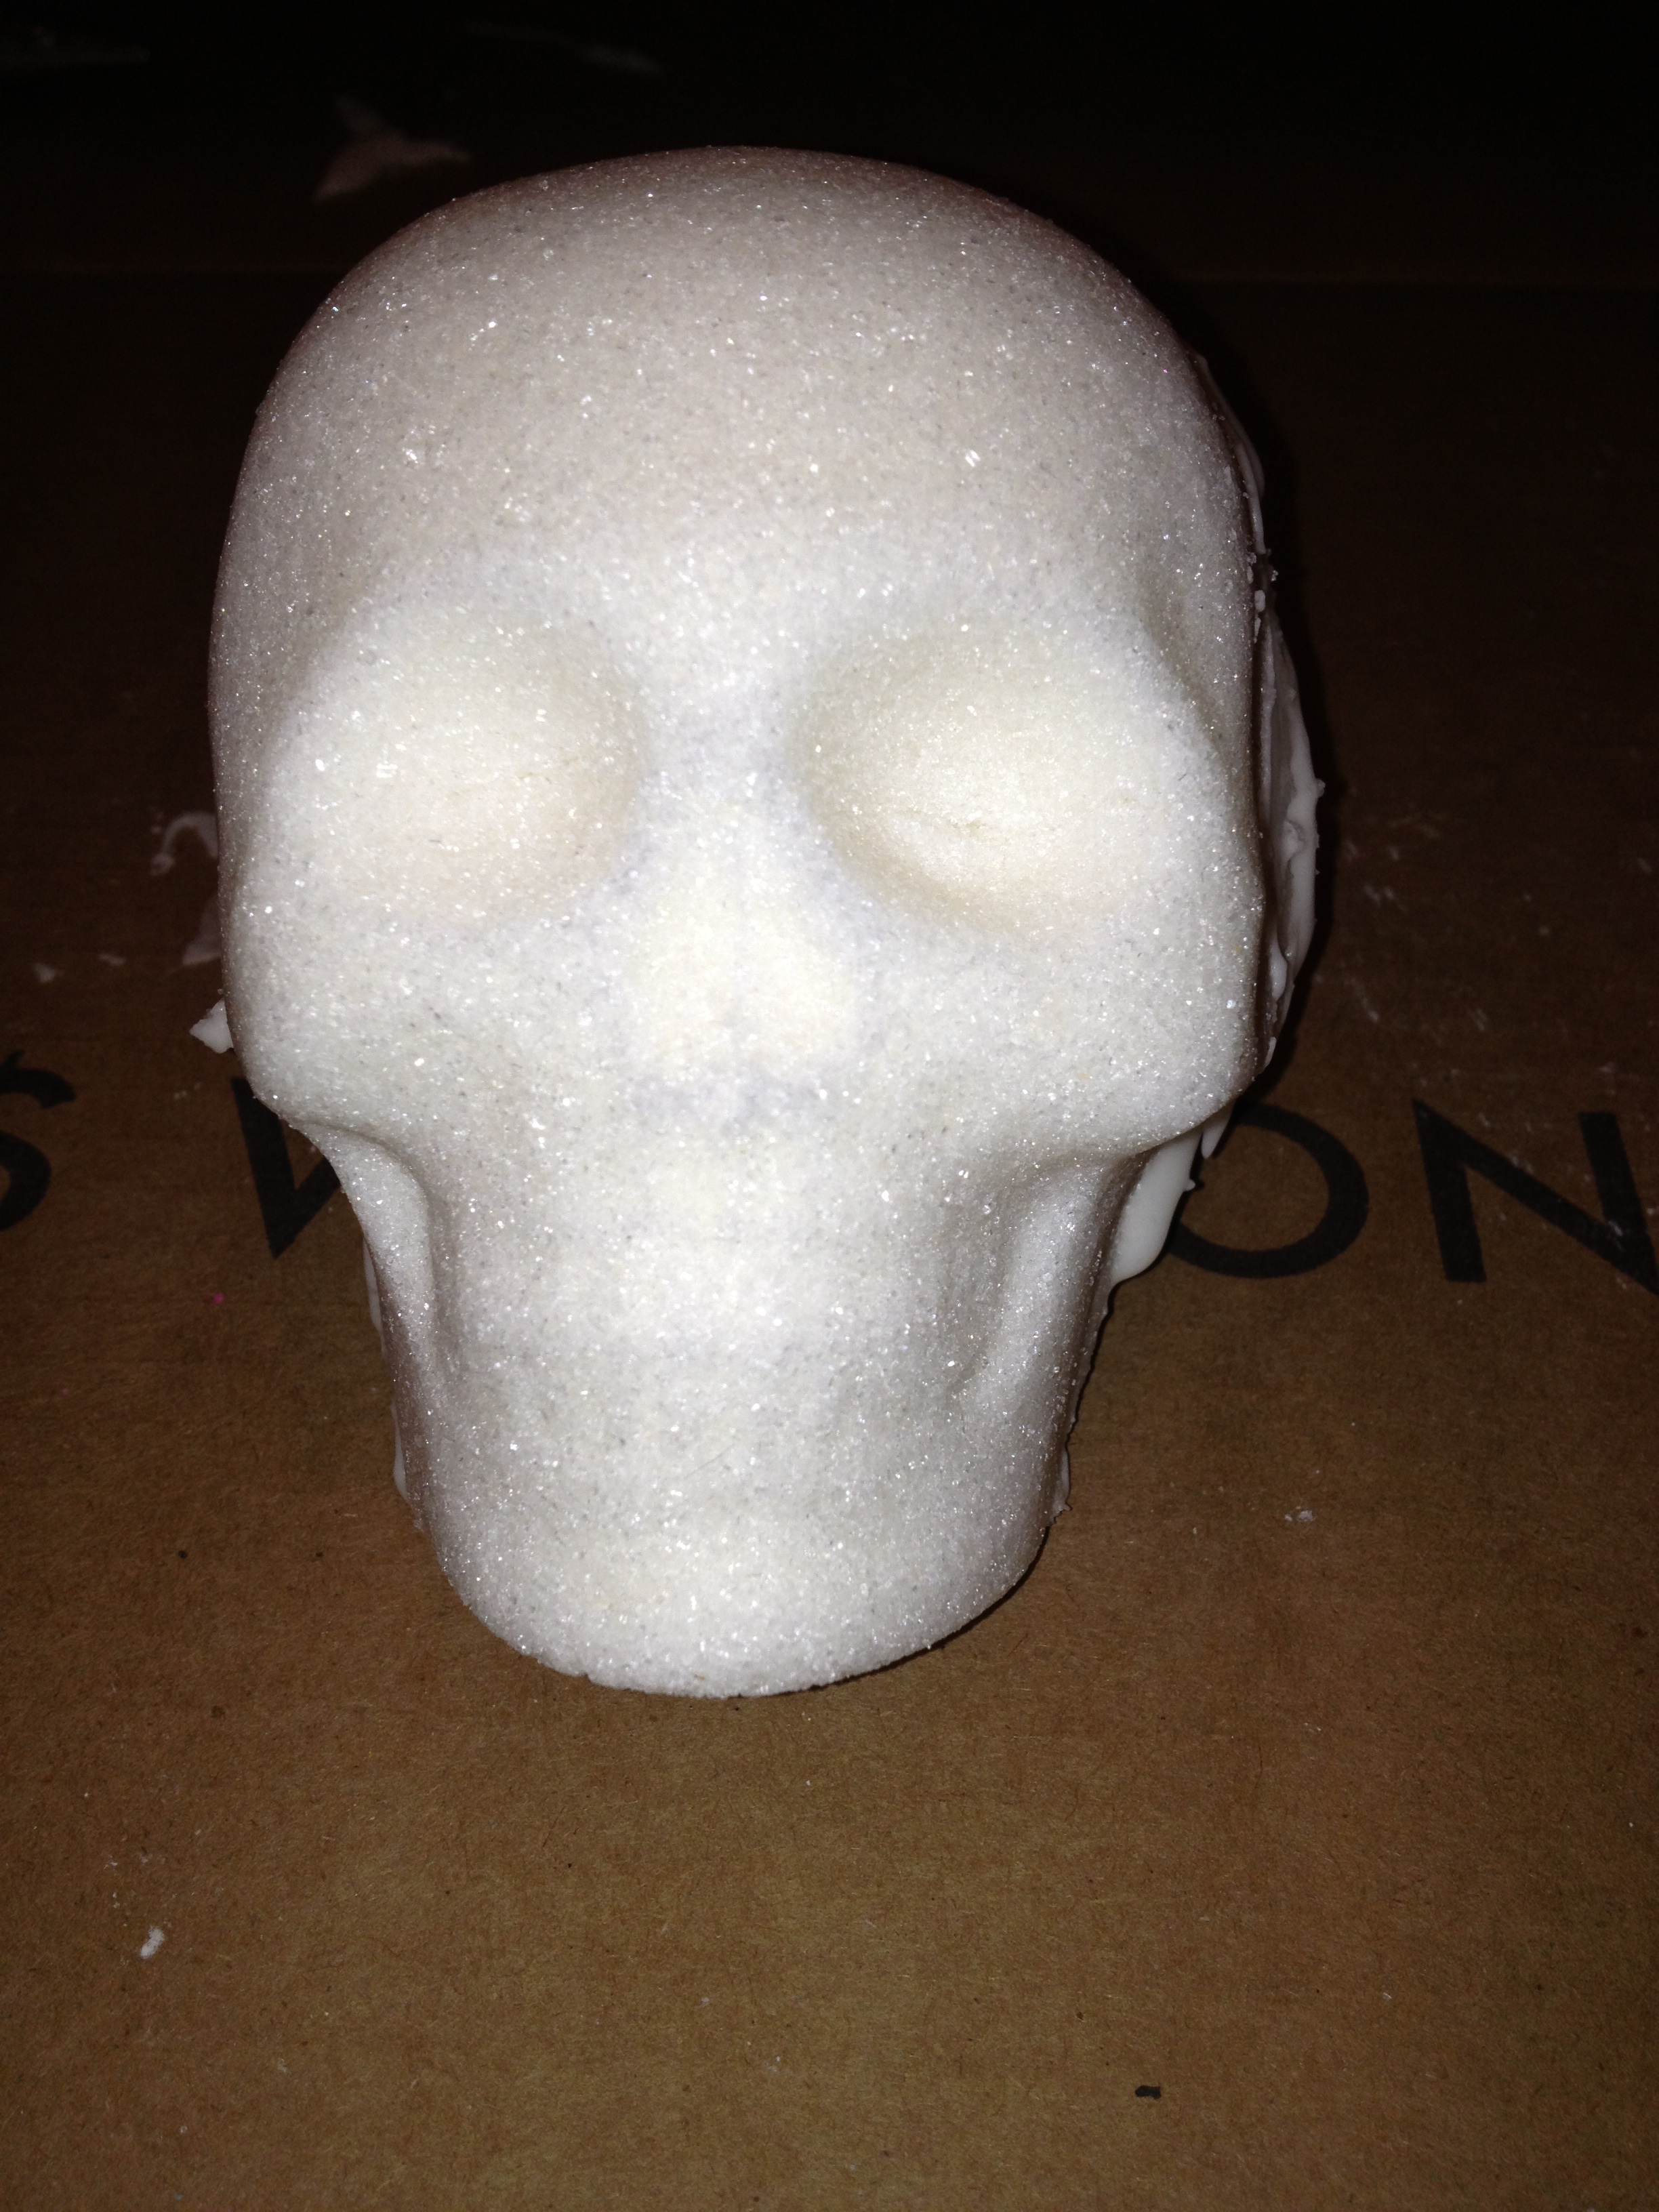
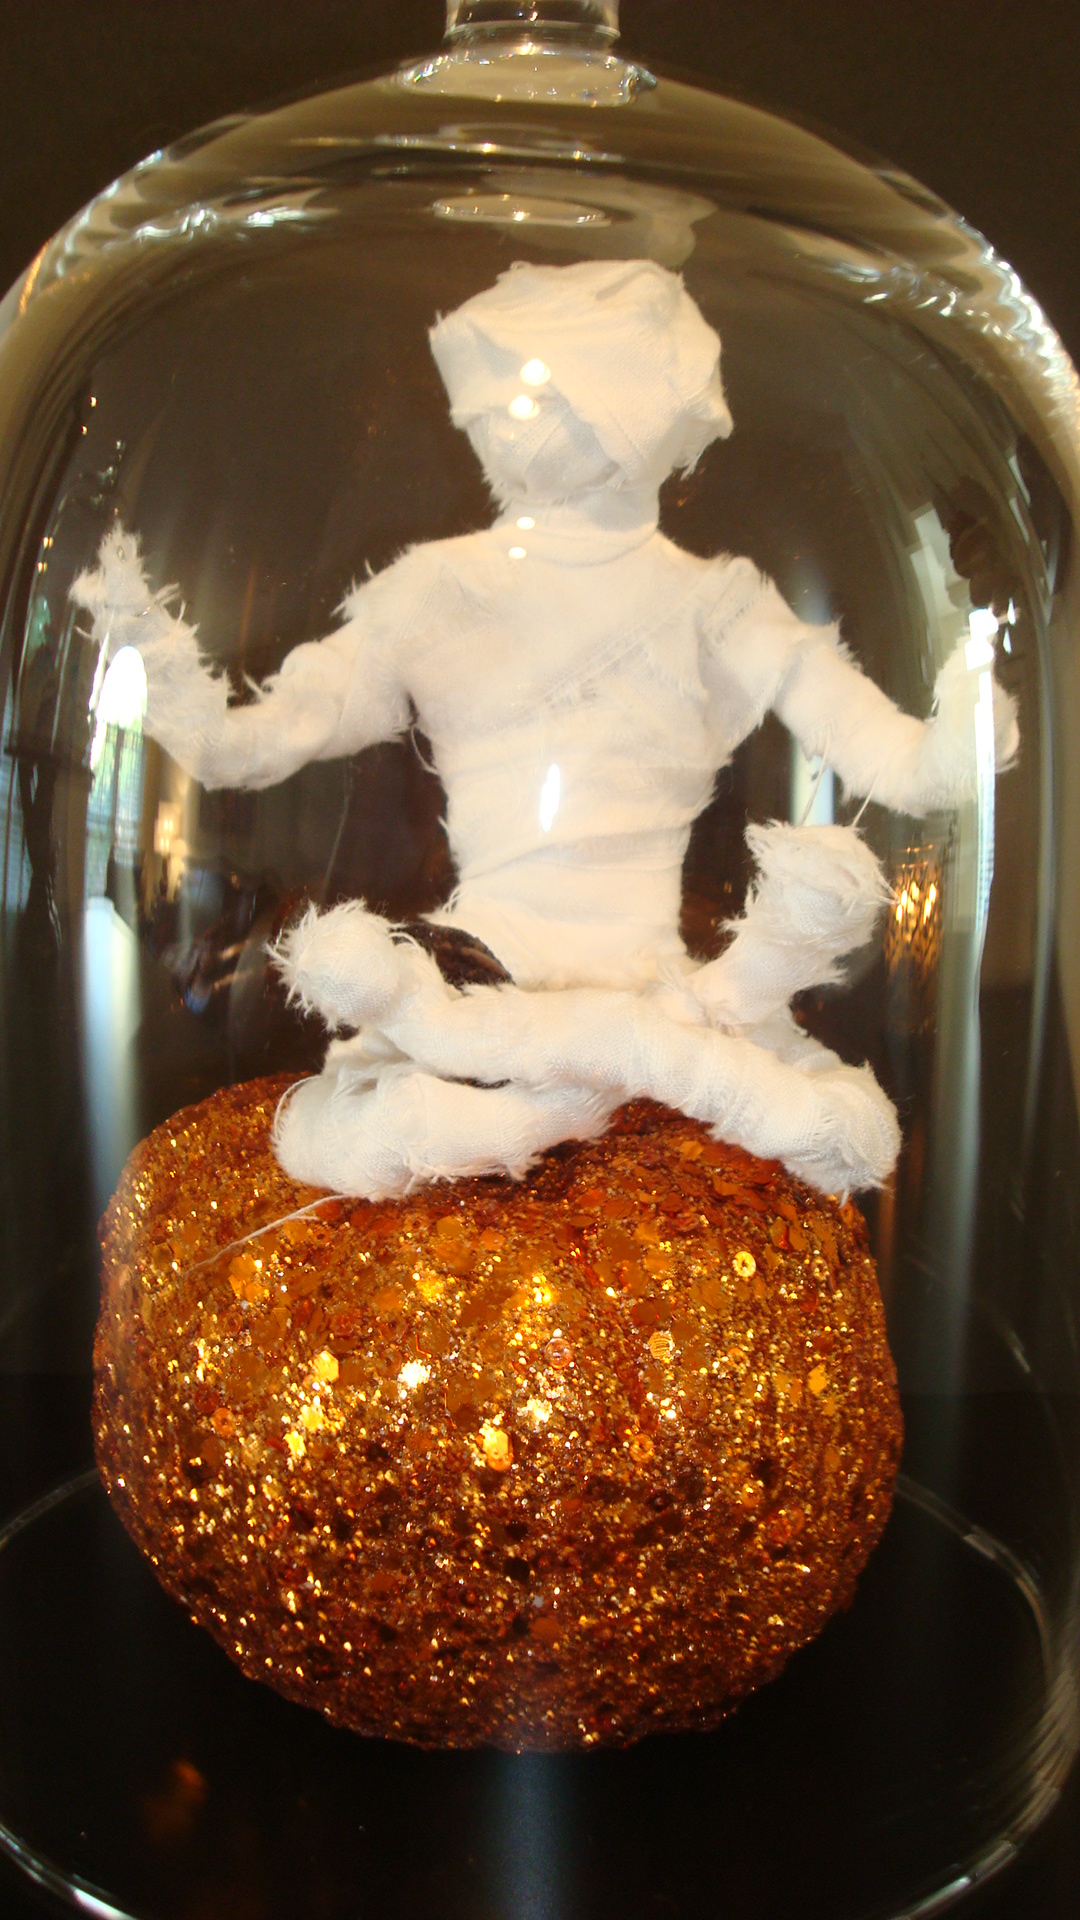
…and pictures of a few of the individual asanas…

Corpse pose
Corpse Pose
Plow Pose
Plow Pose
Lotus Pose
Lotus Pose
Side Angle Twist
Side Angle Twist
P1000650
Tree Pose
Full Wheel Pose
Full Wheel Pose

…and as decorations in my kitchen…

P1000661

P1000667P1000674

I used Cook’s Illustrated’s Thick and Chewy Gingerbread Cookie Recipe, which I always use with great results.

For about twenty 5-inch gingerbread people or thirty 3-inch cookies

3 cups all-purpose flour
3/4 cup firmly packed dark brown sugar
1 tablespoon ground cinnamon
1 tablespoon ground ginger
1/2 teaspoon ground cloves
1/2 teaspoon salt
3/4 teaspoon baking soda
12 tablespoons (1 1/2 sticks) unsalted butter, cut into 12 pieces and softened slightly
3/4 cup unsulphured molasses
2 tablespoons milk

1. In food processor workbowl fitted with steel blade, process flour, sugar, cinnamon, ginger, cloves, salt, and baking soda until combined, about 10 seconds. Scatter butter pieces over flour mixture and process until mixture is sandy and resembles very fine meal, about 15 seconds. With machine running, gradually add molasses and milk; process until dough is evenly moistened and forms soft mass, about 10 seconds. Alternatively, in bowl of standing mixer fitted with paddle attachment, stir together flour, sugar, cinnamon, ginger, cloves, salt, and baking soda at low speed until combined, about 30 seconds. Stop mixer and add butter pieces; mix at medium-low speed until mixture is sandy and resembles fine meal, about 1 1/2 minutes. Reduce speed to low and, with mixer running, gradually add molasses and milk; mix until dough is evenly moistened, about 20 seconds. Increase speed to medium and mix until thoroughly combined, about 10 seconds.

2. Scrape dough onto work surface; divide in half. Working with one portion of dough at a time, roll 1/4-inch thick between two large sheets of parchment paper. Leaving dough sandwiched between parchment layers, stack on cookie sheet and freeze until firm, 15 to 20 minutes. (Alternatively, refrigerate dough 2 hours or overnight.)

3. Adjust oven racks to upper- and lower-middle positions and heat oven to 350 degrees. Line two cookie sheets with parchment paper.

4. Remove one dough sheet from freezer; place on work surface. Peel off top parchment sheet and gently lay it back in place. Flip dough over; peel off and discard second parchment layer. Cut dough into 5-inch gingerbread people or 3-inch gingerbread cookies, transferring shapes to parchment-lined cookie sheets with wide metal spatula, spacing them 3/4 inch apart; set scraps aside. Repeat with remaining dough until cookie sheets are full. Bake cookies until set in centers and dough barely retains imprint when touched very gently with fingertip, 8 to 11 minutes, rotating cookie sheets front to back and switching positions top to bottom halfway through baking time. Do not overbake. Cool cookies on sheets 2 minutes, then remove with wide metal spatula to wire rack; cool to room temperature.

5. Gather scraps; repeat rolling, cutting, and baking in steps 2 and 4. Repeat with remaining dough until all dough is used.

P1000665

Day of the Dead Sugar Skulls


Day of the Dead Mexican Sugar Skulls

skullcloseup

When we used to live in Orange County, California, my sister and I (and later Raj), would occasionally make the trek up to Olvera Street, the oldest part of downtown Los Angeles, via the train. It was an annual trip at the end of September that signaled the beginning of Halloween decorating season and an excuse to buy Day of the Dead items. If you’ve never been to Olvera Street, you need to go. It  makes a great day trip to eat authentic Mexican food and to stroll around cool and hip shops full of Day of the Dead figurines, sugar skulls, and lots more. A few years back, I tried to find a local shop or bakery in Virginia that sold sugar skulls and/or Pan de Muerto (Day of the Dead bread), but with no such luck, I’ve had to create my own.

Making your own sugar skulls is really easy, but it does take time and LOTS of granulated sugar. I only made four large skulls and two smalls ones and used  5 pounds of granulated sugar for the skulls and 2 pounds of powdered sugar for the Royal Icing, but your hard work will pay off AND they last for years!

bigtrio

Sugar Skulls

Ingredients

  • 5 pounds granulated sugar
  • 1/4 cup meringue powder (a must; it helps the sugar stick together)
  • 3 tablespoons of water

Directions

  1. Mix all of the ingredients into a large bowl using your hands until all of the sugar is moistened. It should feel like wet sand.
  2. Pack the plastic sugar skull molds (I purchased a small one at Sur la Table and a large one online) firmly with sugar, using a straight edge to scrape the back of the mold flat–I used a piece of cardboard for this.
  3. Tip sugar out of mold and place on a flat surface to dry overnight.

skulls

sinlgeskull

Royal Icing

After the sugar skulls have been allowed to dry at least overnight, prepare  Royal Icing recipe to piece the two halves of the skulls together and to decorate them.

Ingredients

  • 2 pound bag  of powdered sugar (7 cups)
  • 1/2 cup meringue powder
  • 2/3 cup water

Directions

  1. Mix 2/3 cup water, 1/2 cup meringue powder and 2 pounds of powdered sugar with an electric mixer until icing peaks (about 9 minutes).
  2. Mix icing with food coloring.
colors
I use Ziploc bags with tips for decorating.

Making Your Skulls

  1. My molds are made of two pieces, a face and the back of the skull. With the plain white Royal Frosting, add a small amount to each half and place together, wiping away any excess that comes out of the seams.
  2. Decorate your skulls using sequins foil paper (I ordered this online as well)
tinwrapper
The foil that I used to fill in the eyes and to cover up mistakes I made when decorating.

tinclose

sequins
Sequins for decorating.

cardboard

clochetrio

Mummy Loves You


redo

Mummies are not generally considered cute…unless they adorn your home during Halloween season, doing yoga, riding a cast iron lamb mold, or sitting atop your mantelpiece.

DSC05289
Namaste!
DSC05286
Full Lotus Pumpkin Pose

Here’s an inexpensive and  quick project that you can whip up in no time. After your first one, you will probably find the need to make numerous others to accompany your pack of mummies.

photo-95
Ride ’em Mummy

All you need is floral wire, white cloth  (or rags) torn into strips, and your imagination.

materials

1. Make the armature out of wire.

1

2. Wrap in cloth.

3. Shape the mummy to your preference.

4. Display and smile.

ridem

Felted Valentine’s Day Garlands


DSC04977

My newest fascination is with wool felt balls. Why? Because they are adorable, inexpensive, and make my home festive. I bought 200 in multiple colors just before Christmas to string for garland for the tree. I loved the garland SO much that I decided to purchase more in Valentine’s day hues.

I ordered the felt balls online from TaDaaStudios and I have to say, the packaging is adorable.

DSC04974

I strung up a few shades of pink with white and hung them in the kitchen…

DSC04995

DSC04998
Detail of the embroidered heart
DSC05003
Side view of the garland draping on the bakers rack

…and on the menu board…

DSC04988

DSC04990

…and I can’t help myself, so I’ll share with you AGAIN, my fabulous felt Valentine’s Day calaveras (skulls) from last year–though I couldn’t do them justice being housed in Amman.

DSC04983

DSC04986

…and since I’m on a roll, I’ll just add one last Valentine’s day touch in the kitchen…another embroidered tea towel.

DSC04993

Happy pre-Valentine’s day and stay tuned for my next Easter garland.

Cross-Stitched, Handmade Christmas Stockings–A Year in the Making


DSC04914

With my underwhelmingly open schedule while living in Jordan, I had lots of time to bake homemade bread almost daily, make Greek-style yogurt, read, exercise and craft. A lot! Here are two fine examples of what my idle hands were able to stitch in record time. Normally, such projects would take countless months to make each one; not so in Jordan. I did both of these stockings in about two months. I’m not a skilled sewer, unlike my highly gifted mother, whom I managed to convince (connive?) that no one else would be able to sew the final products nearly as well as her. I think they turned out spectacularly, even better than I imagined with lining, piping and all.

get-attachment-1.aspx

get-attachment.aspx

get-attachment-2.aspx

get-attachment-3.aspx

Raj’s is sewn on a tan linen, and mine is sewn on an off-white, extremely fine Irish linen.

DSC04909DSC04911

How to Avoid Doing Chores–Take Up Embroidery


The trio of fabulousness…
(which will be even better once I sew the pompoms along the borders)

I am busier than ever, yet find myself carving out minutes here and there to work on my newest favorite hobby–embroidery. Before you feel sorry for me and ask me how many pounds I’ve put on or how many cats I’ve adopted since returning stateside, you need to check out the website Sublime Stitching. As the website states, “This ain’t your gramma’s embroidery.” Do yourself a favor. Check it out. Now!

{I’d like to add that I was in Anthropologie today (I’m VERY busy) perusing the tea towel section and I have to say, I was not even TEMPTED to buy one of their $34.99 towels because I think mine are equally as adorable–although for $12.99 in the sale section, my heart did skip a couple of beats, but I passed them up. Imagine ALL of the money I’m saving by making my own!}

I happened upon Sublime Stitching’s website months ago while I was trolling the Internet aimlessly (as I did all day long in Amman). I fell in love with her whimsical and charming patterns and ordered a few last month as a prize for myself. I started with a kit, which included a hoop, floss, scissors, a tea towel, and needles, and also ordered a couple of additional patterns: Dia de Los Muertos and Bon Voyage, plus a couple more towels.

Here are my first attempts–and keep in mind, I’m newly minted in this art, so my stitches are BASIC–nothing fancy (yet). I’ve included the pompoms below that I’ll be sewing along the borders once I get my sewing machine back (it’s still in Jordan) just to show you how much cuter they’ll be after the addition. (Can they get any cuter?)

Here’s the progression:

The patterns for Day of the Dead
My very first stitches…so nervous
Voila…
Onto project numero dos
Closeup of Our Lady of Something
The cutest sugar skulls I’ve ever seen
Project number three from a world traveler
I want those gold shoes

I ran out of out of towels last night and I’m almost out of floss…BUT I CAN. NOT. STOP. So I bought some more SUPER cheap towels at Ross ($3.99 for FOUR! What a bargain) in cute colors AND I checked out (as in borrowed from the library–saving even MORE $$$) Jenny Hart’s two embroidery books from the library today. Flipping through the pages, I’m spying some cupcake and pie patterns that I’ll be incorporating into my next masterpieces.

The books that I’ll be buying. I wanted to be sure that I wanted them.

Retail Therapy, Syrian Style


There is nothing to buy in Amman. Sure there are shops and malls, amazing ones too. There are the usual designer boutiques: Louis Vuitton, Burberry…, all of the familiar mall brands: MAC, H&M, Gap, (no Anthropologie)…, but I cannot afford anything here because everything is about three times more expensive than what I’d pay at home. I suppose it’s a good thing that there’s nothing to buy because it makes Raj all the more willing when an opportunity to spend arises, as it did last week at the embassy.

Before arriving to Jordan, Raj and I discussed our desire to purchase some sort of furniture or artwork reflective of the region without going overboard with a middle eastern theme. The uprisings in Syria began shortly before Raj arrived, seriously impeding our travel plans to visit and buy Syrian furniture. The Syrian situation doesn’t seem to be getting any better so I’ve accepted the fact that Syria’s not in our future travel plans. Luckily for us though, a Syrian furniture salesman braved the border crossing to sell his wares at the Embassy.

I’ve been relatively good so far, limiting purchases to a couple of camel-hair rugs, some Arabic looking pottery, a brass lantern, a large mosaic, and now a Syrian chest and mirror to place in our foyer back in Old Town. I don’t know much about Syrian furniture, other than what the salesman shared and what I saw, but it seems to be easily identifiable through its use of walnut wood, mother of pearl inlay, and traditional Arabic design.

Detail of the mother of pearl inlay medallion
The mirror (set aside on the floor temporarily)

The guy arrived with a truck full of tables, chairs, armoires, a few chests, and a fantastic array of lanterns (these were amazing but were the first things to go). He got delayed crossing the border, creating a stir for the eager shoppers (money in hand) anxiously awaiting his arrival. He began unloading the truck while a small swarm of embassy employees pretended to feign interest, casually eyeing each piece as the packaging materials were removed. People began posturing and sidling up close to the things they liked, lest something better was to be revealed from the truck. I soon became afflicted with the buying frenzy as nearby shoppers discussed the worsening situation across the Syrian border and how this might be our ‘one and only’ chance to buy authentic Syrian furniture. I was determined to buy something, anything in case this was true. Cost and reason flew to wayside as one chest and then another were quickly spoken for. I swooped in on one of only two remaining chests and had Raj settle the price. (This guy had a captive audience so there wasn’t much in the way of haggling). We added in a mirror to be hung above the chest and sealed the deal.

The chest’s storage

The chest we bought has grown on me significantly since we brought it home. While it was sitting at the embassy, side by side among the other pieces, I was a little overwhelmed. I was having a hard time deciding whether I loved it or not because I felt the pressure to buy, buy, buy. I’m happy with the purchase. I can’t say we got a great price, but who knows? It’s beautiful without being overly ornate.

Top of surface of the chest
Side panel detail
Detail of mother of pearl inlay on mirror
Key to open chest

Crafting for Bored People: Valentine’s Day Calaveras (Sugar Skull) Decoration


Valentine's Day Garland Hanging on Bookshelf

It’s amazing what I find myself doing these days just to stay busy. Can I blame it on reading Amy Sedaris’ Simple Times, Crafts for Poor People? Probably not, although I do owe her a debt of gratitude for comedic relief.  I’m the kind of person who NEEDS to do something at almost ALL times, driving Raj crazy with my manic drive to complete each new project in as little time as possible. (This is what type-A’s do when they’re NOT working. They put ALL of their energy into something, anything trying to forget that they have nothing to do.) Whether I’m watching TV, relaxing, or just talking to Raj, I like having something to work on in my hands. I’m still baking and cooking, but as you can imagine, that gets dangerous–being faced with cookies, cakes, and stashes of sweets haunting you ALL day, each and every time you set foot into the kitchen. So…in the past few months, I’ve revisited crafts that I haven’t done since junior high school (i.e. cross stitching) and have taken up some new ones, a la felt garland making, or whatever you want to call this.  This is what my life has become–craft central.

My latest project involves my affection for all things Day of the Dead–which has nothing to do with Valentine’s day, but who cares? I made this Valentine’s Day Sugar Skull garland out of felt, which I imagine hanging on the mantle of our (as of yet, non-existent) house back in DC. (It somehow doesn’t look as good hanging from the bookcase here in Amman, in a place that isn’t all abuzz in Valentine’s Day decor, as I imagine it will look back in the US.) The garland is comprised of eight calaveras (skulls): four moustached males and four flower bedecked females with nine hearts in between the skulls. Prior to this project, I didn’t know how to embroider, but look at me now. I’ve mastered chain stitch, blanket stitch, back-stitch, and French knots.

A must have on any bookshelf if ever you find yourself living in the Middle East

In addition to this project and in keeping in line with the theme, I’ve also completed another skull garland, this one for Halloween.

Halloween Garland
Closeup 1
Closeup 2

And my next project? I think I need to move away from the skulls, possibly to something more lively. I’m open to suggestions.

Minor Miracle in the Kitchen


As you’ve probably noted by now, I hate this kitchen. Here are the major offenses that this kitchen is charged with:

  • its design (it lacks any!)
  • open cabinets (not one, but two)
  •  propane oven (don’t get me started)
  • chartreuse colored sink with the built-in tray for a dish rack (because there’s no dishwasher!)
  • large window with bars (are we in the ghetto?)
  • funky built-in table (and we don’t have any chairs. I had to send the chairs that came with the table back to storage because they were beyond my magic repertoire–decoupage, painting, fabric…)
  • overhead lighting that goes on upon banging the cabinets (and we’ve had them fixed)
  • the converter box–if I want to use any of my appliances (i.e. Kitchenaid, etc., I have to plug them into a converter which is a HUGE, circa 1965 ugly, metal tool box looking contraption the size of a shoe box that is difficult to camouflage and potentially dangerous, not to mention you can only plug two things in at once).

None of this is charming or quaint or anything in between. It’s just ugly and I cannot live in such a state so I’ve attempted to make some minor adjustments. First on the list, the open cabinets and the window.

Before I show you what I’ve done, let’s review my constraints:

  • I don’t know of any fabric stores like JoAnn Fabrics, etc. where I can get fabric and notions, etc. This means I have to order online, sight unseen, which is difficult, especially with fabric.
  • I didn’t bring all of my crafting supplies, just a couple and nothing great.
  • Raj is CHEAP (He often reminds me, “we’re only here 2 years so why spend ANY money.”).

Given these obstacles, I have to say that I’m very pleased with the results. What do you think?

Here’s the before and after of the dishwasher space:
Before and after of the large cabinet to the left of the refrigerator:
…and the window treatment (it’s really hard to see anything, sorry):
It’s difficult to see what I’ve done, but I ordered a dark brown burlap (yes, Raj, it’s very cheap) and a couple of tension rods (total cost $20). One of the rods didn’t fit, so I had to improvise with some other way to hang the fabric in the tall cabinet. Luckily, I had a few decorative tacks in my craft box and hammered the fabric on the shelf above. Although I have my sewing machine here, I found it more efficient to use “steam and seam” for the seams and to attach the grosgrain ribbon onto the front panels. (If you’ve never used “steam and seam” it’s a great product). I ran out of fabric so I was forced to pull out the sewing machine to seam together what little fabric I had leftover. I staple gunned the fabric to the wood panel above the kitchen window and used more of the decorative tacks and grosgrain ribbon to finish it off. It’s so much better that I can almost step foot in the kitchen without cringing.

A Minor Victory in the Bathroom


Our "Summer Cottage" Theme

Check out the shower curtain in the master bathroom. Pretty, huh? Notice anything (aside from the sea-themed design including lighthouses, sailboats and shells) that isn’t quite right? Look again.

CLose-up

The shower curtain, which I might add is hung properly (you can see the holes in the top), is sideways–the lighthouses, sailboats, and shells are all askew. This curtain kerfuffle has been making me sick since I first stepped foot into the shower and noticed its flaw. But it’s more than just the flaw. It’s just plain ridiculous to have a sea themed shower curtain in Amman. There aren’t any sailboats or seashells or lighthouses ANYWHERE in the vicinity. Luckily for me, I came armed to Amman with a shower curtain, just in case I faced a conundrum as insurmountable as this. Below is the new and improved shower curtain. It looks much better, not awesome, but given the constraints, my new awesome is so much different then my former one. It’s a huge improvement unless you live in the sideways world.

New & Improved